Your Cart is Empty


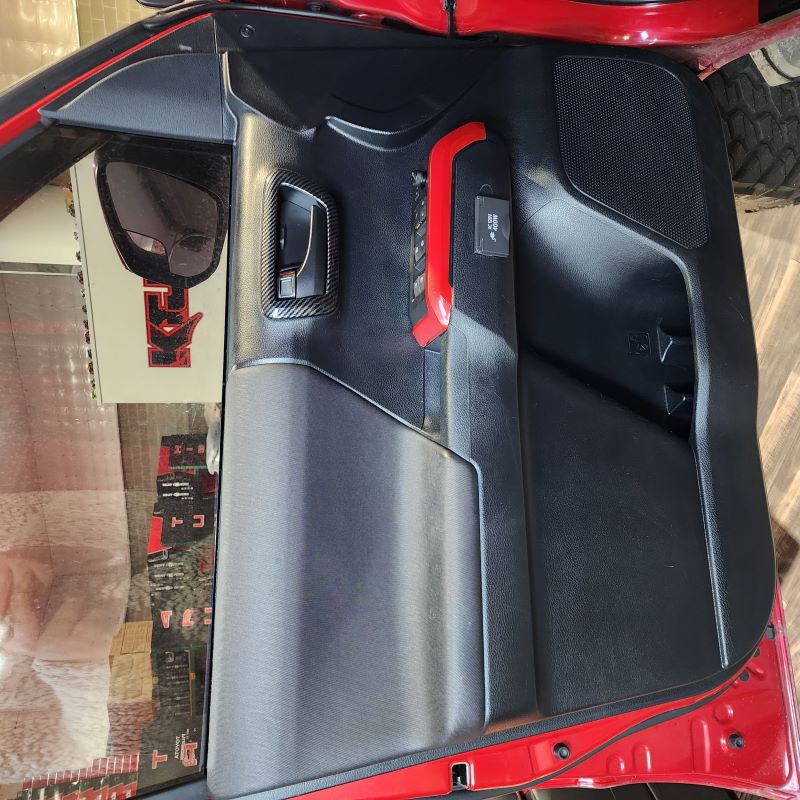
FOR TOYOTA TACOMA MODEL
ITEMS INCLUDED IN THE ACCESS CAB DOOR BOWL LIGHTING KIT:
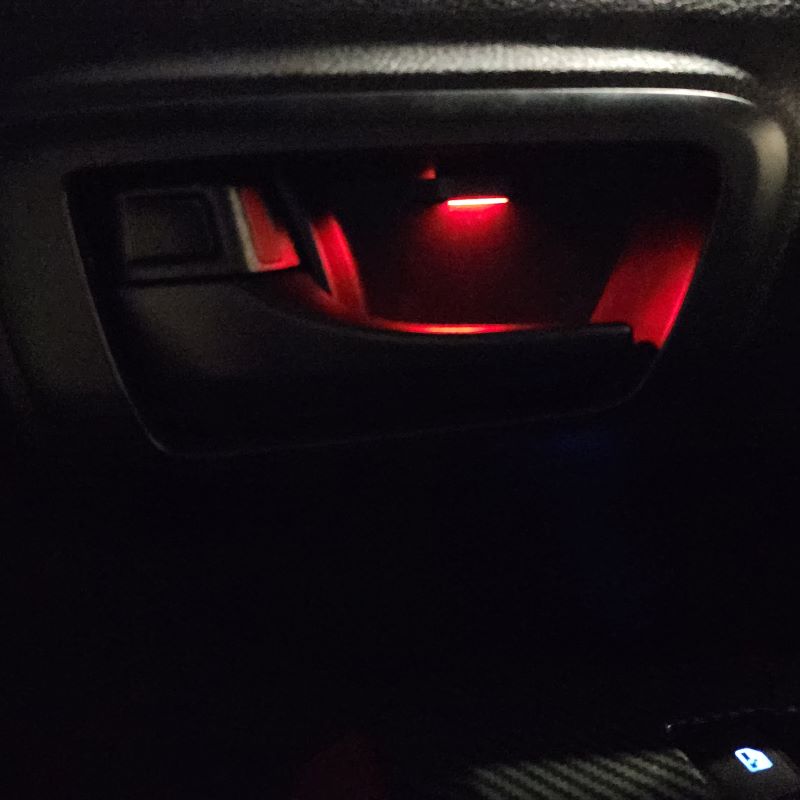
2 x Door Bowl "LED ILLUMINATED" Hole Covers
TRD Off-Road, Sport Access Cab:
1 x Driver Plug-N-Play Wiring Harness
1 x Front Passenger Plug-N-Play Wiring Harness
SR, SR5 Access Cab:
1 x Driver Plug-N-Play Wiring Harness
1 x Rear Passenger Plug-N-Play Wiring Harnesses
All Connectors & LEDs Included
ITEMS INCLUDED IN DOUBLE CAB DOOR BOWL LIGHTING KIT:
4 x Door Bowl "LED ILLUMINATED" Hole Covers
TRD Pro, Off-Road, Sport Double Cab:
1 x Driver Plug-N-Play Wiring Harness
1 x Front Passenger Plug-N-Play Wiring Harness
2 x Rear Passenger Plug-N-Play Wiring Harnesses
SR/SR5 Double Cab:
1 x Driver Plug-N-Play Wiring Harness
3 x Rear Passenger Plug-N-Play Wiring Harnesses
All Connectors & LEDs Included
Installation Instructions - Door Bowl Lighting (Located on Website)
Phillips Screw Driver
Door Panel Remover (optional)
DISCONNECT THE BATTERY BEFORE YOU BEGIN INSTALLATION
Must Press + to see the narrative on each Step
-
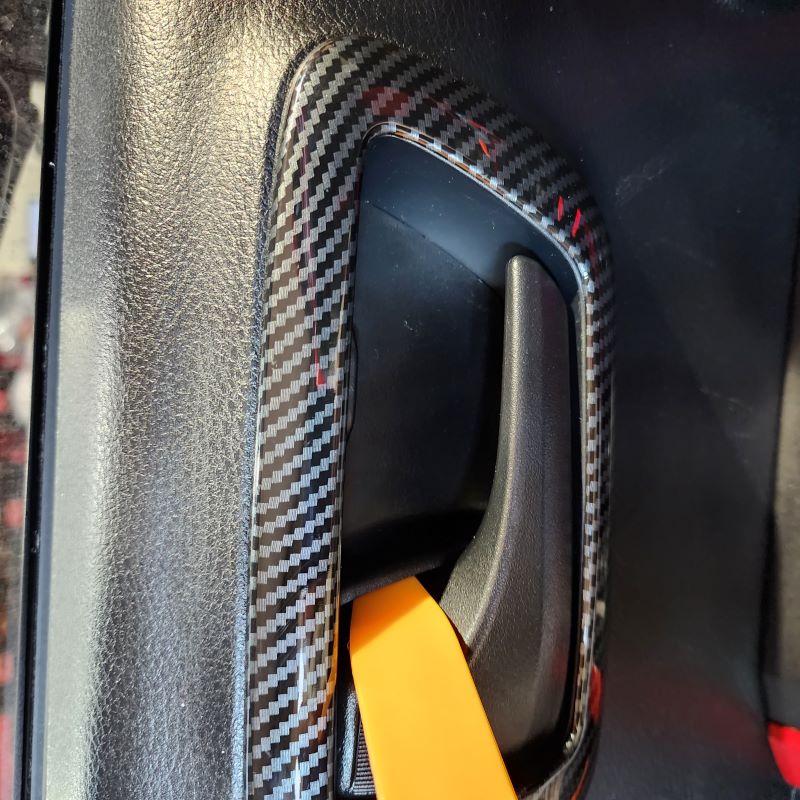
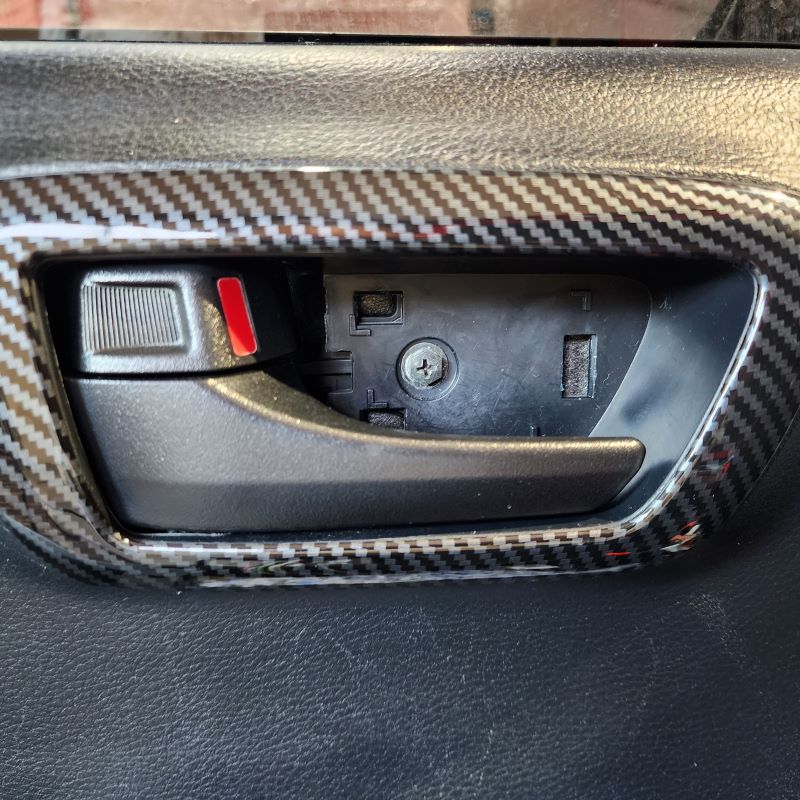
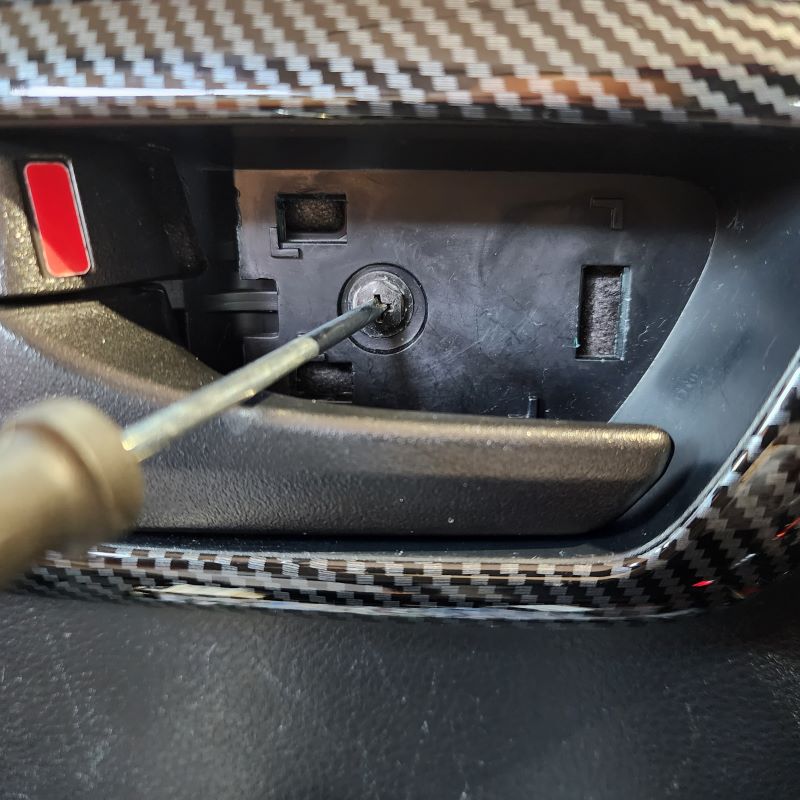
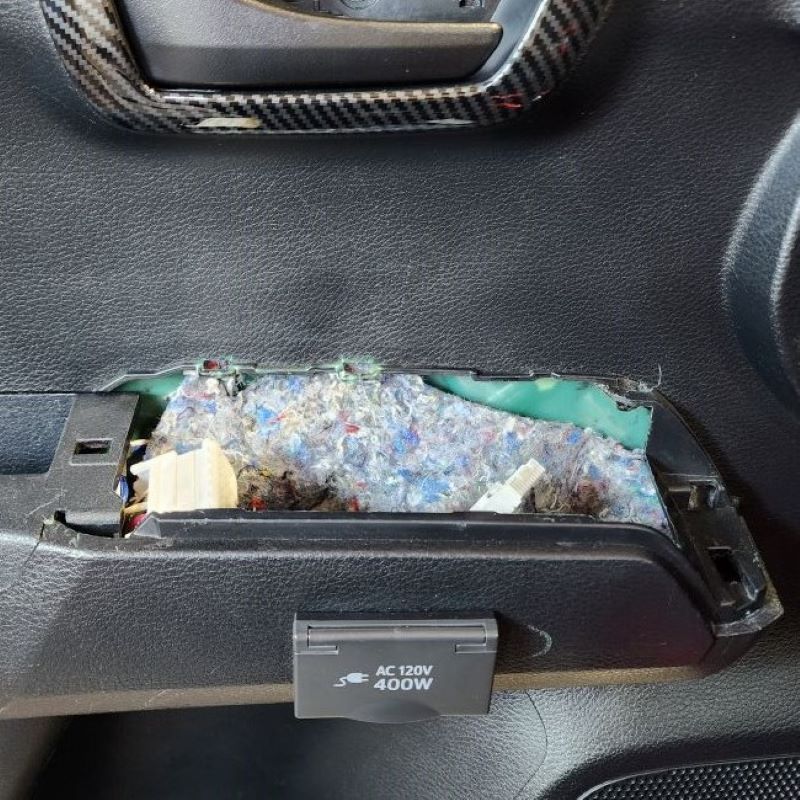
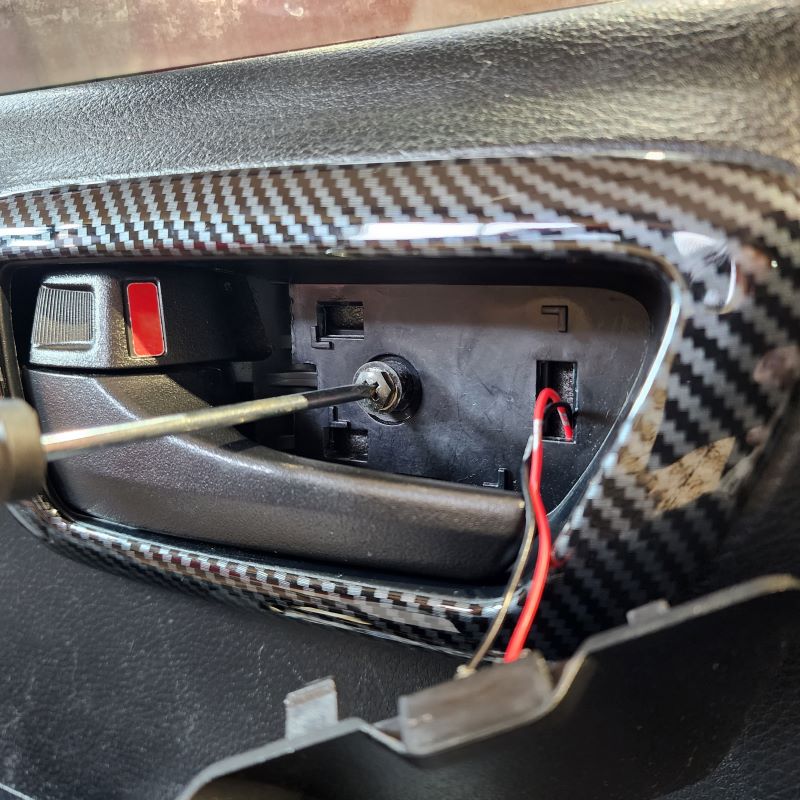
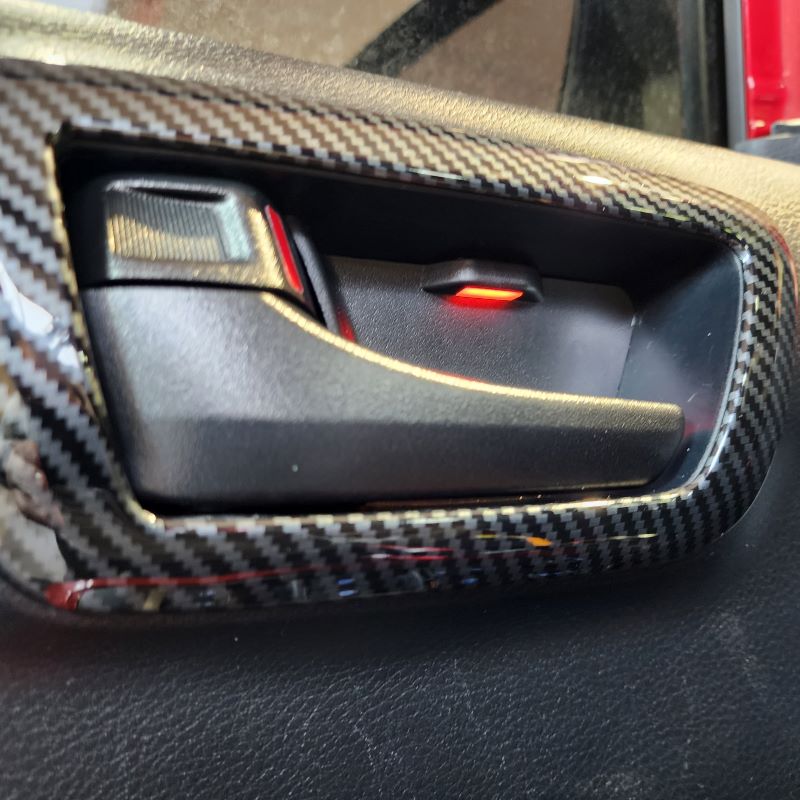
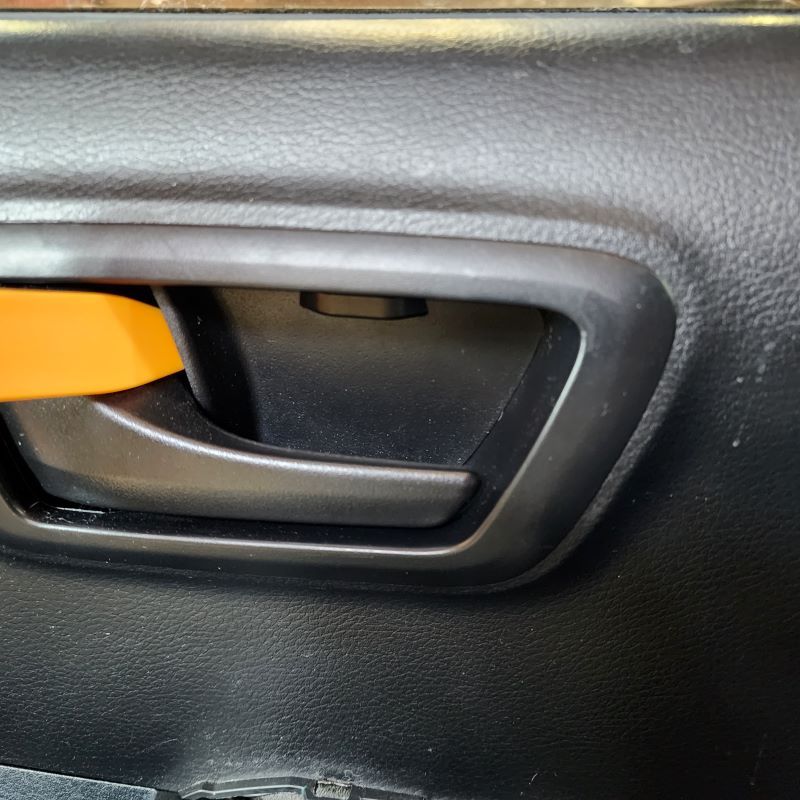
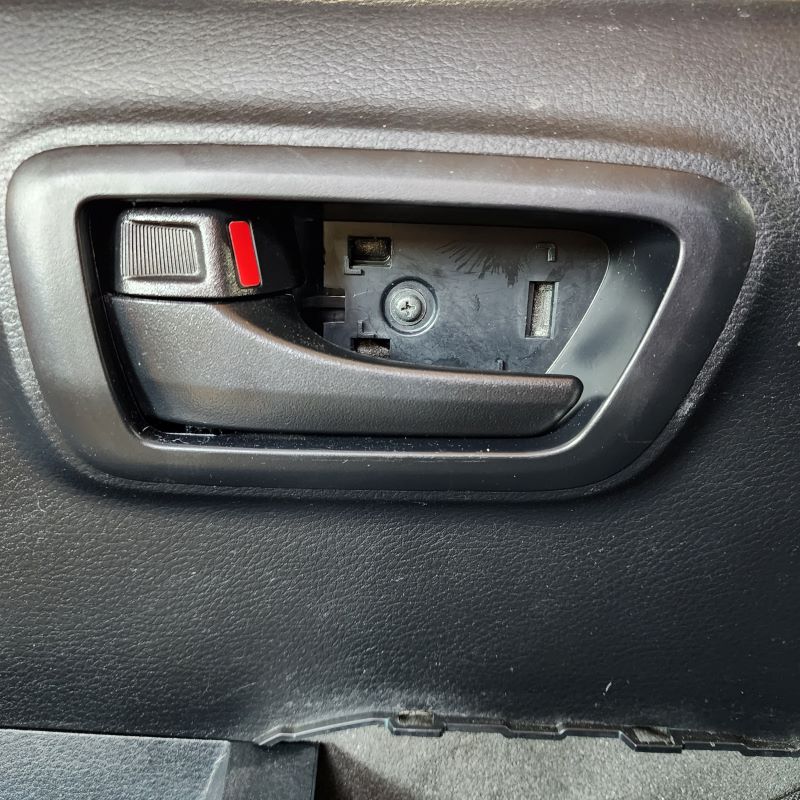
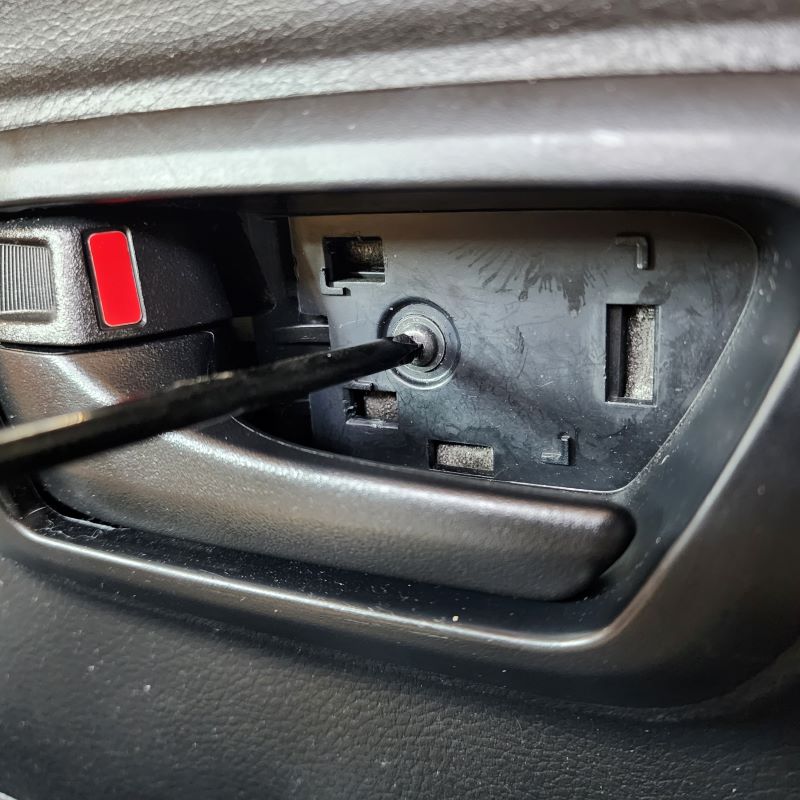
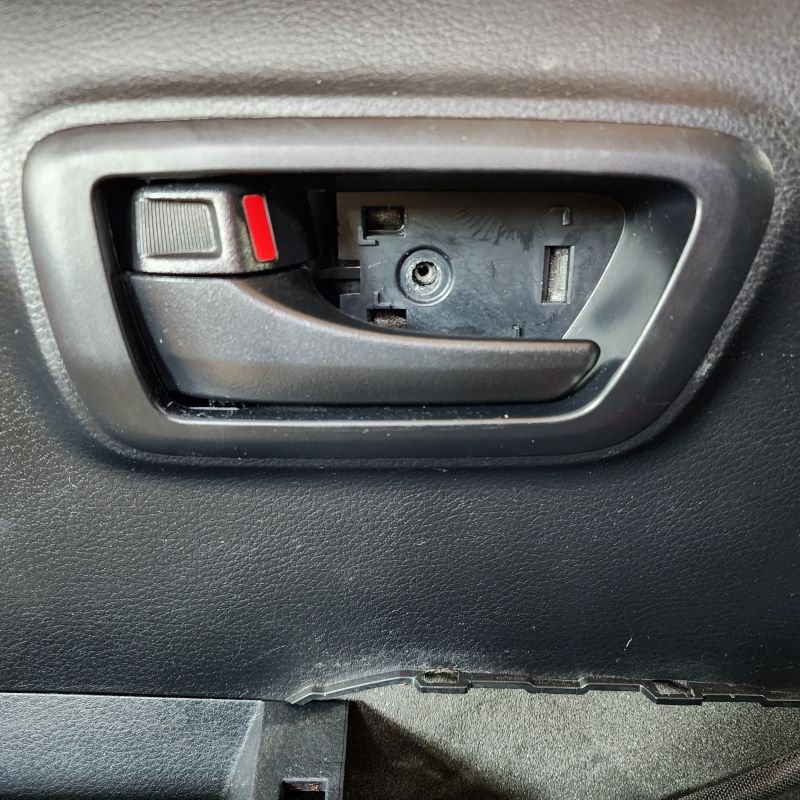
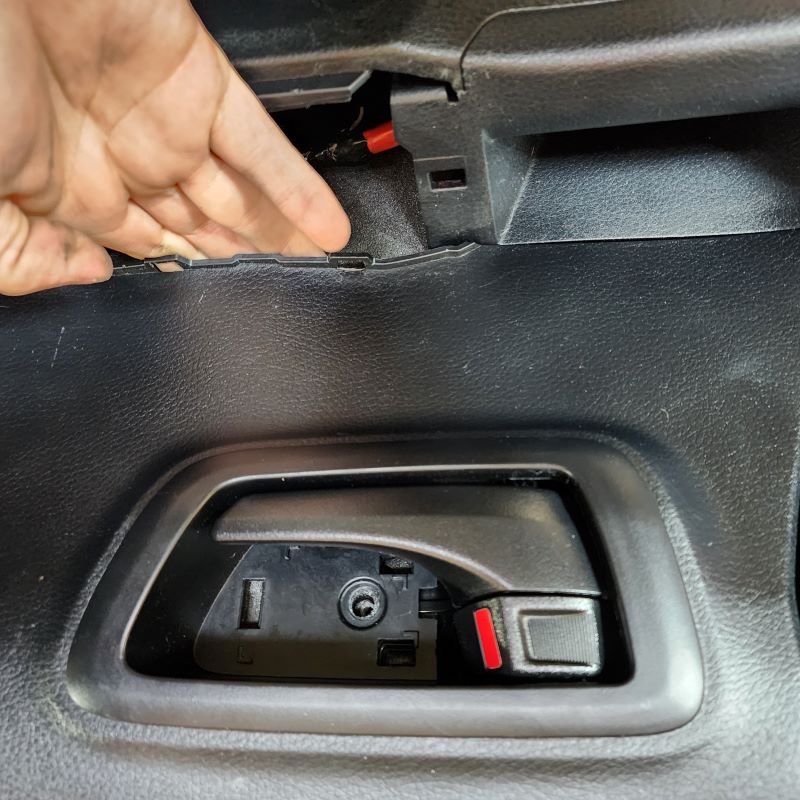
Start by removing the door bowl hole cover by using a trim removal tool if you have one or something like it. Start on the left side closest to the door handle. Pry outward away from the door panel from behind the hole cover. It may be easier to pull the door handle out to create more space. Behind the hole cover, you will notice a hidden screw. Take a screw driver and remove that screw. Set it aside for now.
STEP 1
INSTALL IMAGES


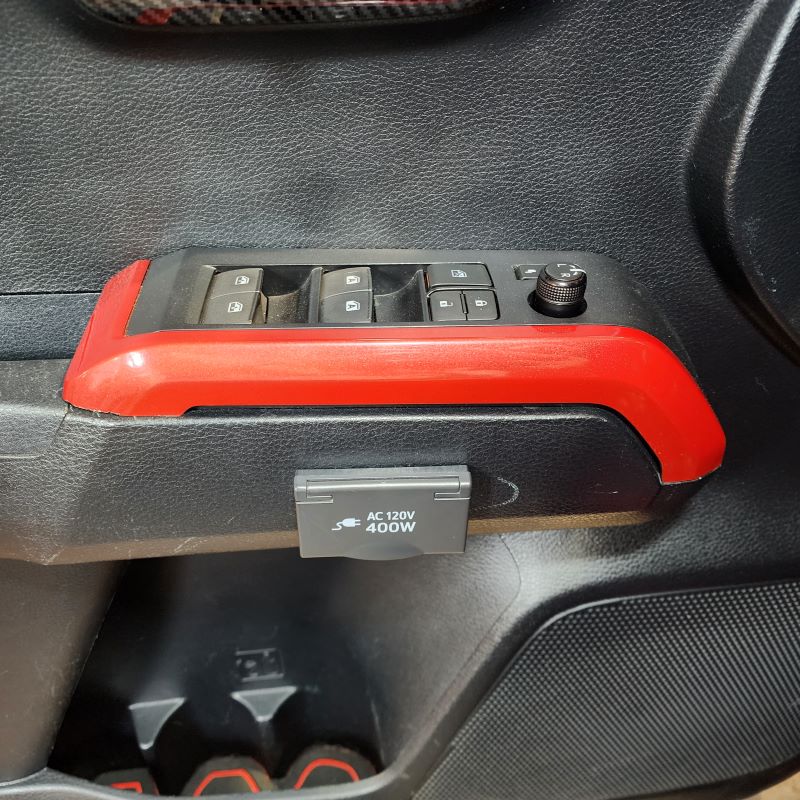
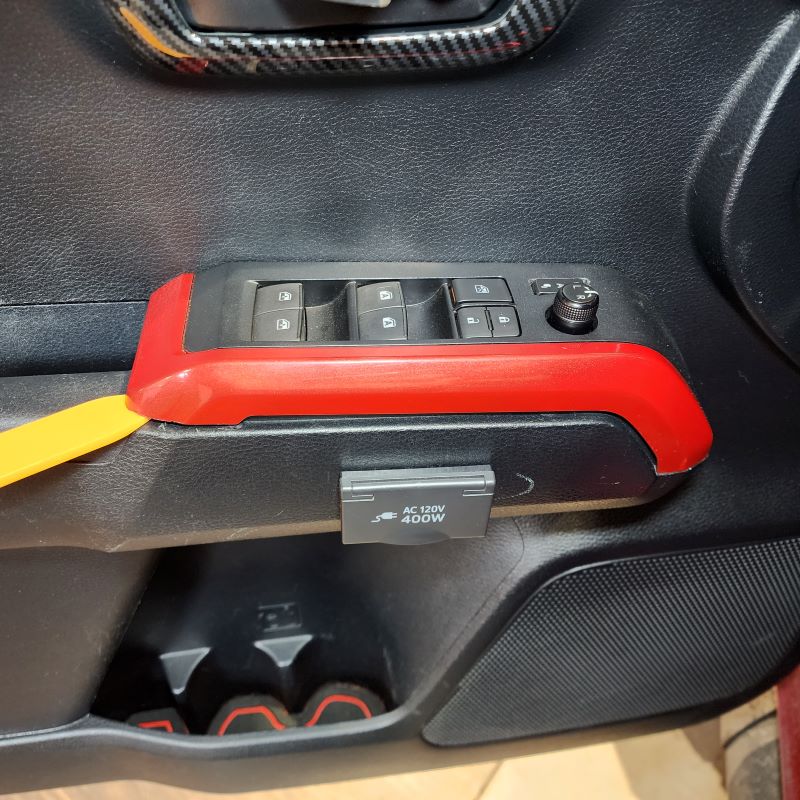
STEP 2
-
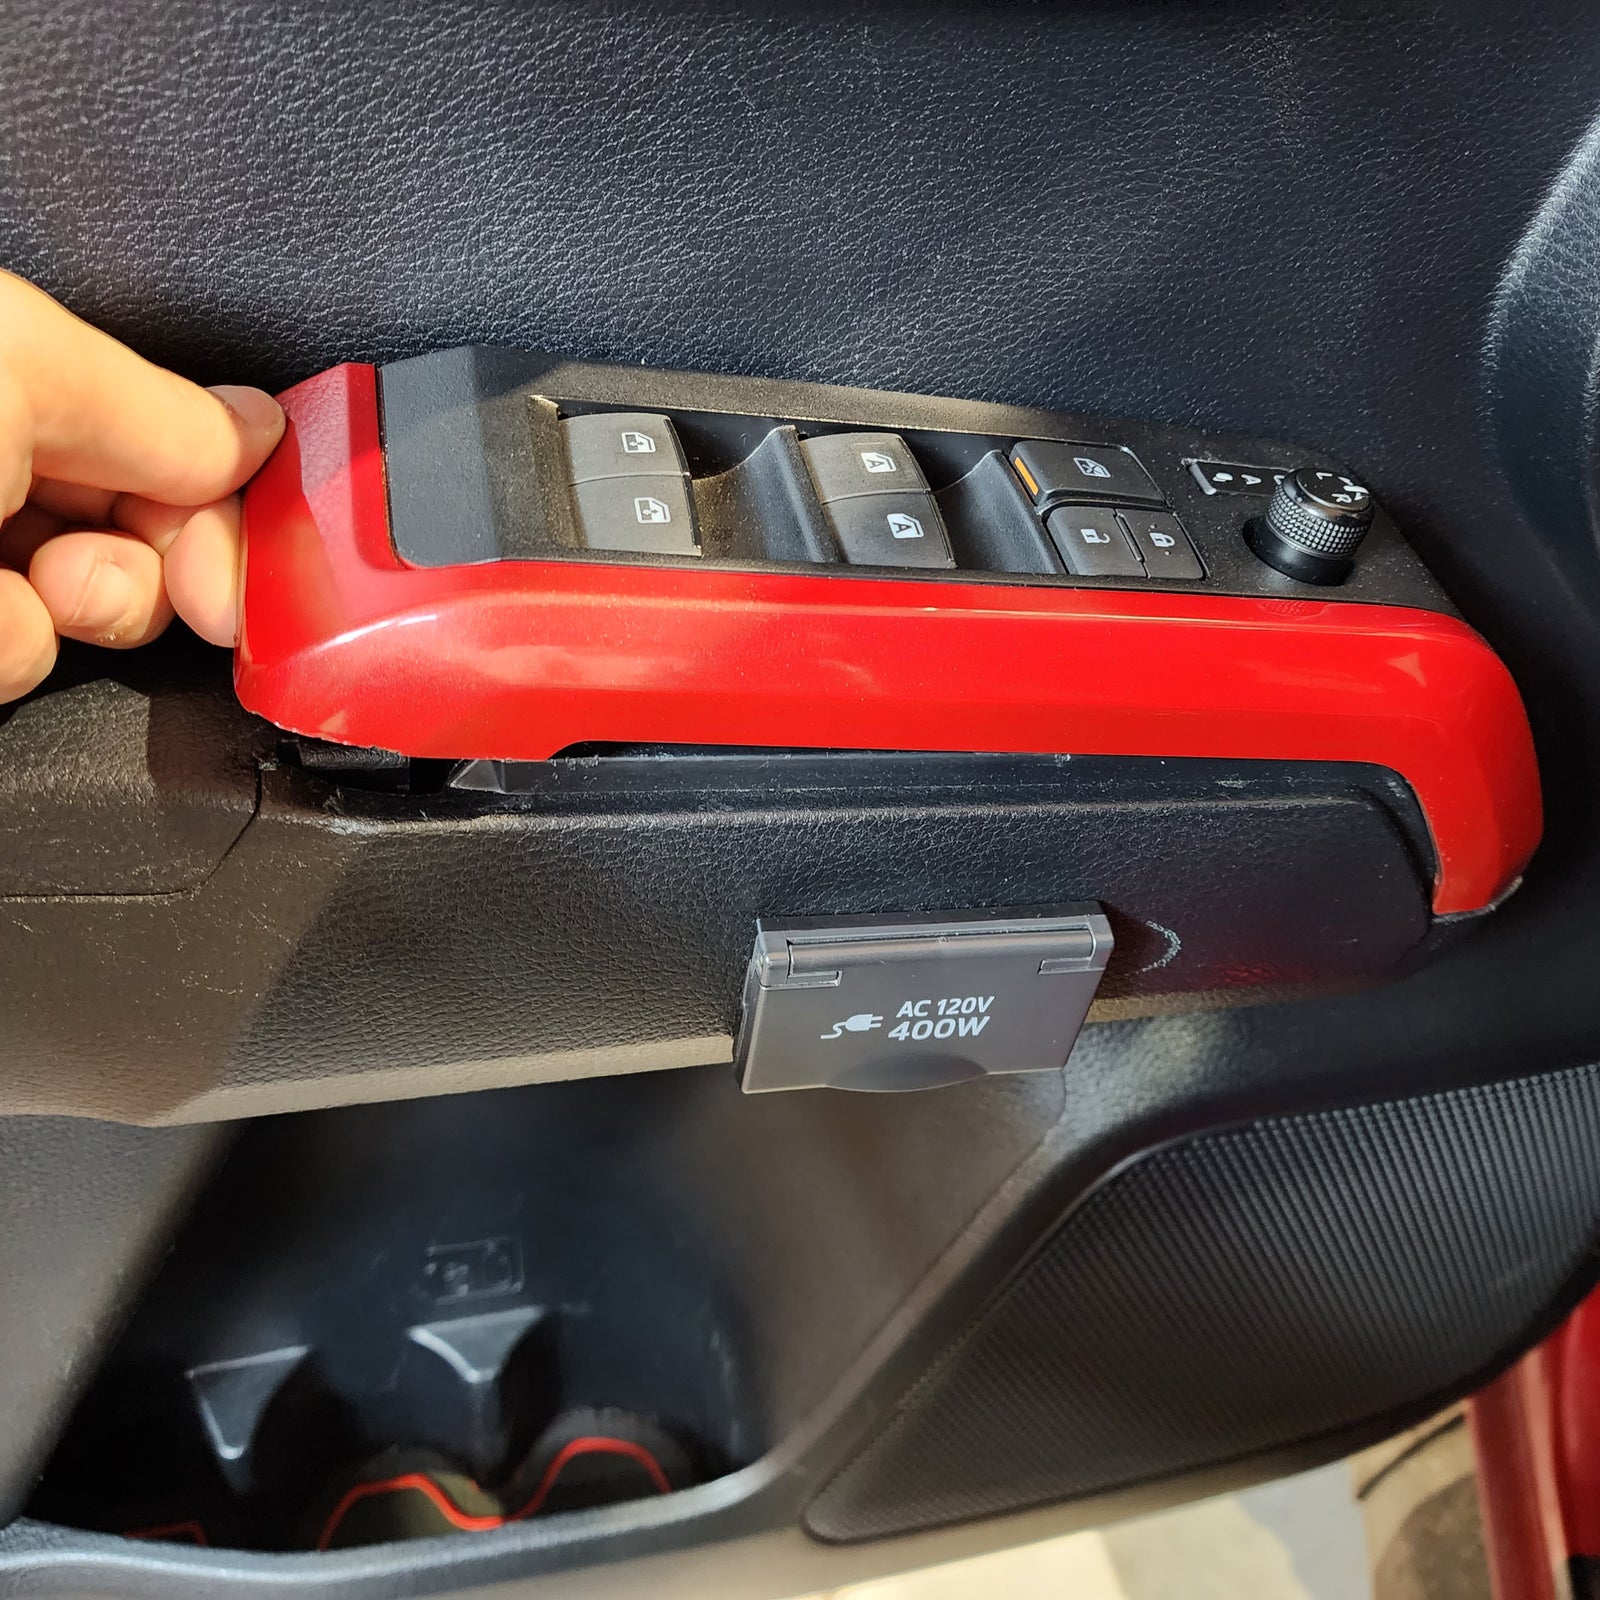
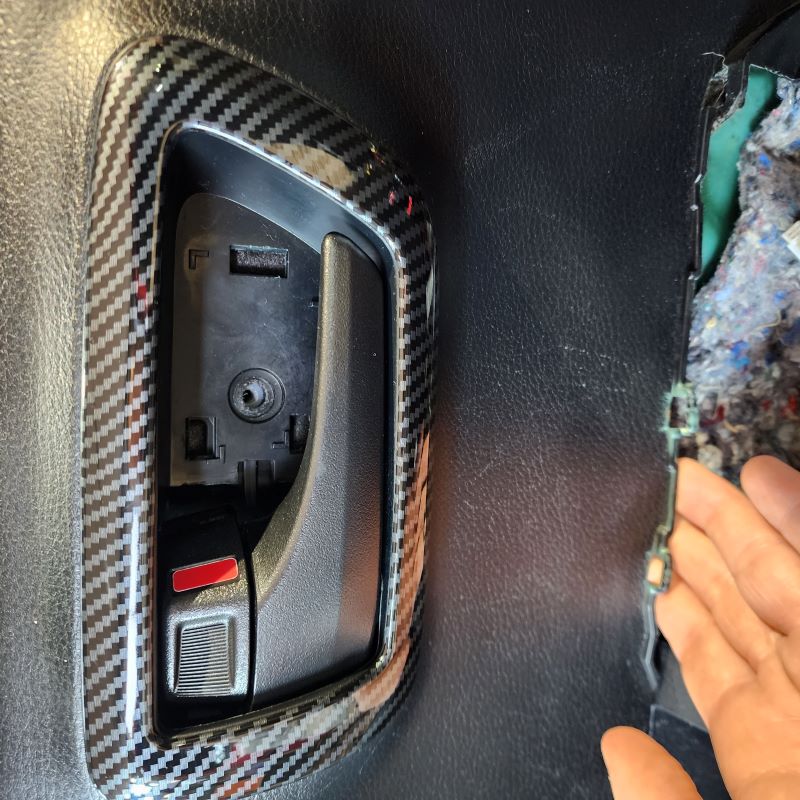
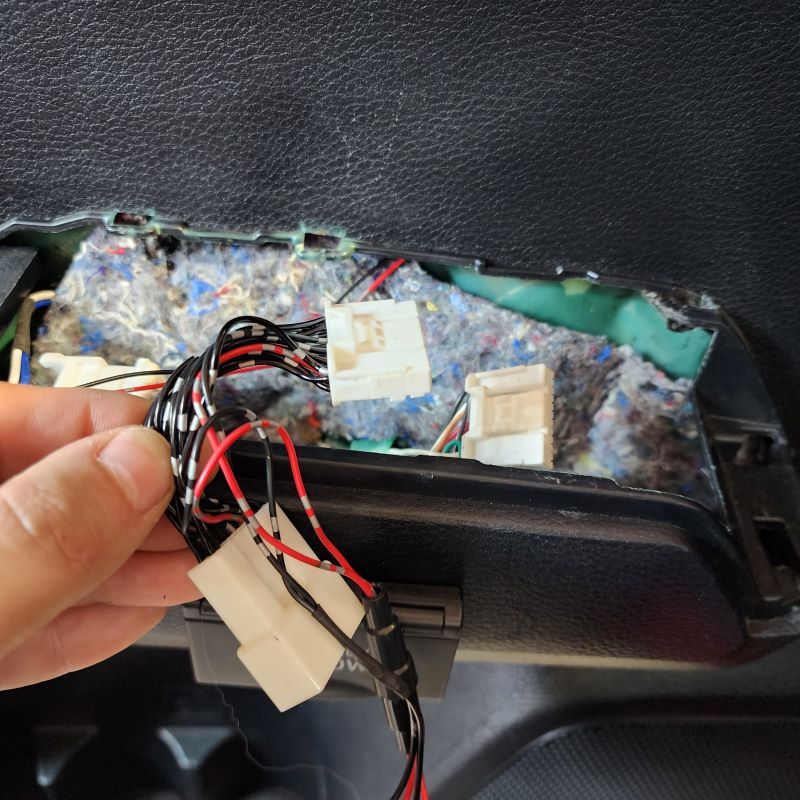
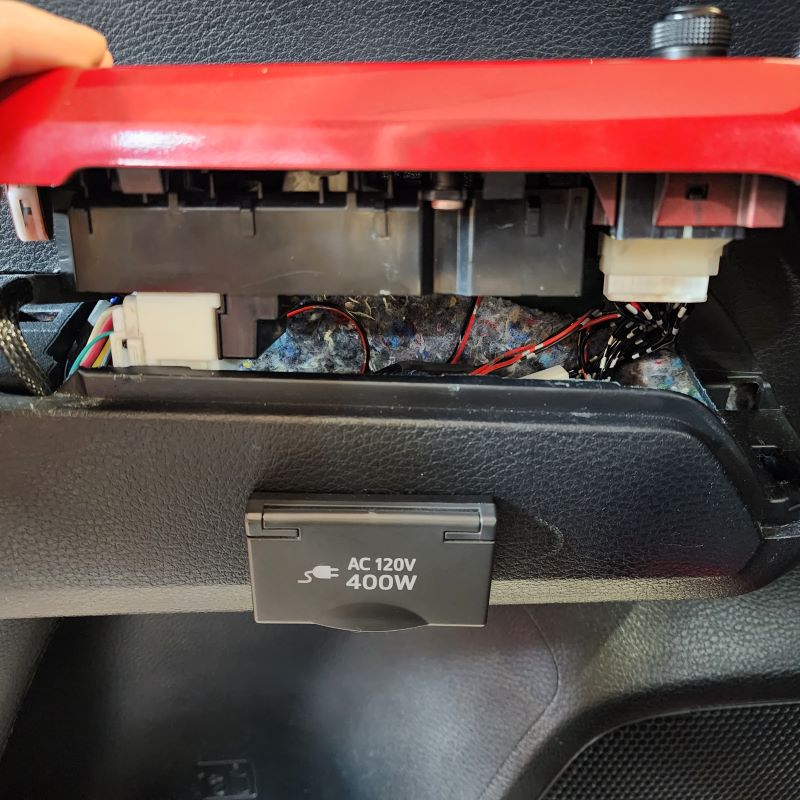
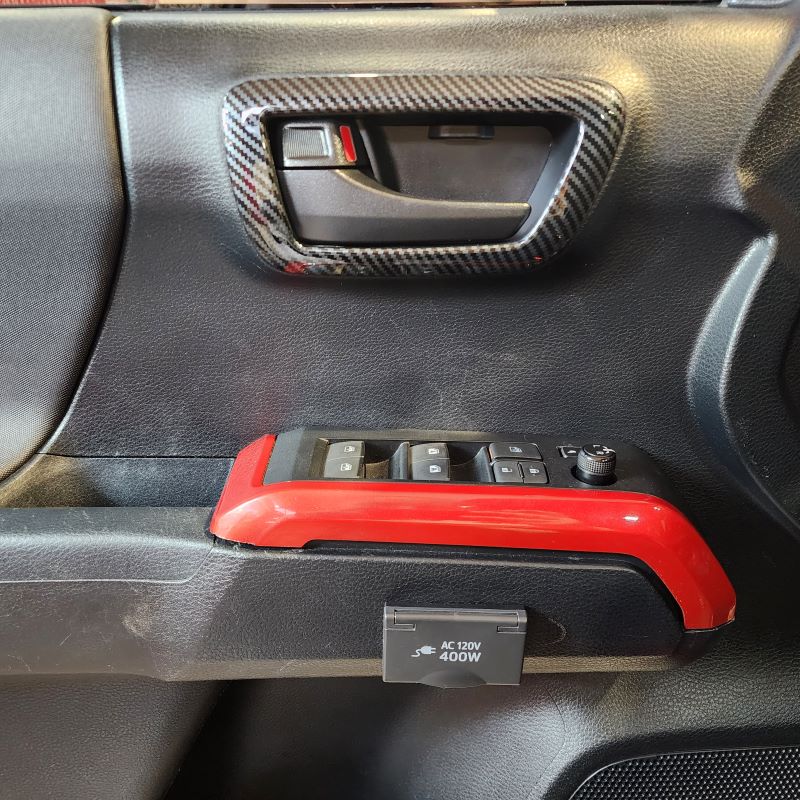
Using your handy trim removal tool, begin in the lower left corner and start separating the door trim piece from the door panel. Slowly work your way around the bottom, popping off each successive snap until you’re left with the trim panel in your hand.
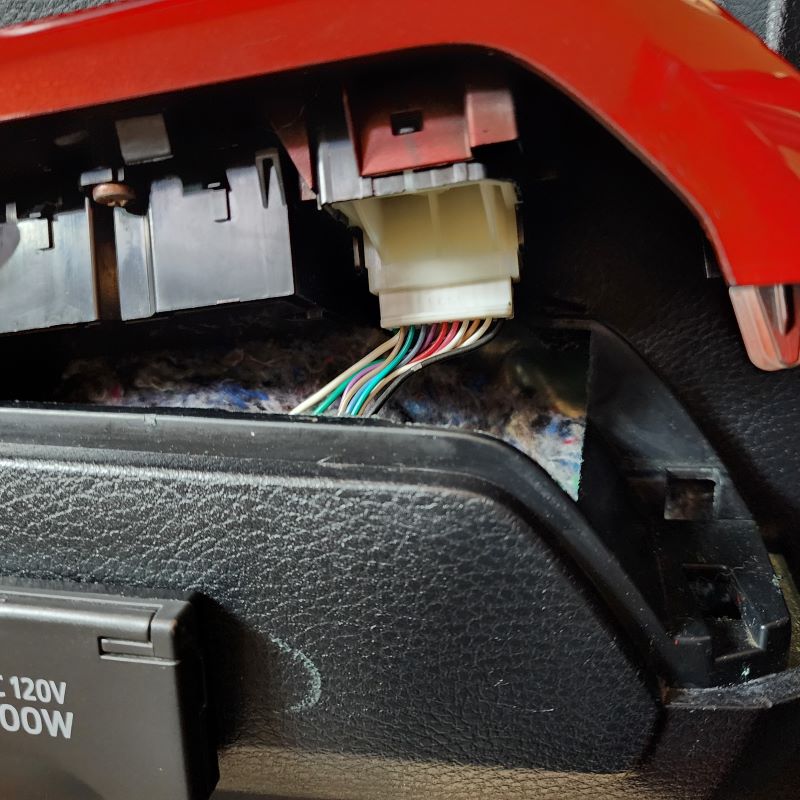
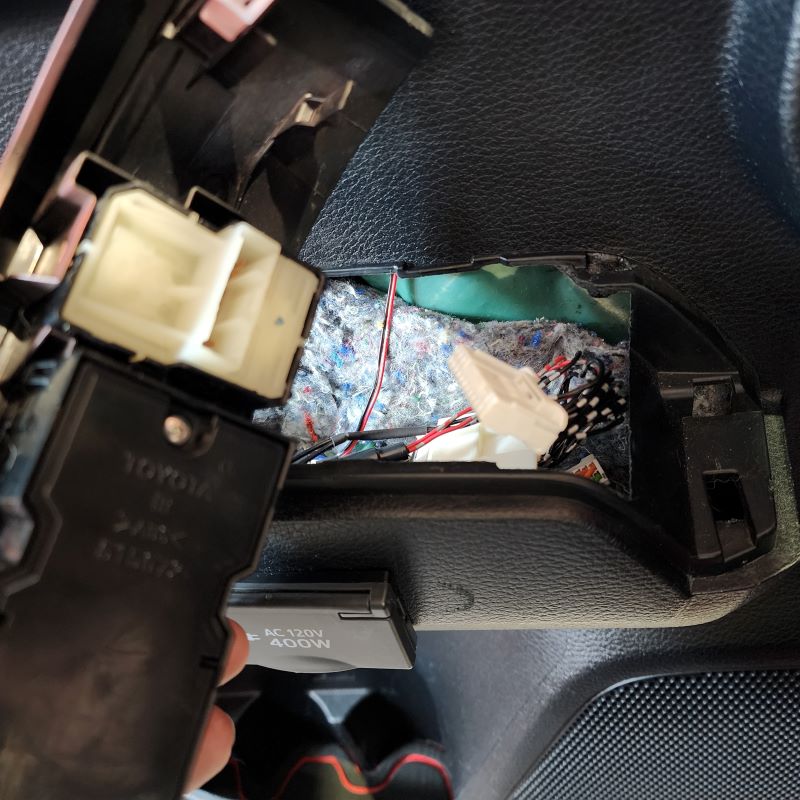
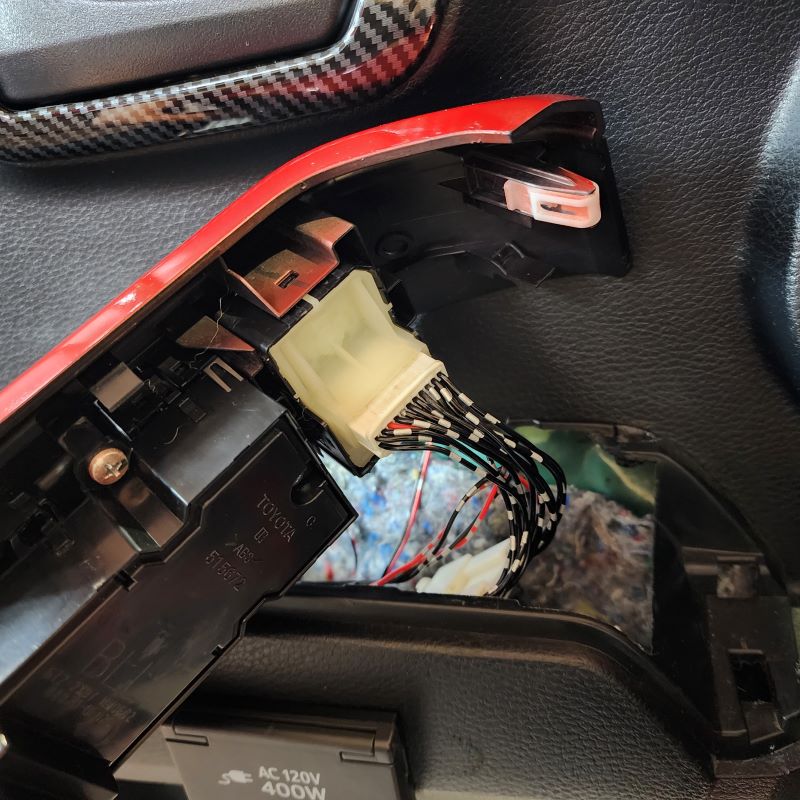
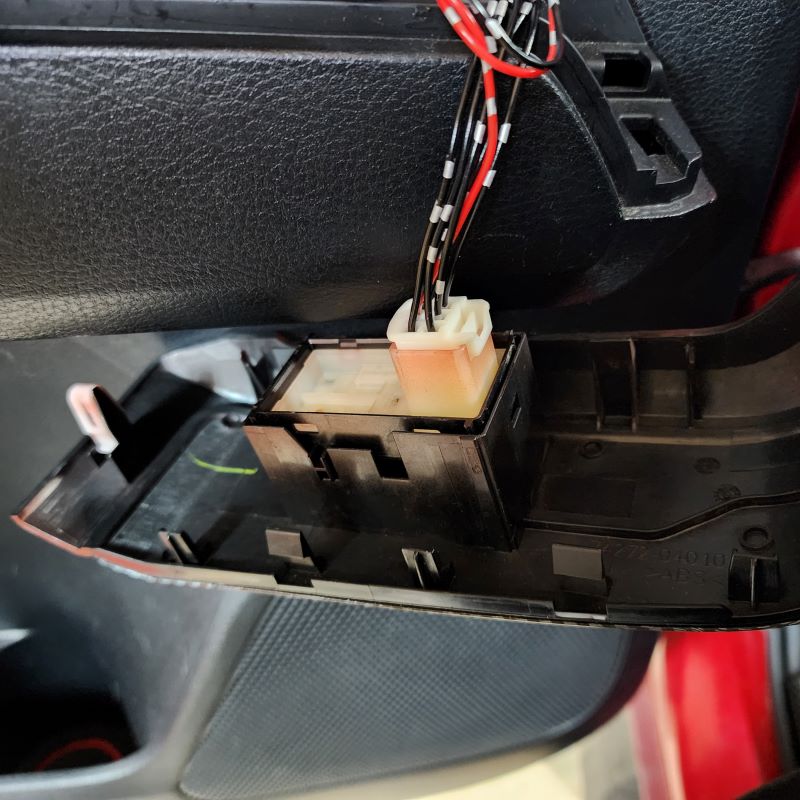
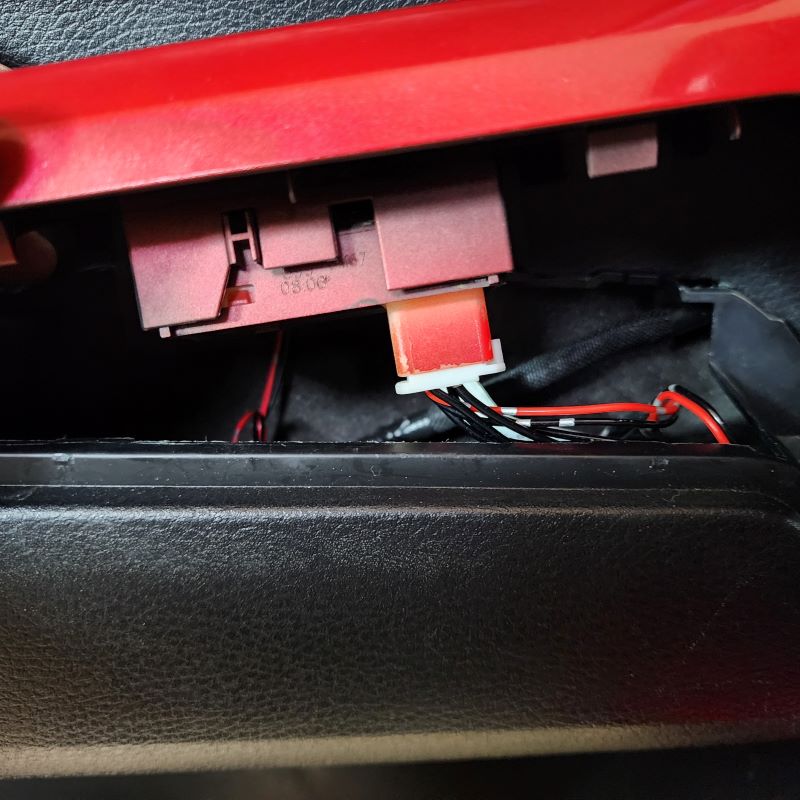
Before trying to lift and pull off the window switch trim, disconnect and remove all the connections underneath of the panel. First, disconnect the the mirror adjustment connector in the front. That will allow more room for you to disconnect the master switch connector at the bottom. You will need to press in the little white tabs on the side of the connector. Once it is pressed in, you will be able to pull the connector free.
NOTE:It is not necessary to completely remove the door panel if you can just lift the door panel section in between the hole cover area and the window switch panel. Take a look at the next step. If you would rather, you can remove the door panel.
INSTALL IMAGES


STEP 3
-
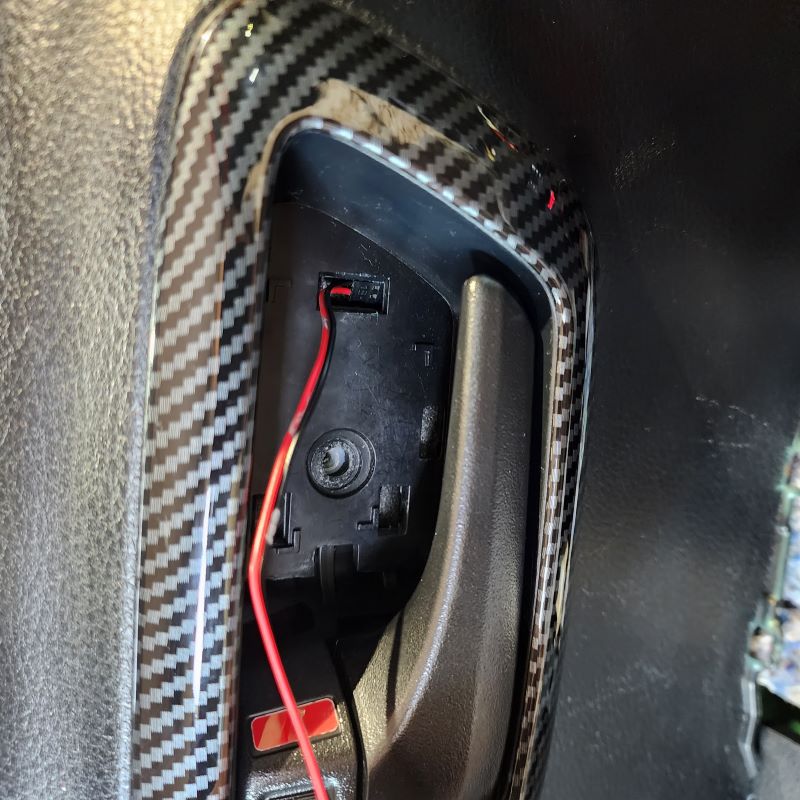
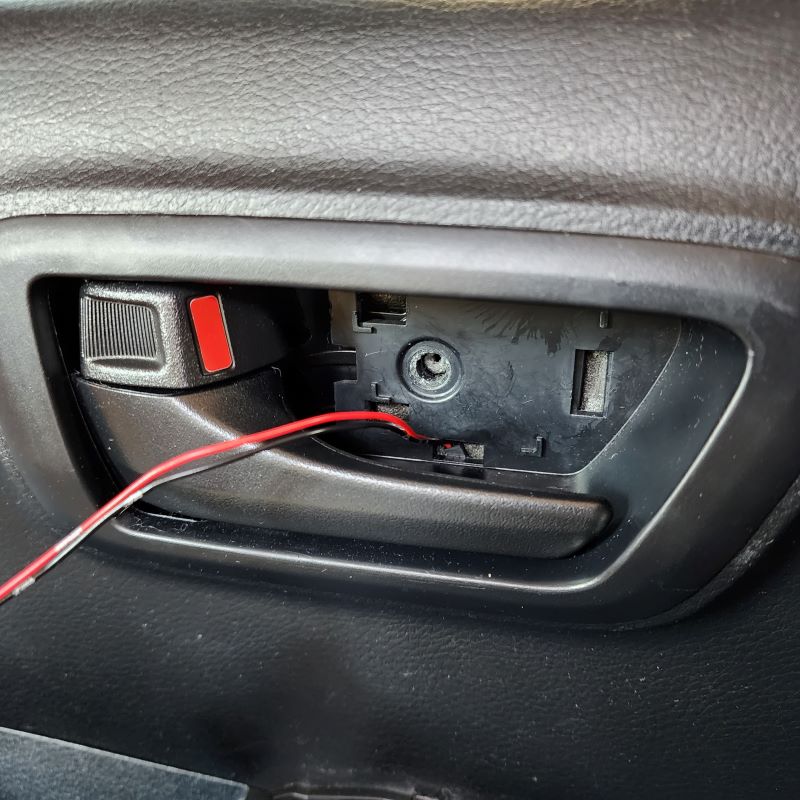
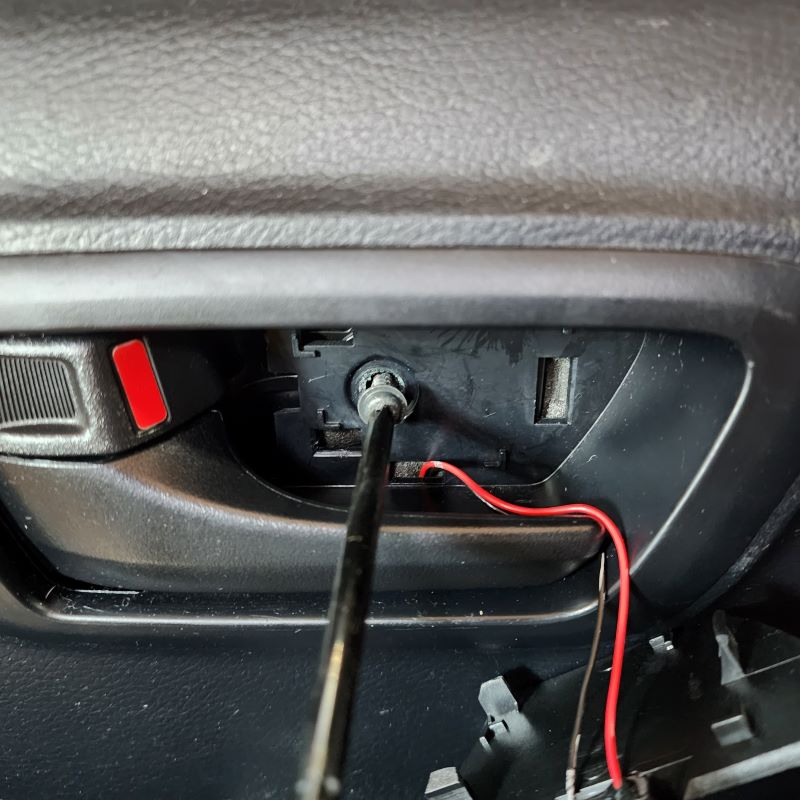
Start with pulling the middle section away from the door frame. It doesn't need to have a big gap behind it. Once you have a little gap, start at the top where the hole cover is going to be installed and fish the red and black wires down the door panel on the back side. At the bottom, you will be able to pull the wire through until you are able to reinstall the screw and new hole cover at the top.
INSTALL IMAGES


STEP 4
-
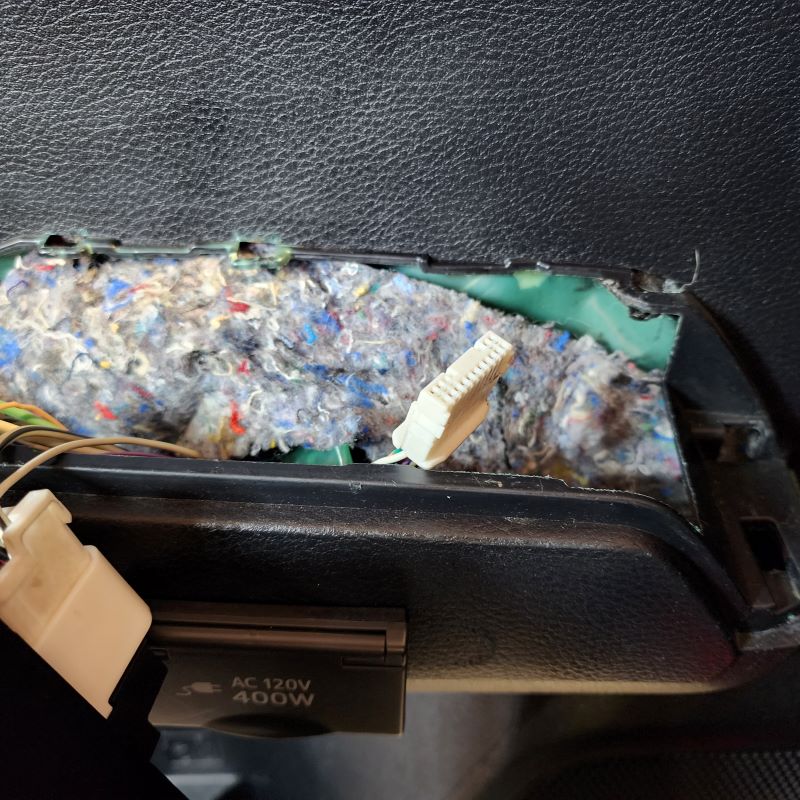
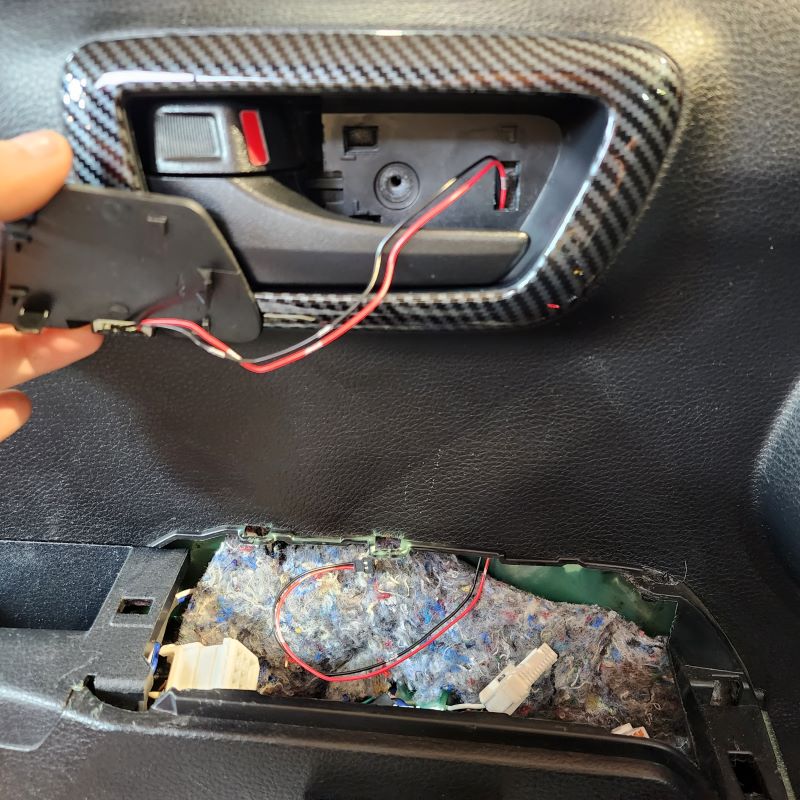
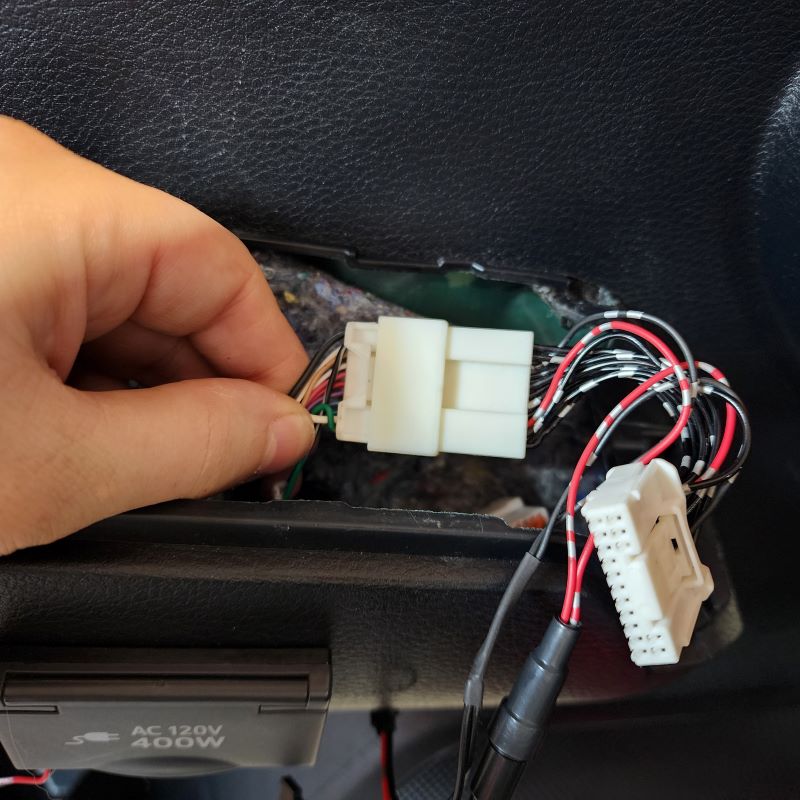
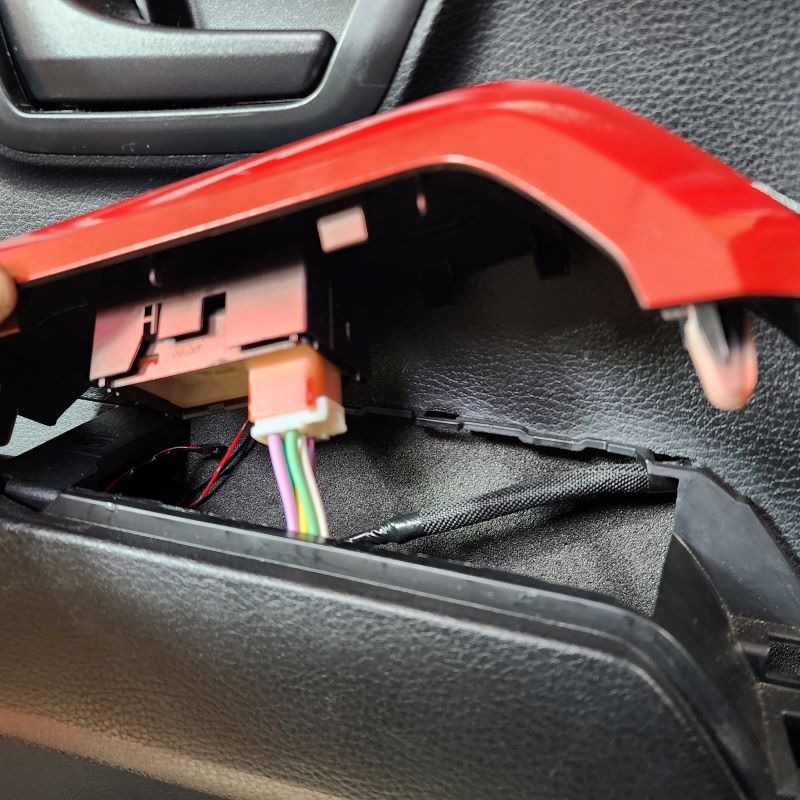
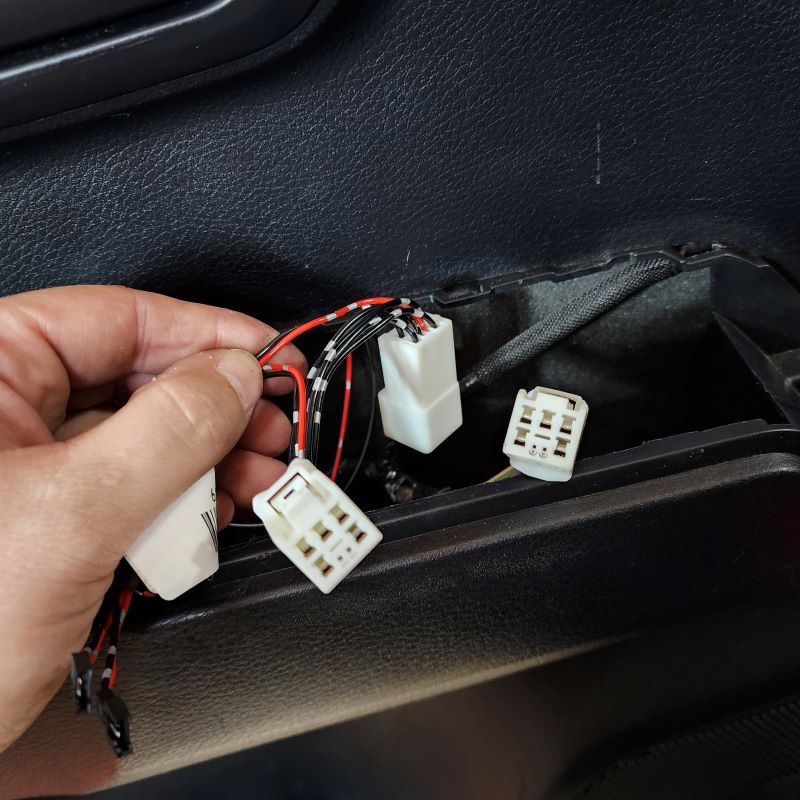
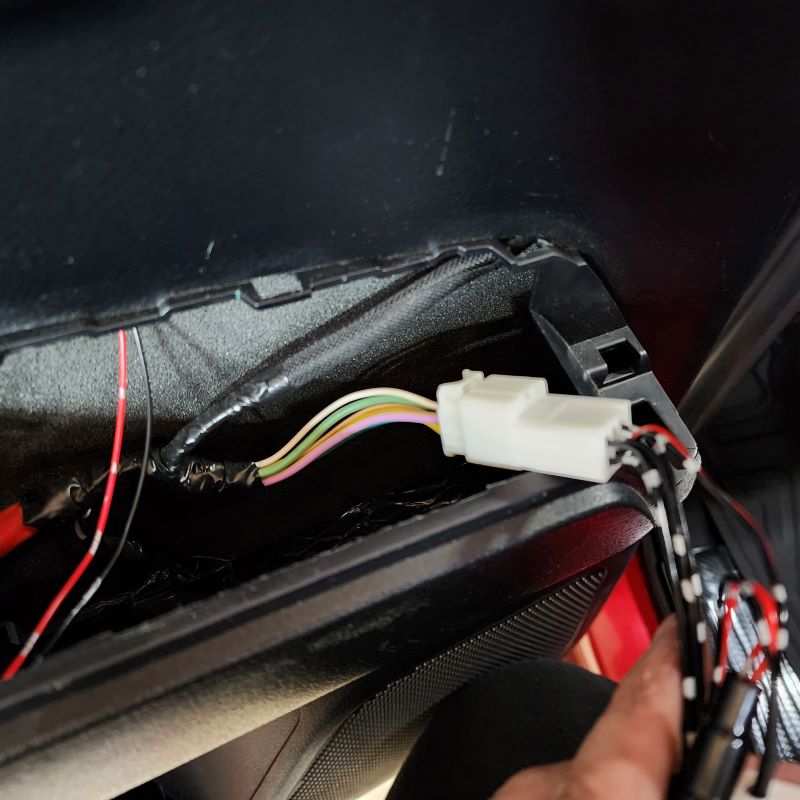
Locate the adjustment mirror connector that is at the front or right side. This connector should look just like your new harness. Go ahead and plug the factory connector into the new harness. Once that is secure, you can directly connect the other end into the switch panel itself.
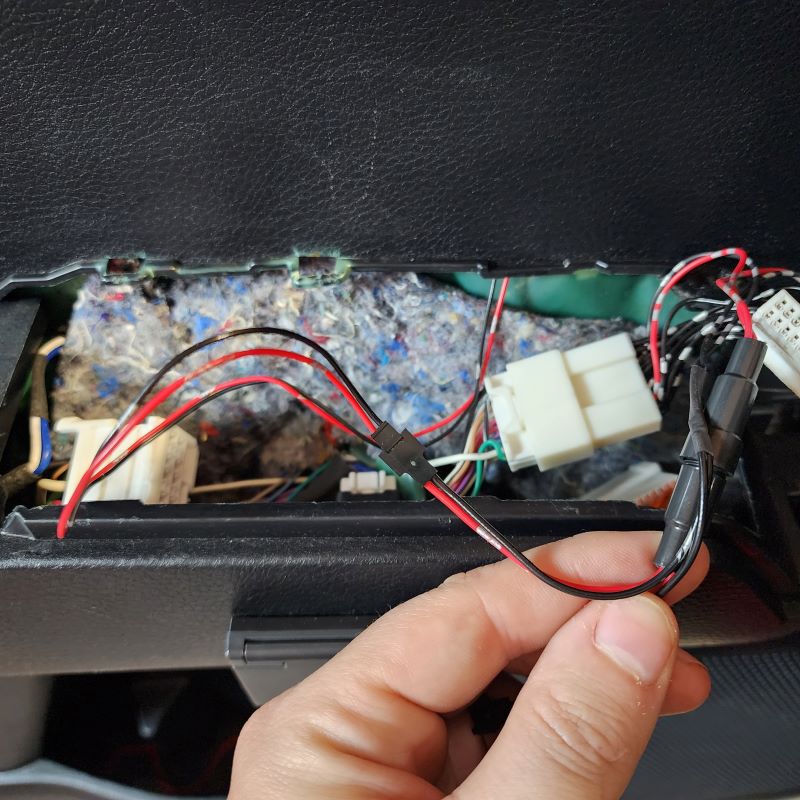
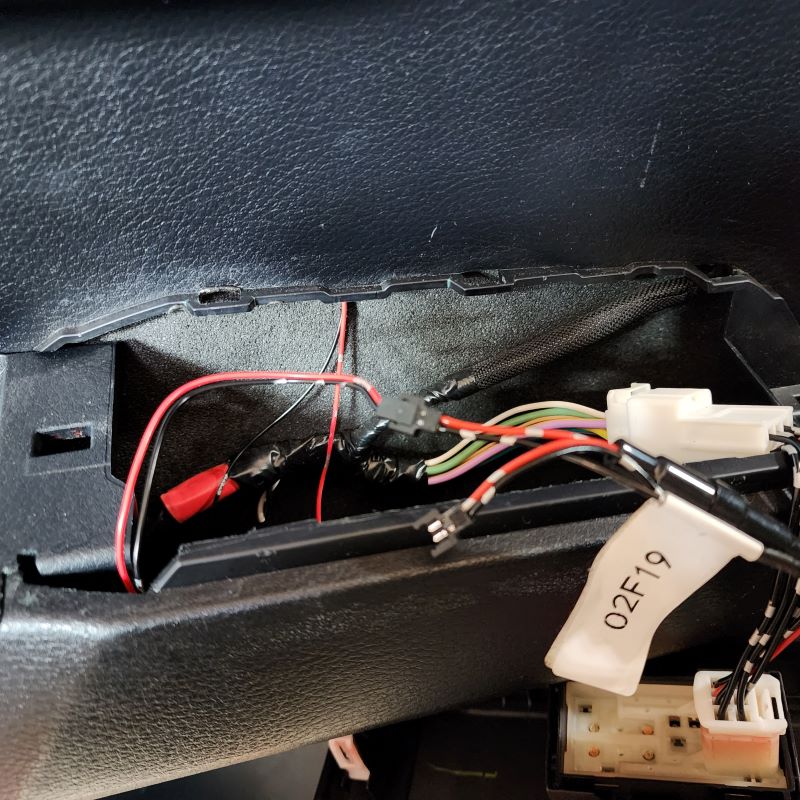
Prior to re-installing the panel in the door, you want to make sure to connect the power and negative wires. There are two little black connectors that will go together.
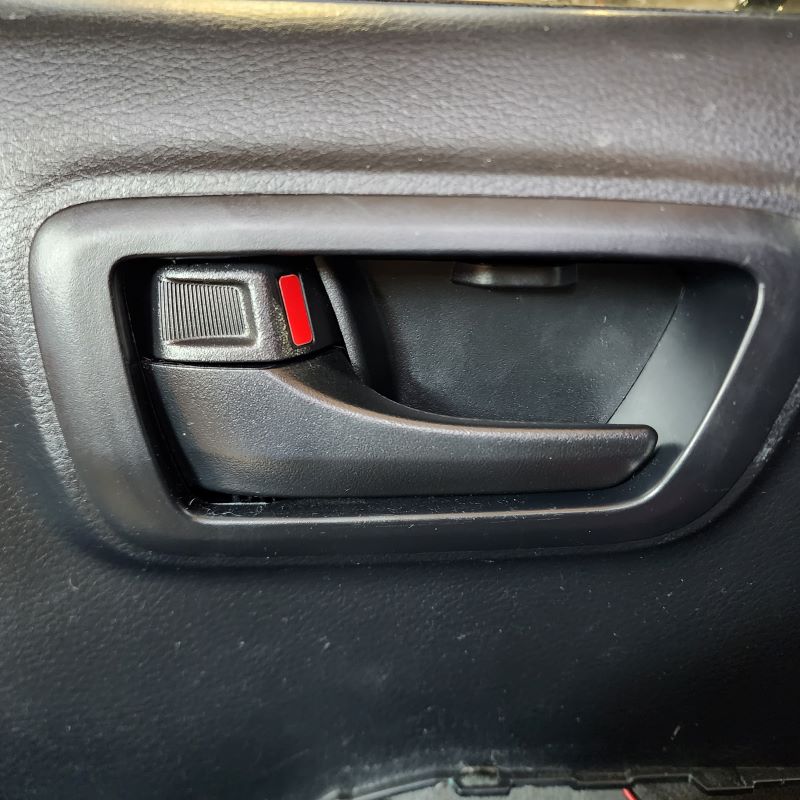
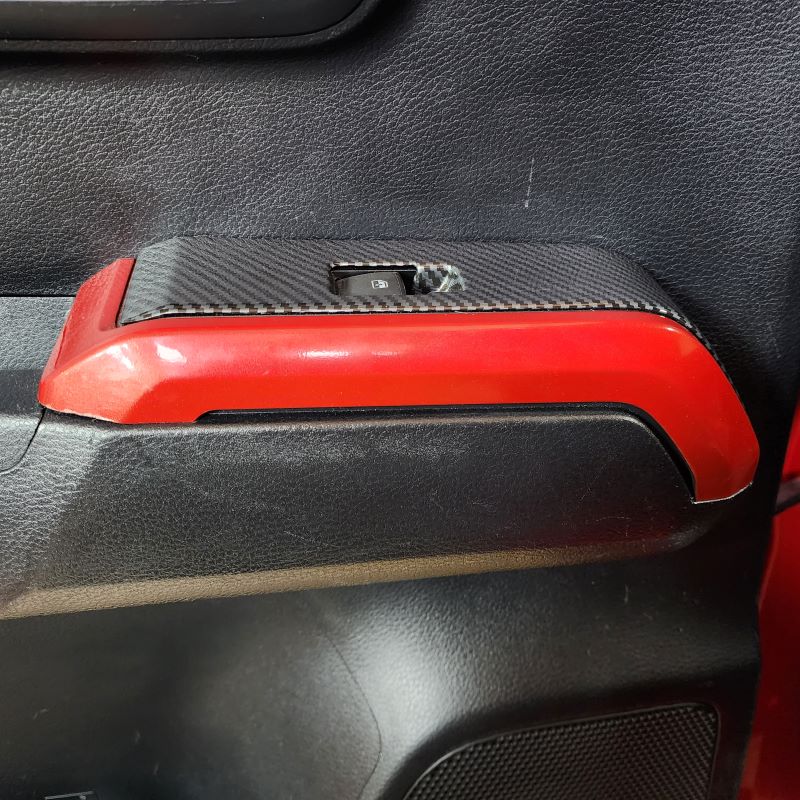
Lastly, re-install the window switch trim panel. Make sure all the wires are nice and tucked inside the door panel. Then align the tabs that are on the backside of the trim panel to their respectful places on the door panel. Finish by pressing down and snapping it into place.
You may test it now to make sure all the connections were nice and secure.
INSTALL IMAGES


STEP 5
-
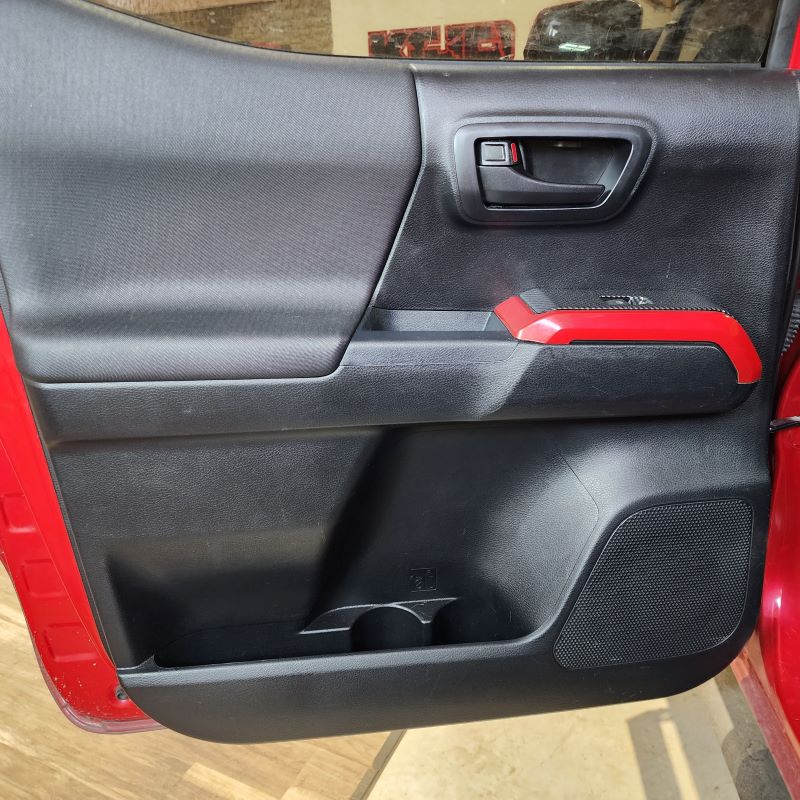
Just like above, you can either start by removing the door hole cover or the Switch Trim Panel. Here we started this time by removing the window switch trim panel.
Using your handy trim removal tool, begin in the lower left corner and start separating the door trim piece from the door panel. Slowly work your way around the bottom, popping off each successive snap until you’re left with the trim panel in your hand.
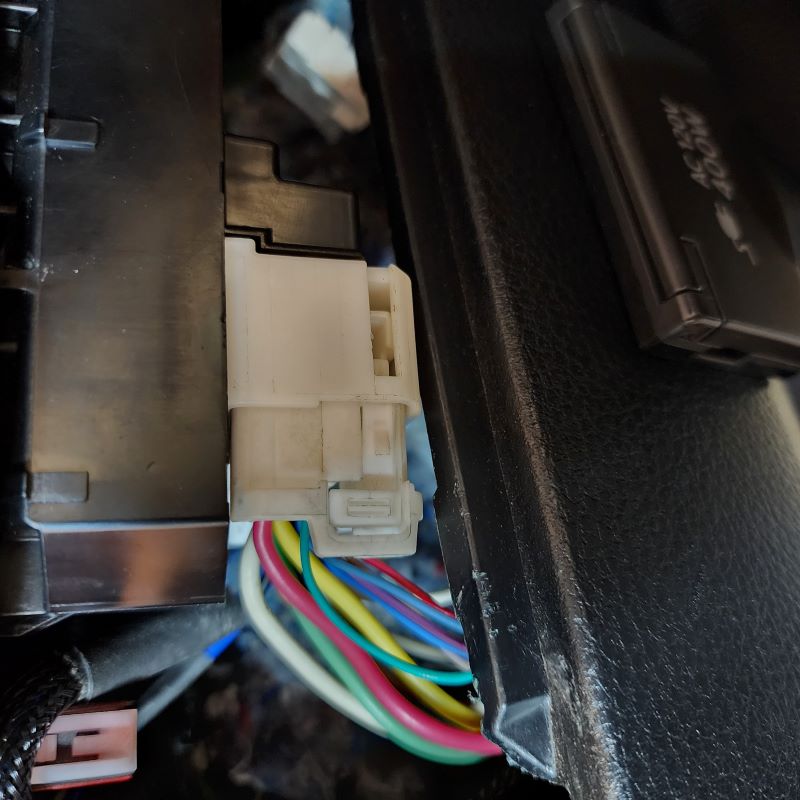
Before trying to lift and pull off the window switch trim, disconnect and remove the connector underneath of the panel. You will need to press in the little white tab on the top of the connector. Once it is pressed in, you will be able to pull the connector free.
INSTALL IMAGES


STEP 6
-
Next, remove the door bowl hole cover by using your trim removal tool once again. Start on the left side closest to the door handle. Pry outward away from the door panel from behind the hole cover. It may be easier to pull the door handle out to create more space. Behind the hole cover, you will notice a hidden screw. Take a screw driver and remove that screw. Set it aside for now.
NOTE:Once again, it is not necessary to completely remove the door panel if you can just lift the door panel section in between the hole cover area and the window switch panel. If you would rather, you can remove the door panel.
INSTALL IMAGES


STEP 7
-
Once again, begin in the lower right corner and start separating the door panel from the door frame. Slowly work your way around the bottom and sides, popping off each successive snap until you’re left with the door panel hanging by the top lip.
Before trying to lift and pull off the door panel, disconnect and remove all the connections on the backside of the panel. Unlike the Driver Door, you will not need to disconnect the courtesy light connector located in the bottom left of the door panel.
Now, in order to remove the door panel, pull it up and straight back off the door frame at the top lip. Make sure not to pull the door panel too far away from the frame – we still need to deal with the latch and lock cables and a couple other connections.
If you look behind the door panel you just pulled off, you’ll see one white and one green Bowden Cable termination. Carefully snap these out of the black housing and maneuver the steel cable ends out of their enclosures just like you did before in Step 2.
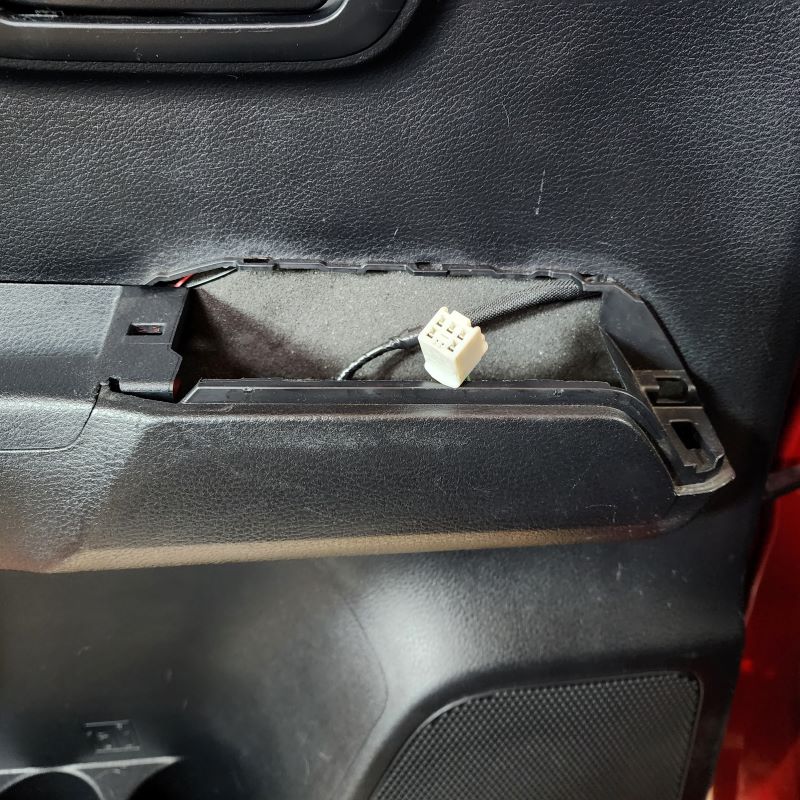
Finally, unplug the white connector towards the front of the door panel as it is the last connector that is standing in the way of removing the door panel completely from the door frame. This will be the connector we are going to work with for the Door Bowl Lights.
NOTE:It is not necessary to completely remove the door panel if you can just disconnect the window switch connector (white connector towards the front of the door panel) and reconnect it using the new harness from the package (Step 8).
INSTALL IMAGES


STEP 8
-
Locate the window switch connector that is at the front or right side. This connector should look just like your new harness. Go ahead and plug the factory connector into the new harness. Once that is secure, you can directly connect the other end into the switch panel itself.
Prior to re-installing the panel in the door, you want to make sure to connect the power and negative wires. There are two little black connectors that will go together.
Finally, re-install the window switch trim panel. Make sure all the wires are nice and tucked inside the door panel. Then align the tabs that are on the backside of the trim panel to their respectful places on the door panel. Press down and snap it into place.
You may test your second door bowl light now to make sure all the connections were nice and secure.
To complete the rest of the installation, follow Steps 1 - 8 on your passenger side.
NOTE: 1-AUTO Tacomas will have the same factory connector as the 2 rear passenger doors. 2-AUTO Tacomas will have a completely different factory connect than the other three doors. Please pay attention when matching up the factory connectors to the new harness connectors included in the package.
INSTALL IMAGES


STEP 9
-
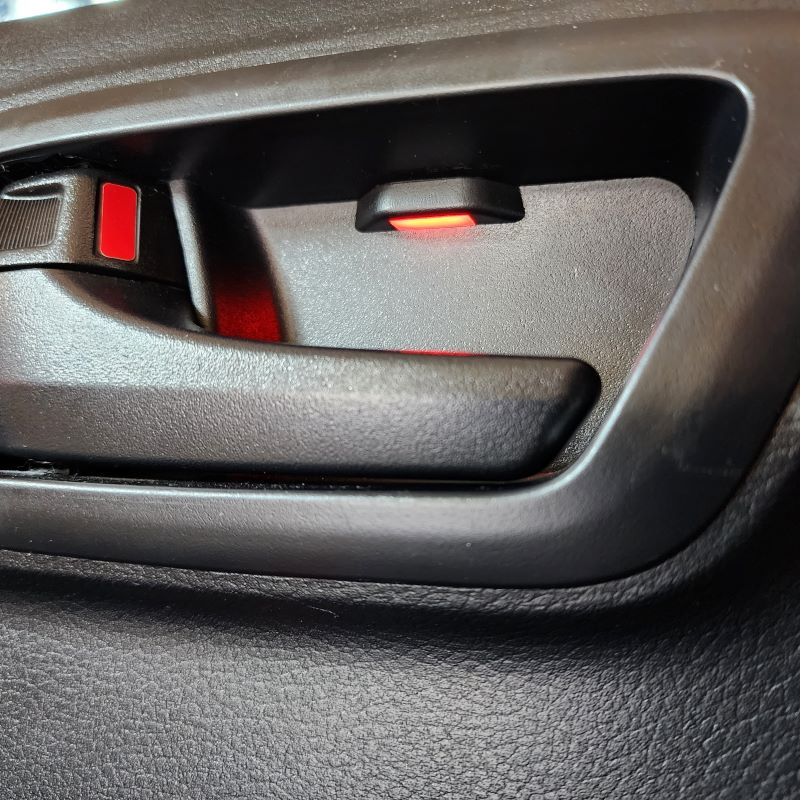
Enjoy your New Door Bowl Lights!
INSTALL IMAGES