


FOR TOYOTA TACOMA MODEL
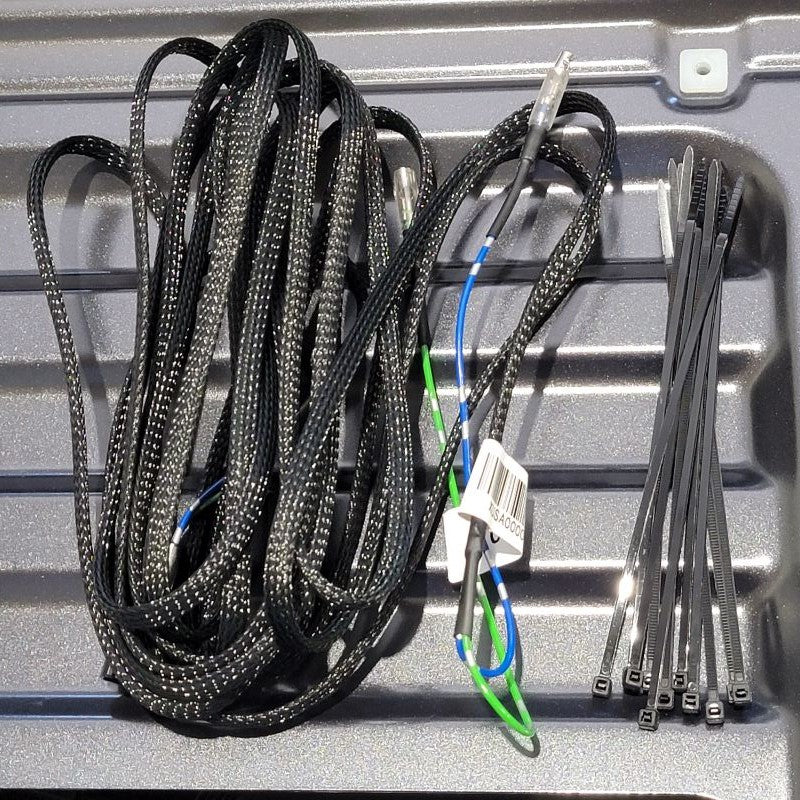
PARTS INCLUDED:
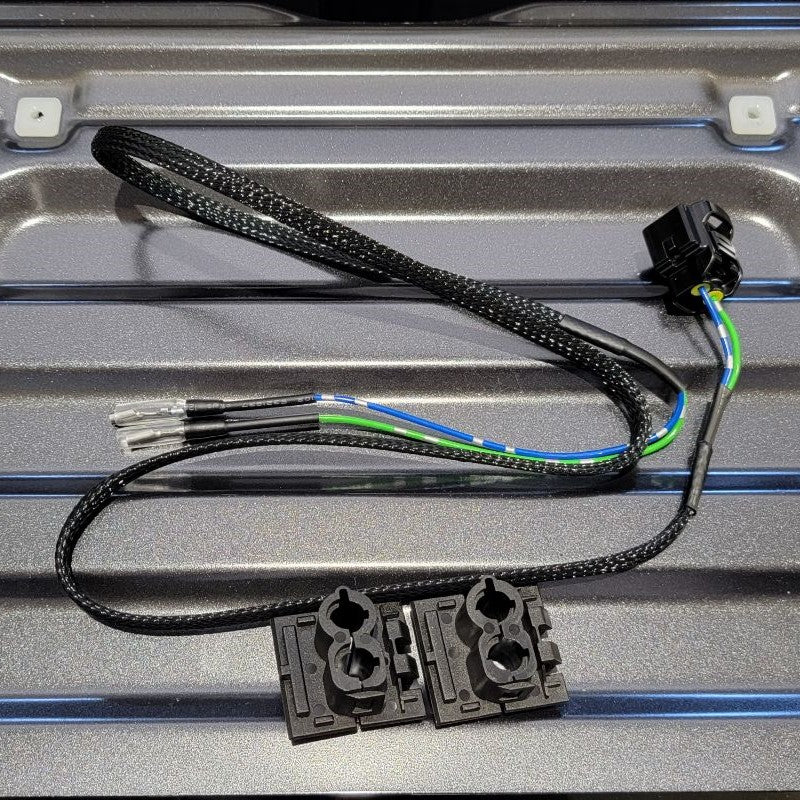
1 x Plug-N-Play Harness1 x Tailgate Wire Harness
1 x Integrated Body Wire Harness
1 x Locking Actuator
1 x Bolt-N-Lock Bracket
1 x Locking Rod
1 x Hardware Package
2 x Dual Wire Harness Protectors
Zip Ties
TOOLS NOT INCLUDED BUT ARE NEEDED:
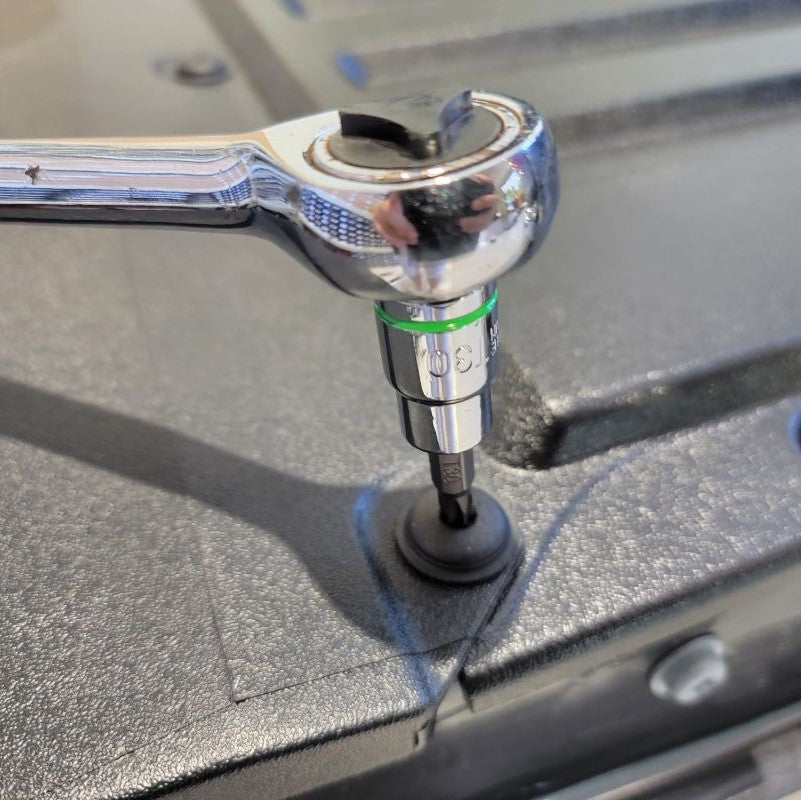
Installation Instructions - Power Tailgate Lock (Located on Website)1/2-in Socket (10 mm)
1/2-in Drive Ratchet
Wrench (8 mm)
Wrench (9 mm)
#15 Torx Screw Driver
#30 Torx Screw Driver
Phillips Screw Driver
Electrical Tape (optional)
Small Flathead Screw Driver (optional)
DISCONNECT THE BATTERY BEFORE YOU BEGIN INSTALLATION
Must Press + to see the narrative on each Step
STEP 1
INSTALL IMAGES


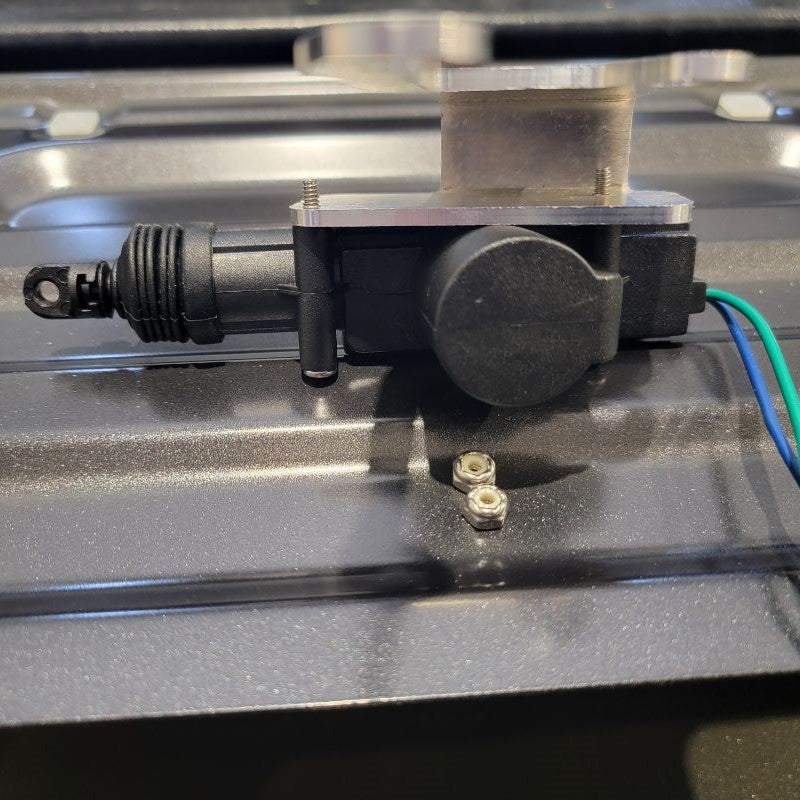
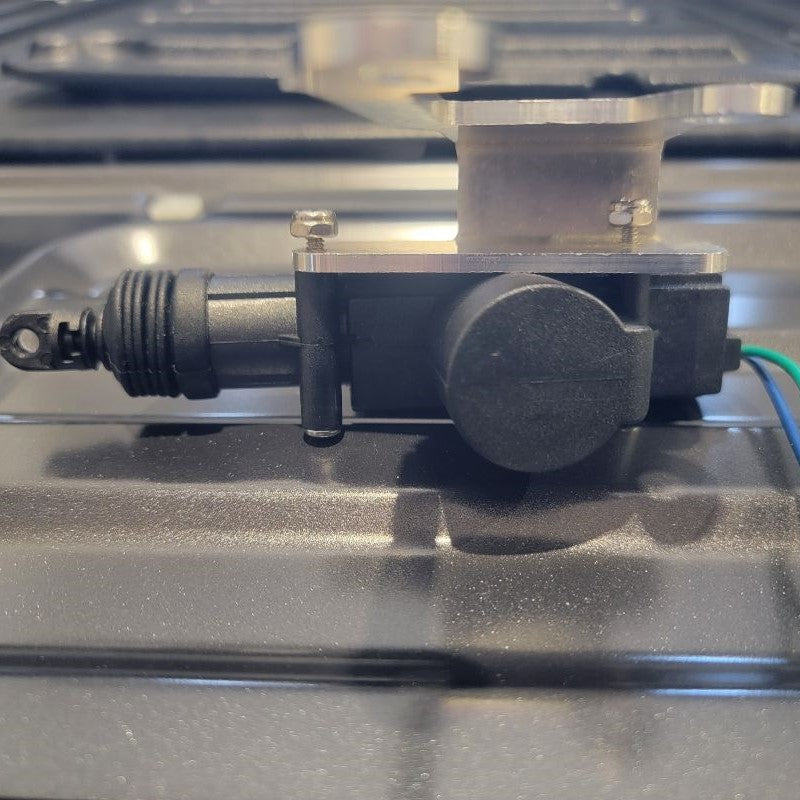
STEP 2
-
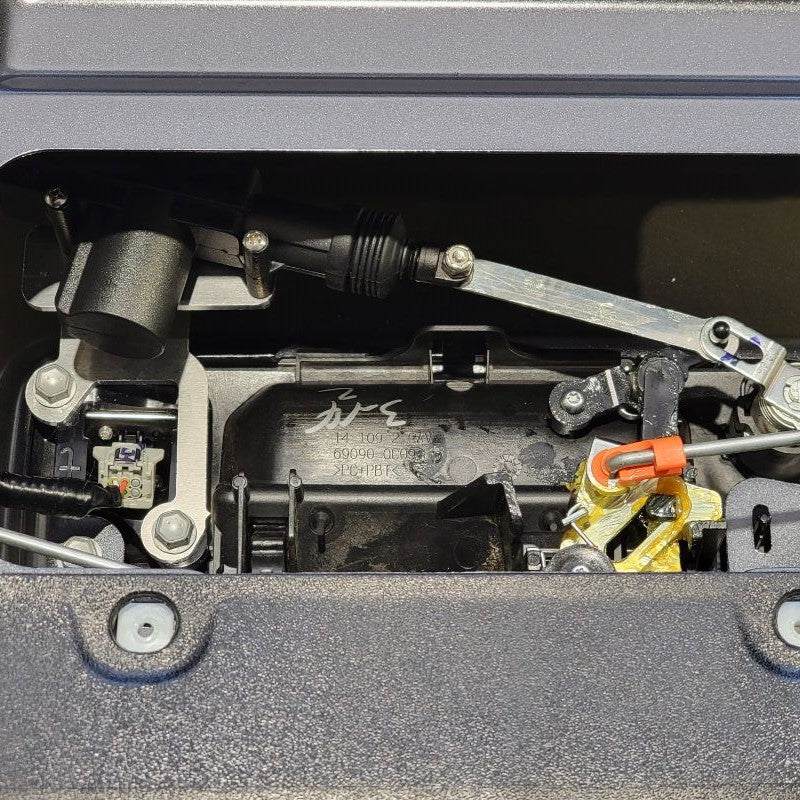
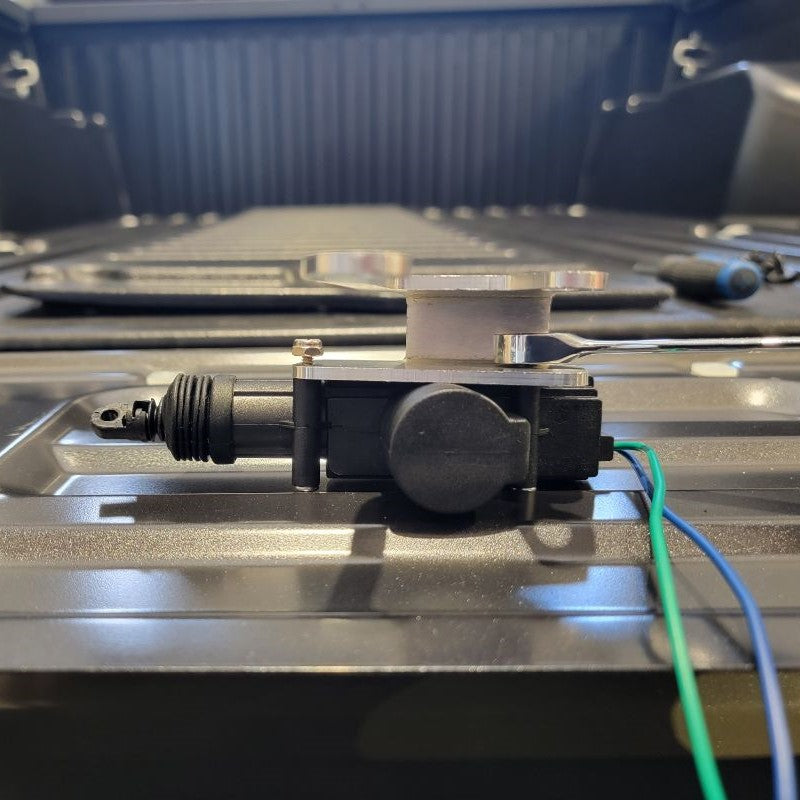
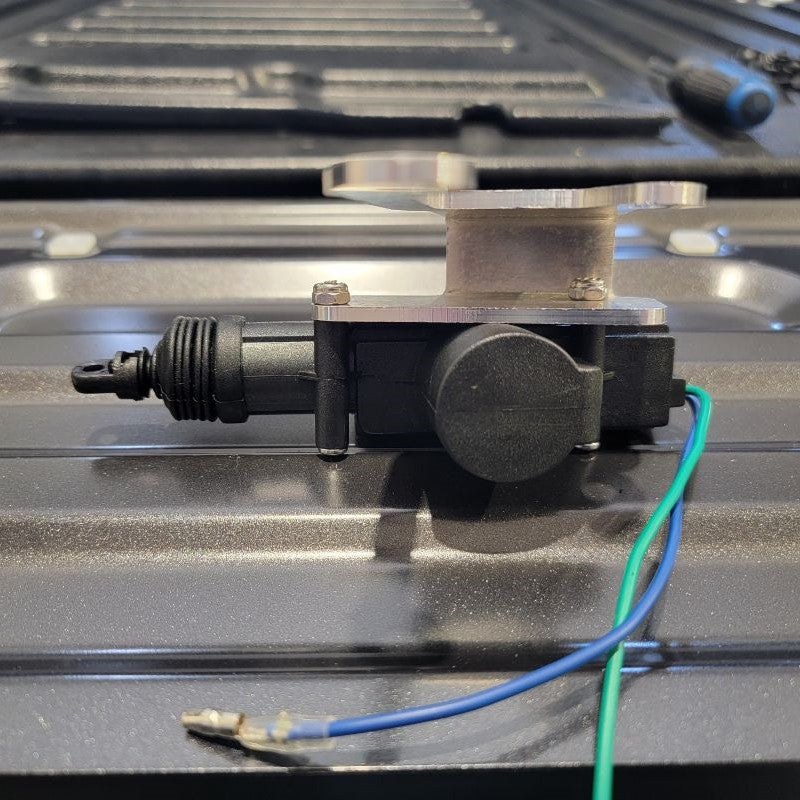
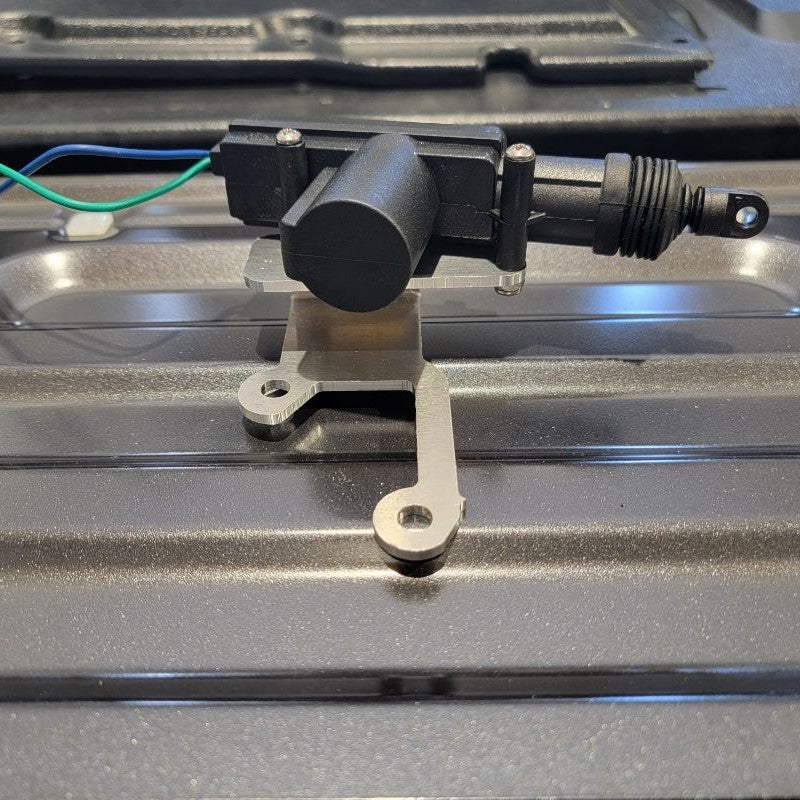
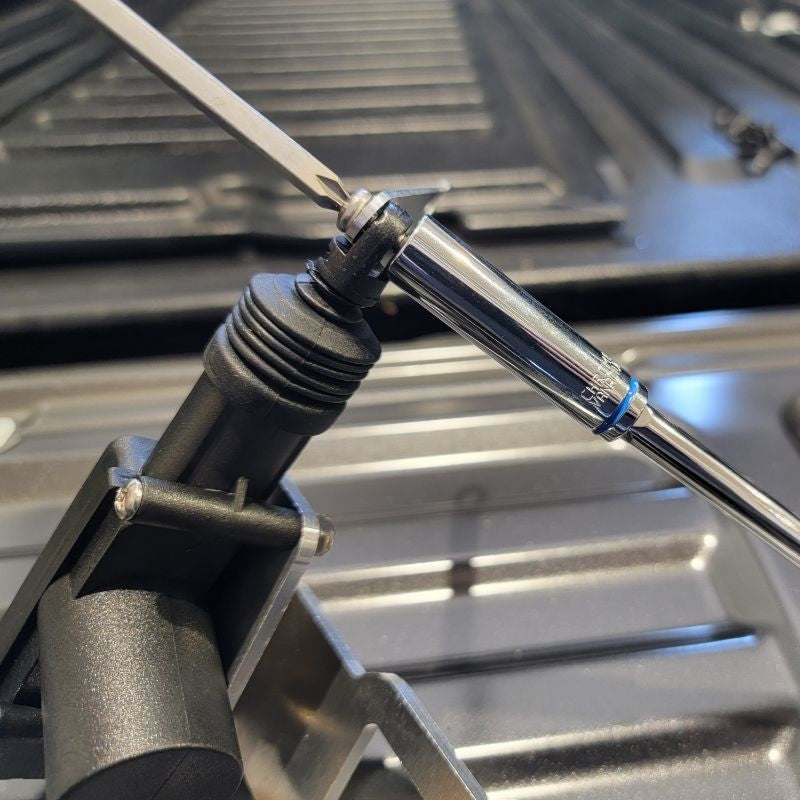
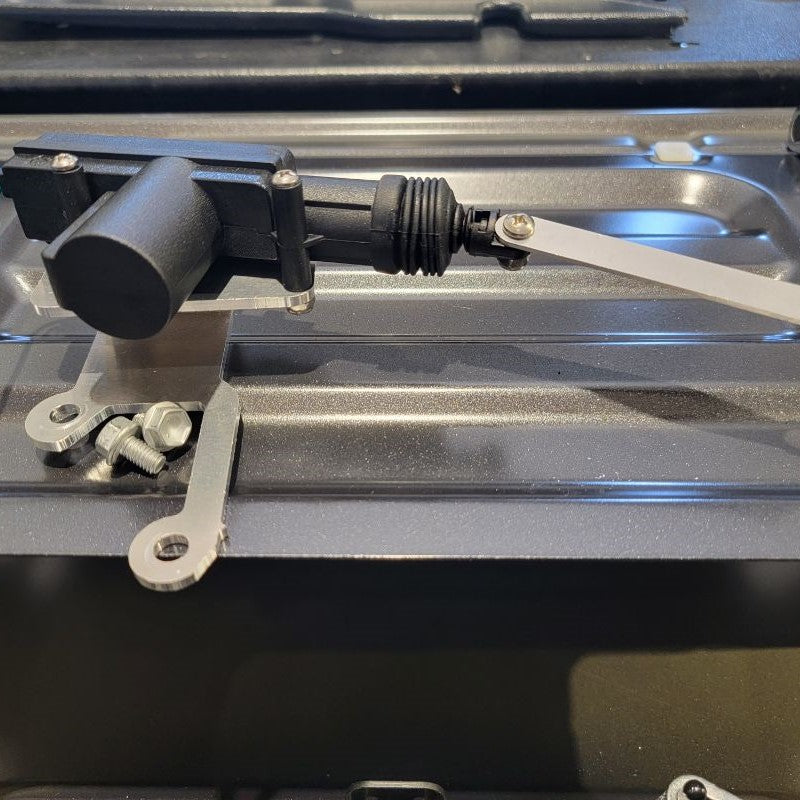
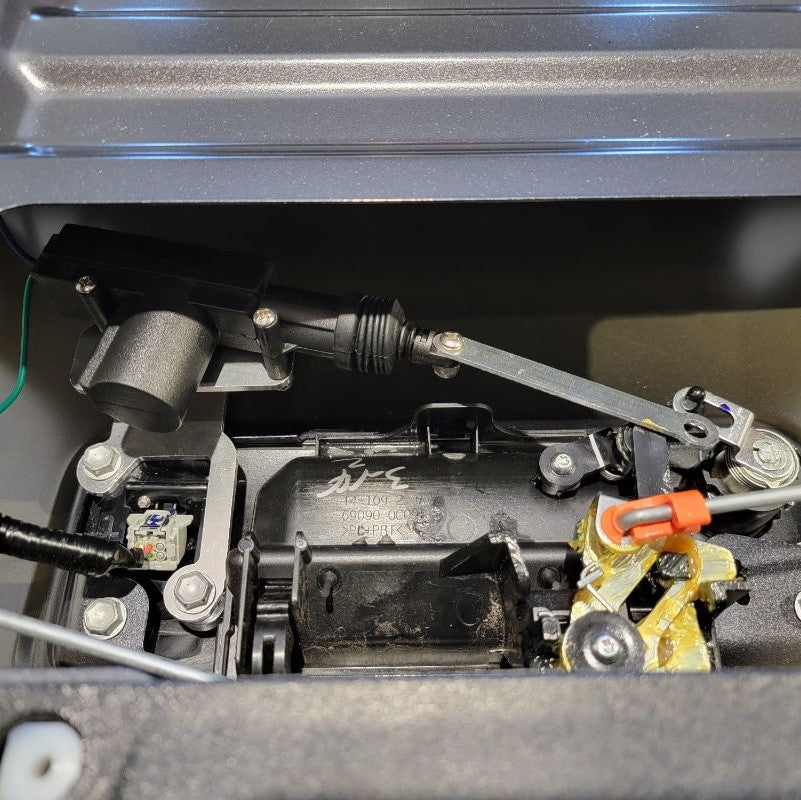
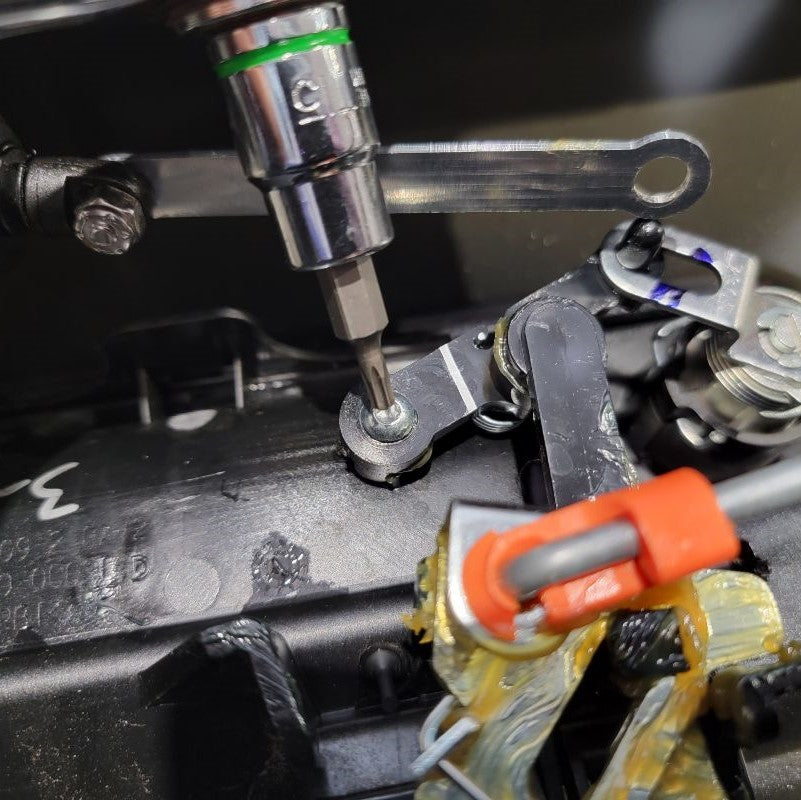
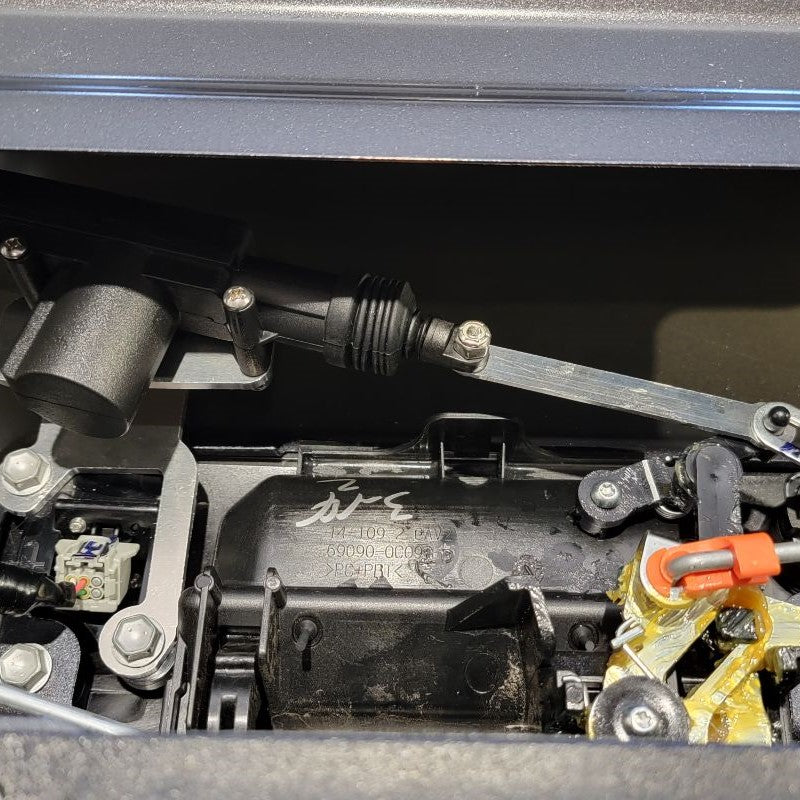
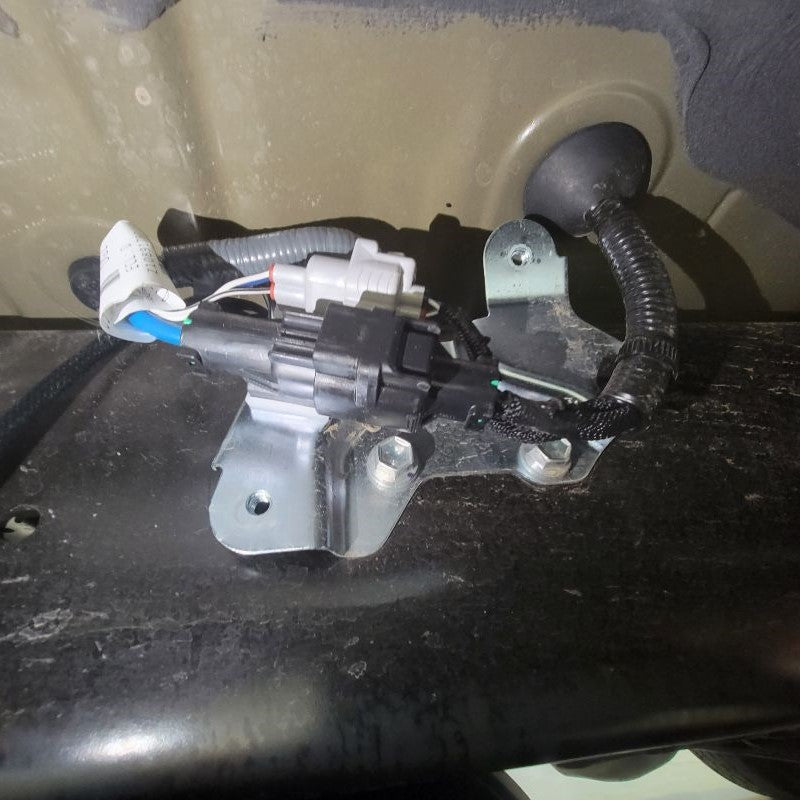
Using a screw driver and a wrench (8 mm), grab the Bolt-N-Lock Bracket that has been supplied for you as your new mounting point for your locking actuator. Use the supplied hardware and secure the actuator to your bracket following the images below as your guide. Finish preparing your actuator by installing the locking rod on the black tip using the smaller screw and lock nut to secure it tightly. Continue using the screw driver and grab a wrench or socket (9 mm) to tighten securely.
INSTALL IMAGES


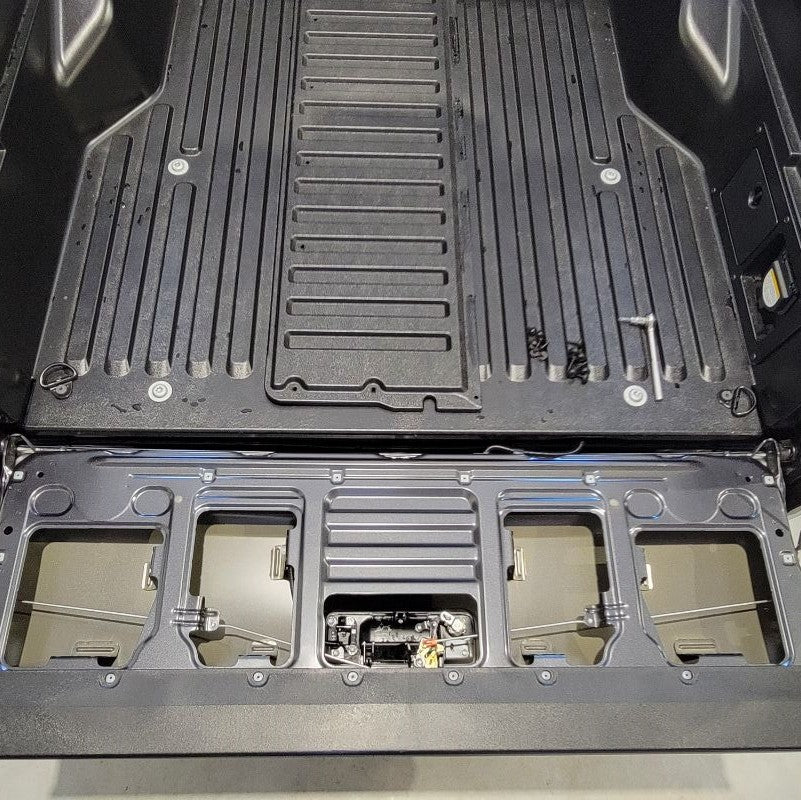
STEP 3
-
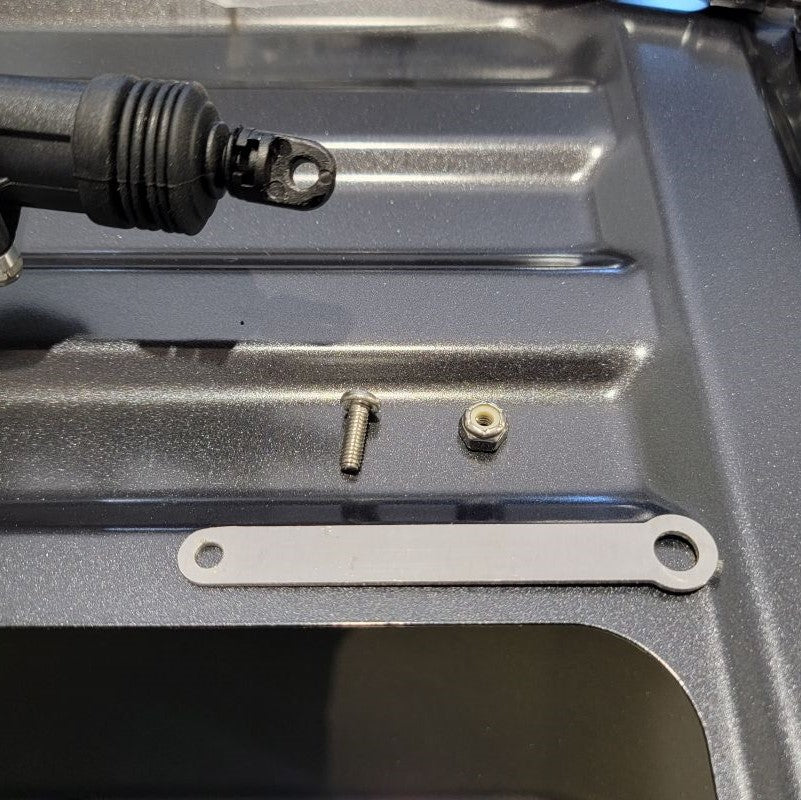
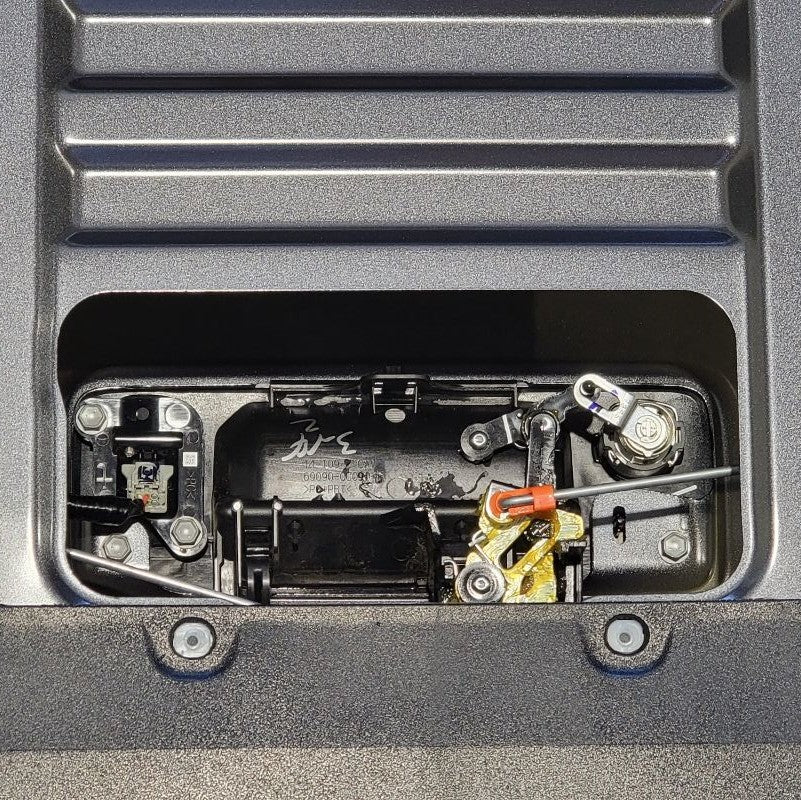
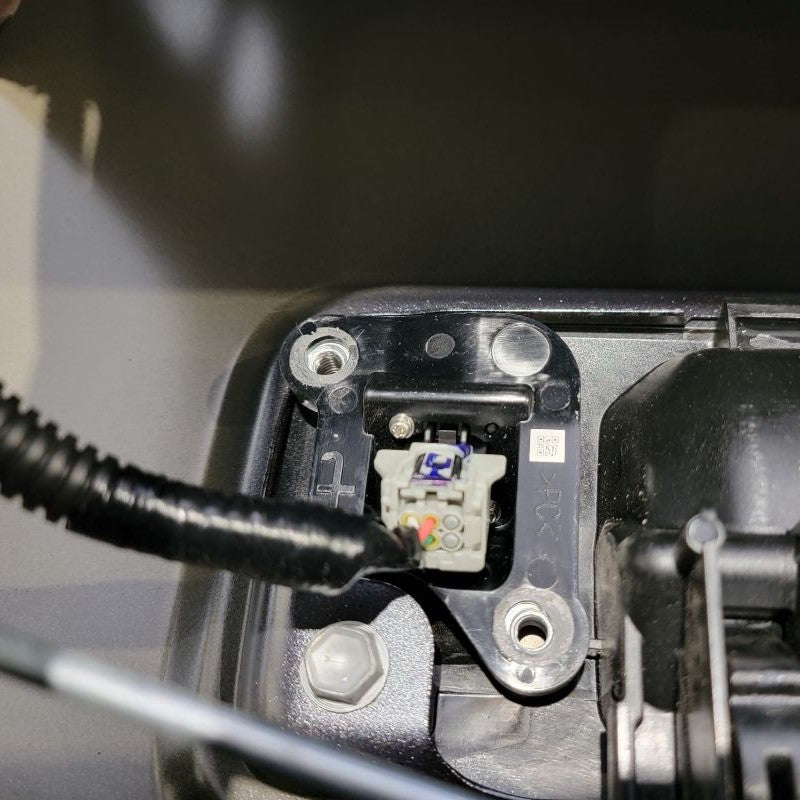
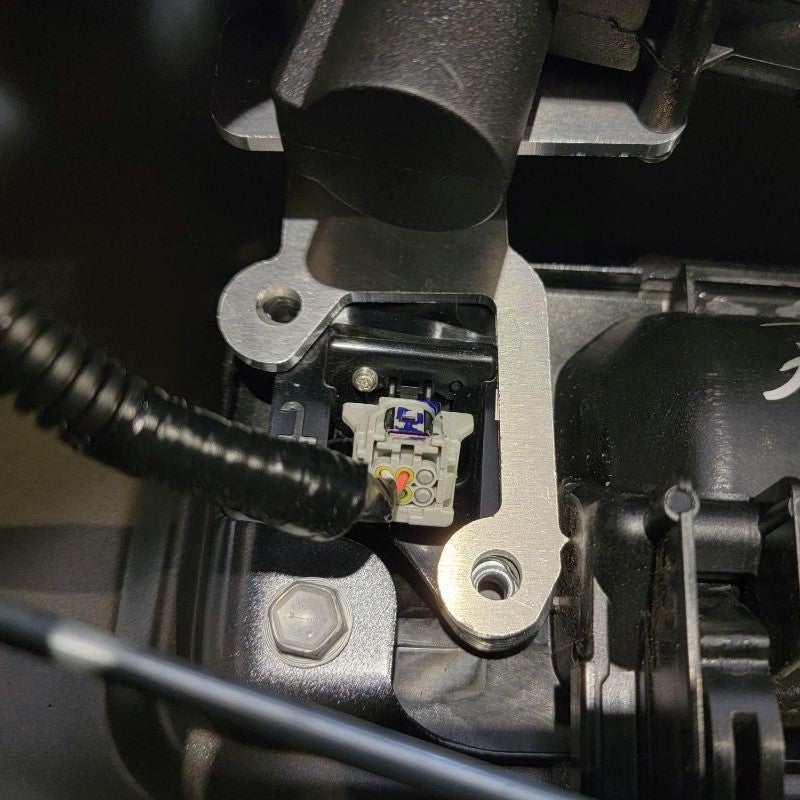
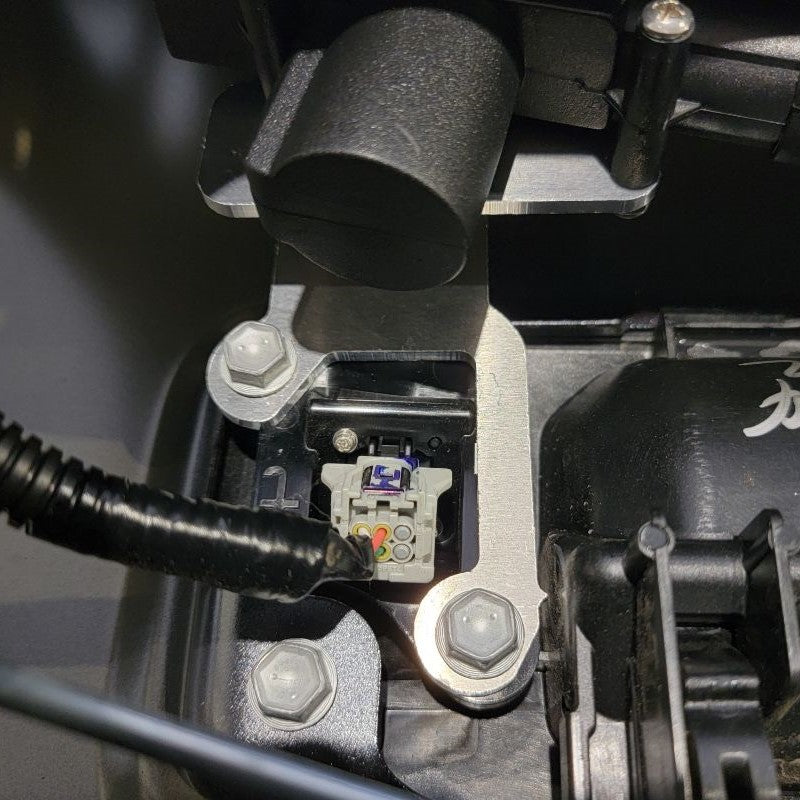
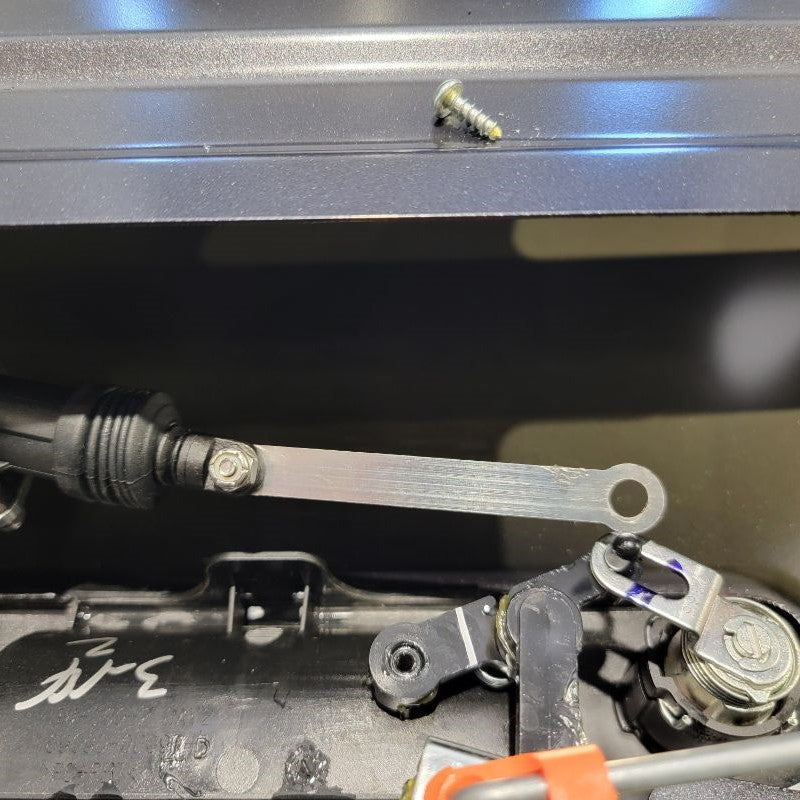
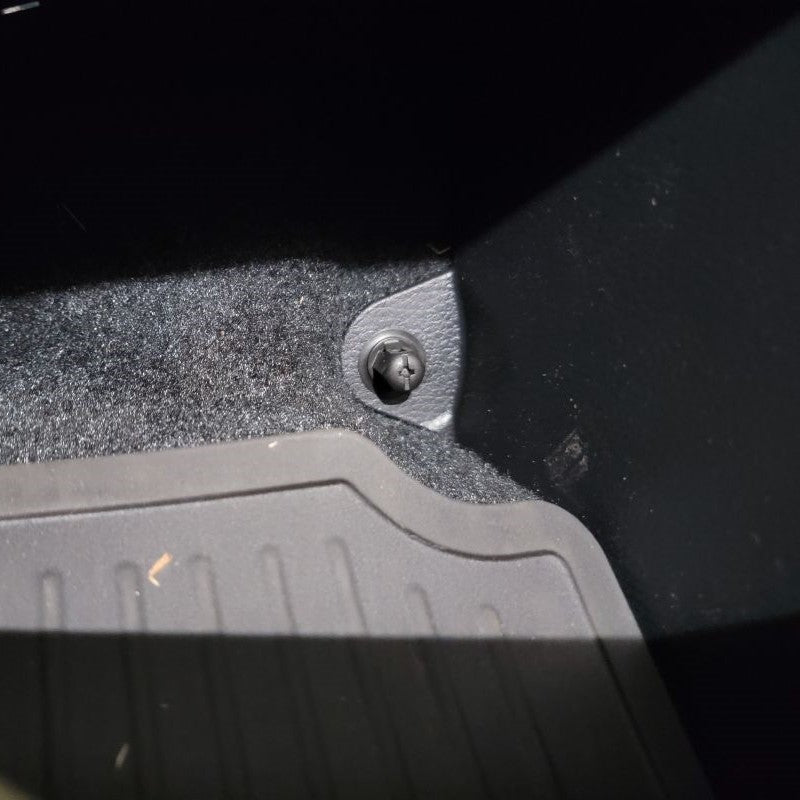
First, we are going to remove the two 10 mm bolts that are holding the factory oem tailgate camera in place. This is where we will be installing our new Bolt-N-Lock Bracket with our newly attached Locking Actuator. You can install the bracket once these two bolts have been removed by aligning the bracket up directly with the two holes and then simply reinserting the two 10 mm bolts.
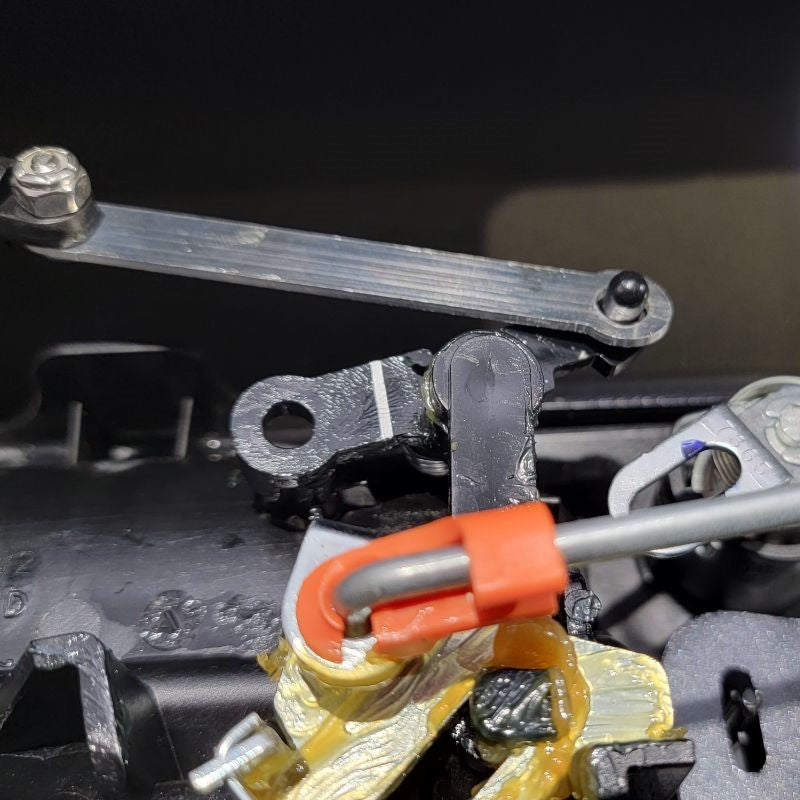
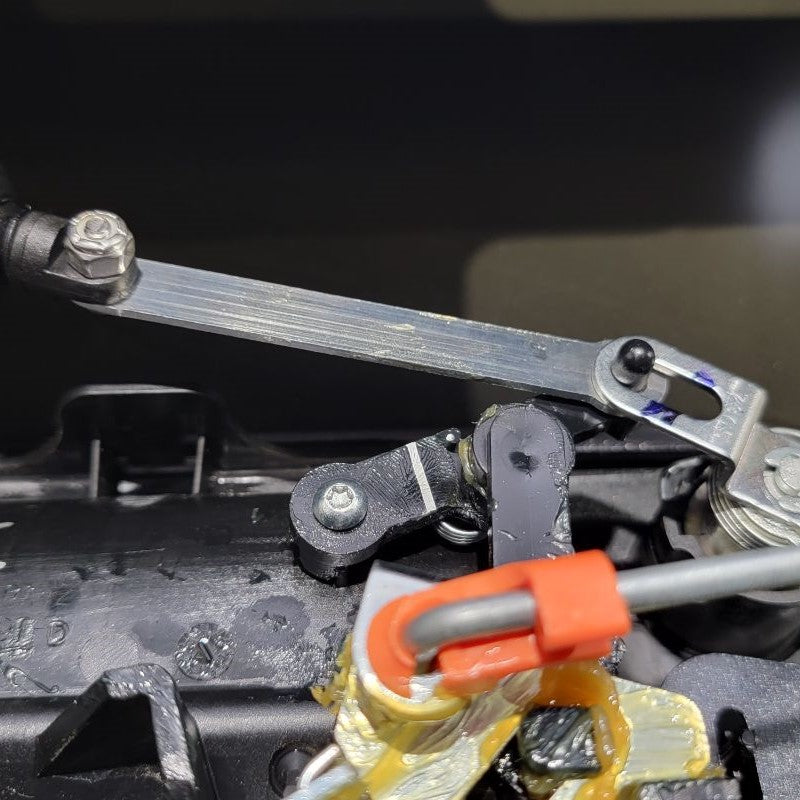
Now, it's time to remove the tailgate locking mechanism by using a #15 Star Screw Driver and removing the screw securing it to the handle of the tailgate. Once it is removed, gently lift up on the black plastic just enough to lift it off the black tab it sits on. The new locking rod will fit directly over the black tab. Please make note of all the pictures provided for you to follow as a guide. After you have completed this step, just make sure you have secured all of the screws as they once were in the beginning.
INSTALL IMAGES


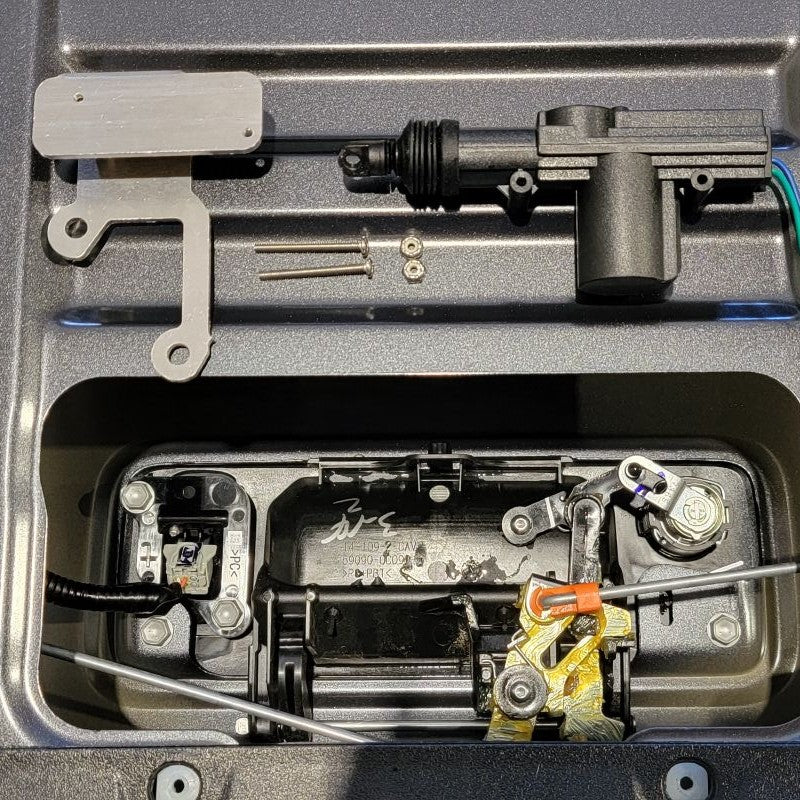
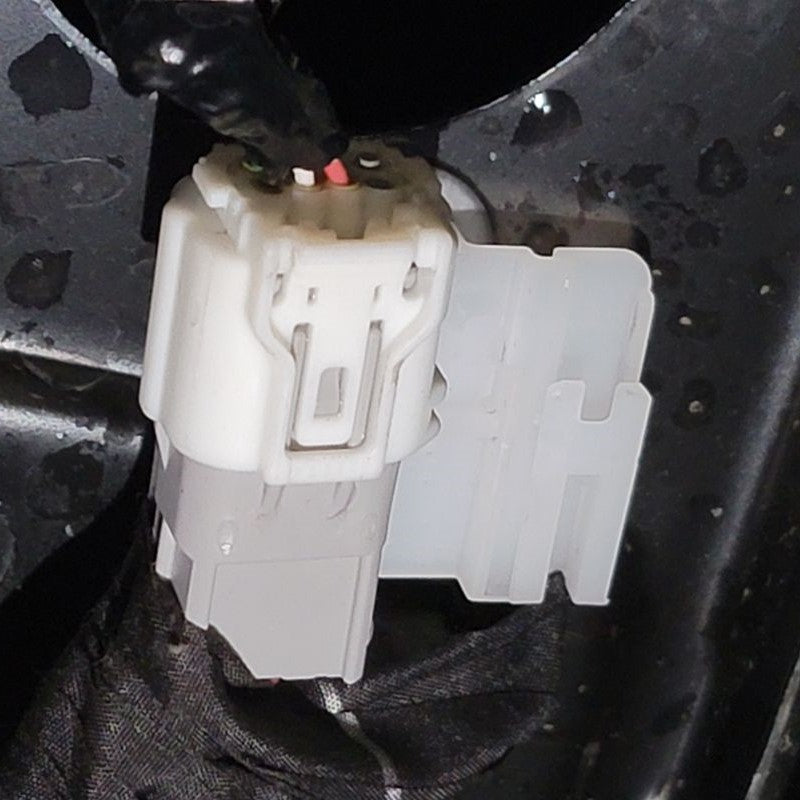
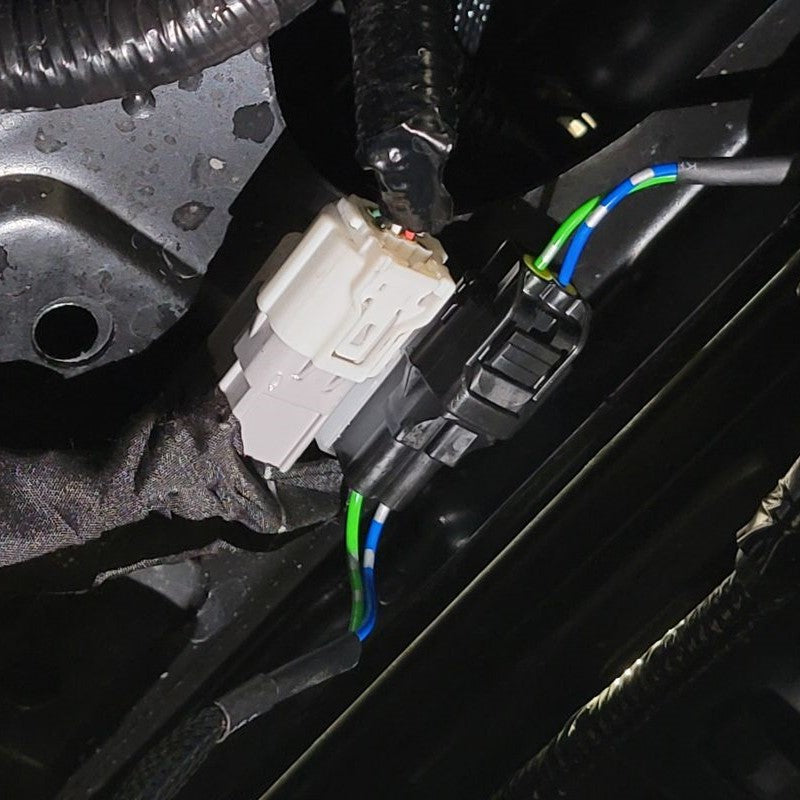
STEP 4
-
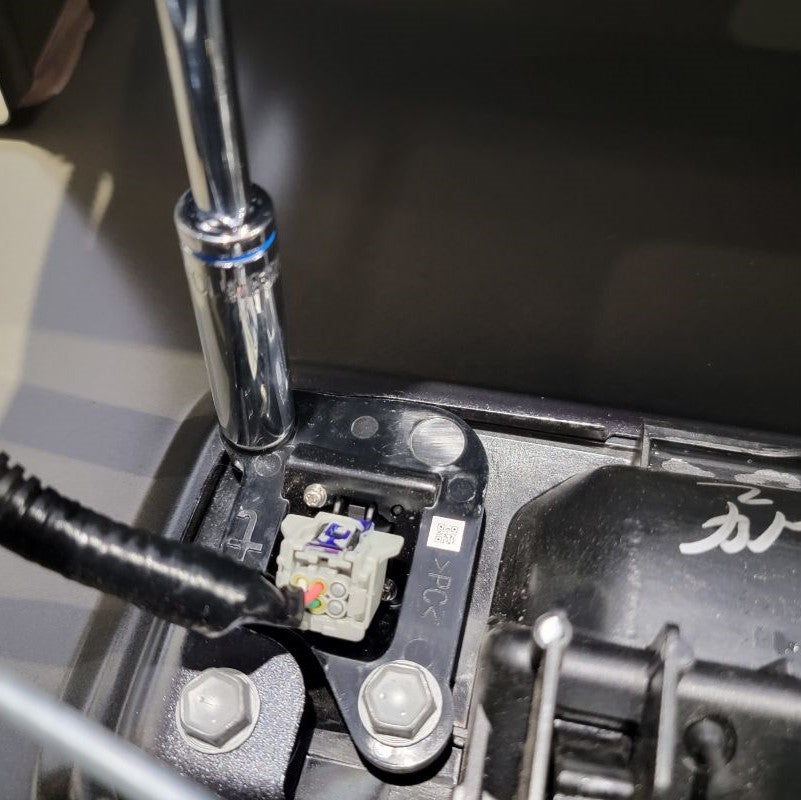
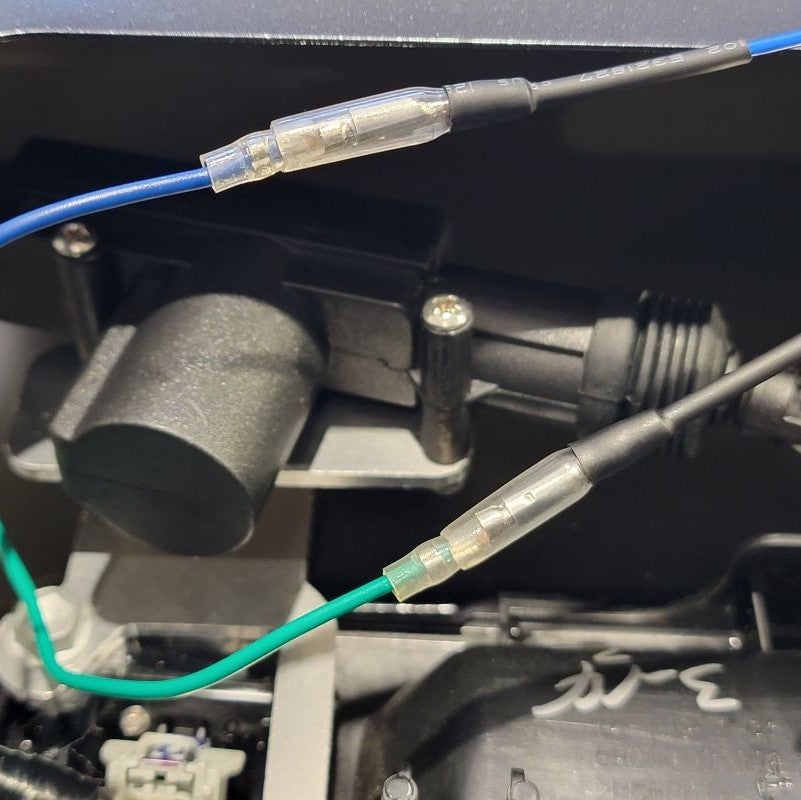
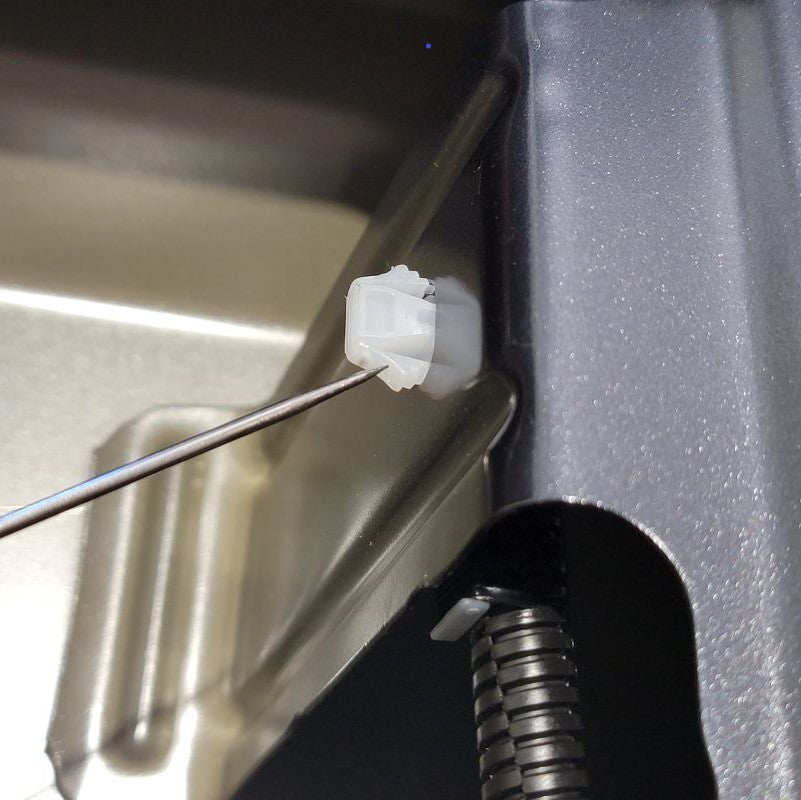
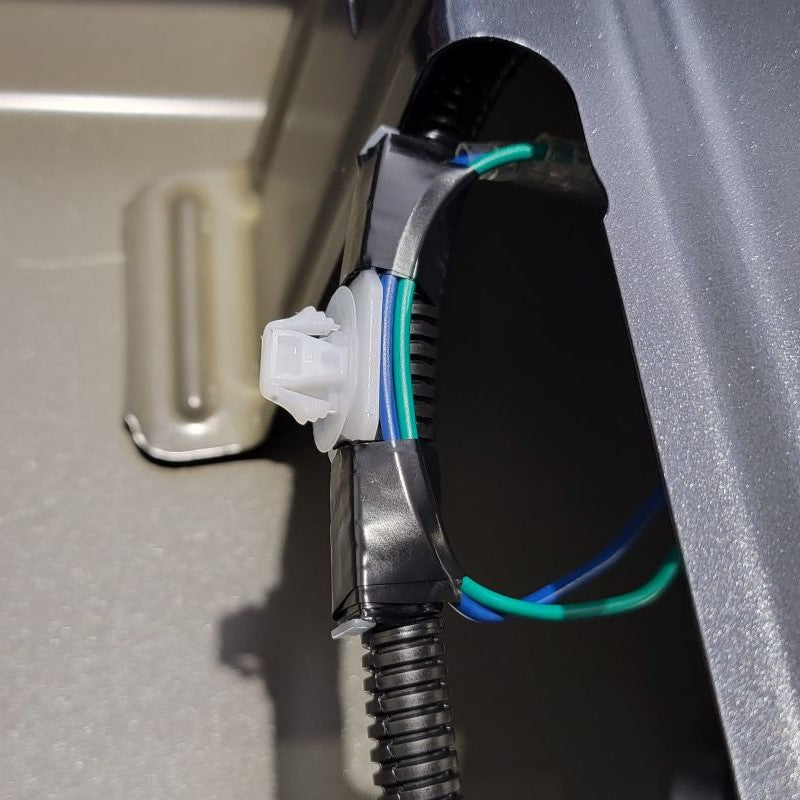
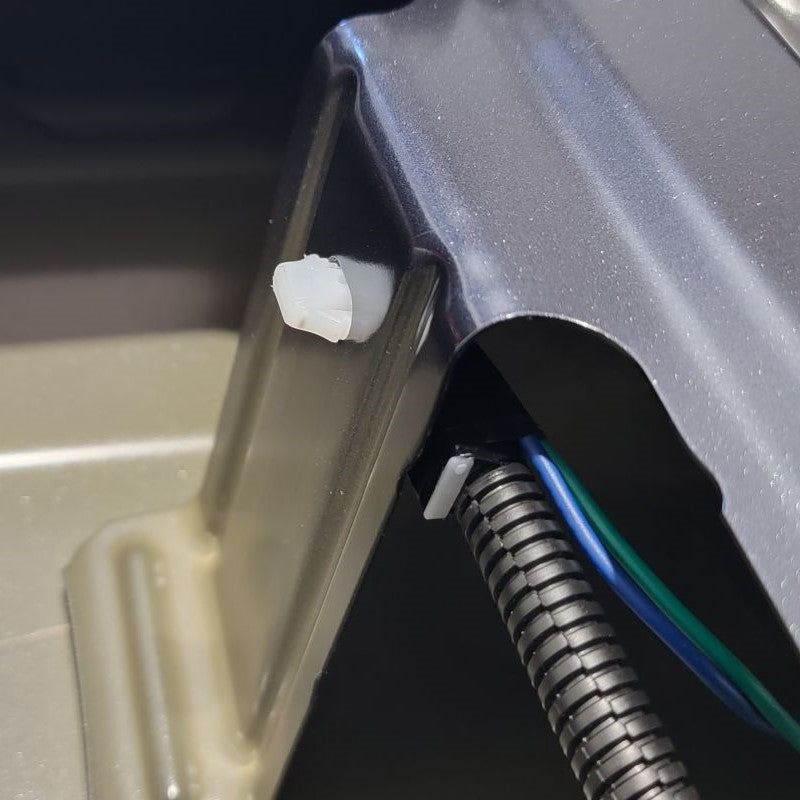
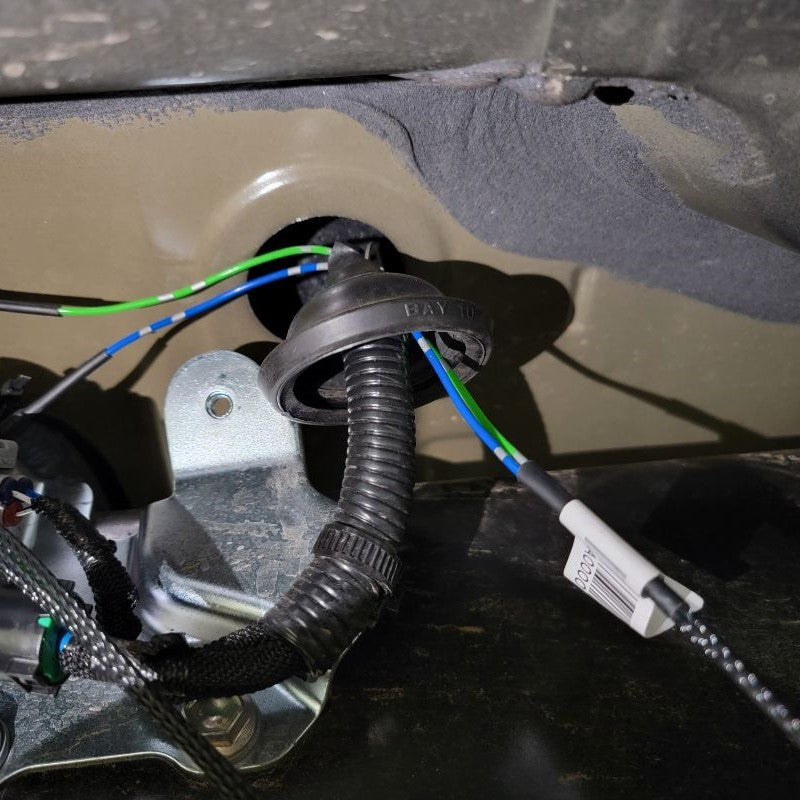
Connect the green and blue wires on the tailgate locking actuator to the green and blue wires on the wiring harness. Push them nice and tight until both click into place and make sure both have their weather protection nicely secured around them at the end. It should be a nice snug fit. Start by removing one of the white plastic fittings located inside the tailgate and go ahead and follow along the factory wiring harness that is located inside the tailgate to exit the tailgate at the end-caps.
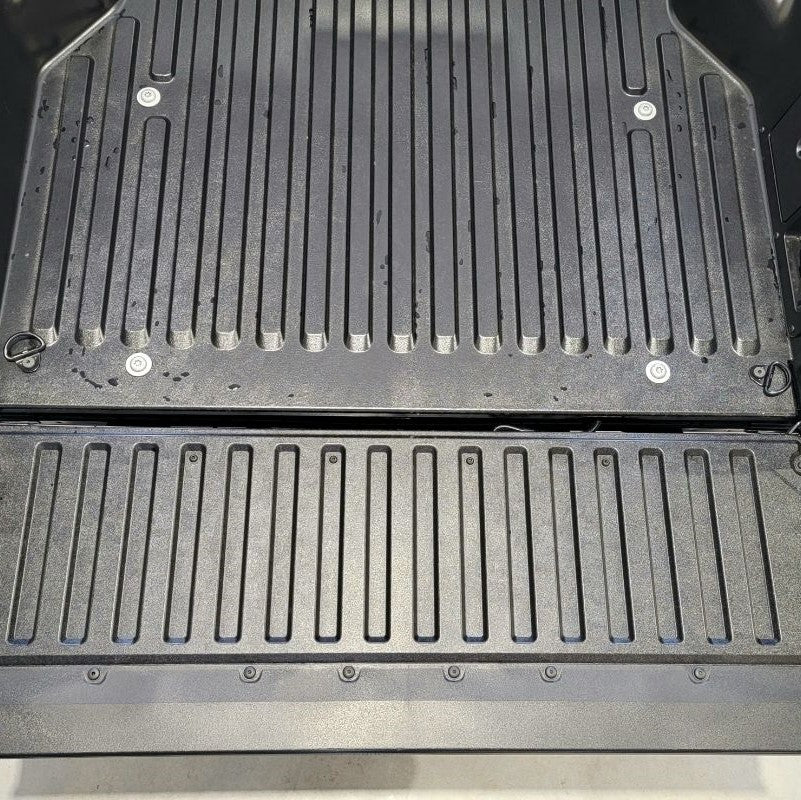
In order to remove the two tailgate harness protectors, you may need a small flathead screw driver. Pry them out carefully to not scratch the paint on your truck. Once you removed these tailgate wire protectors, you can set them aside and grab your new dual wire harness protectors that are included. Now pull the wiring harness all the way through and re-insert the first one back inside the tailgate. Do the same to the bumper side.
INSTALL IMAGES


STEP 5
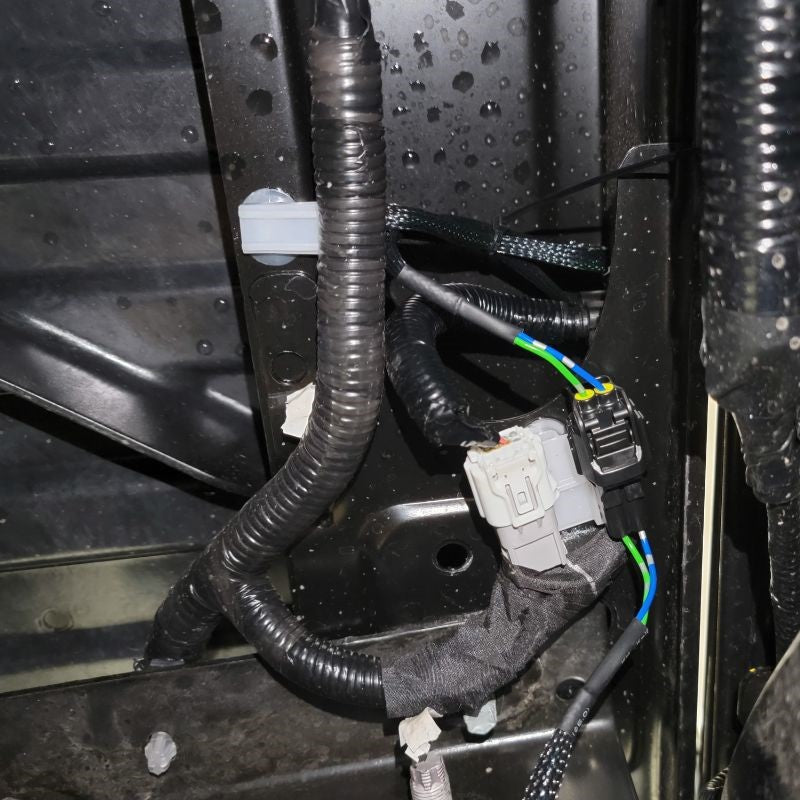
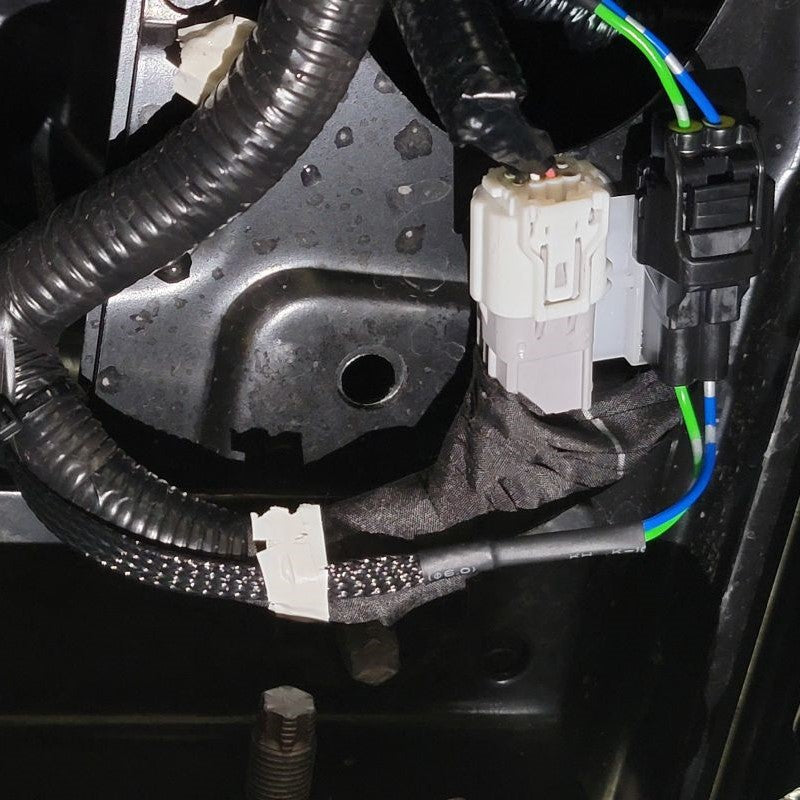
-
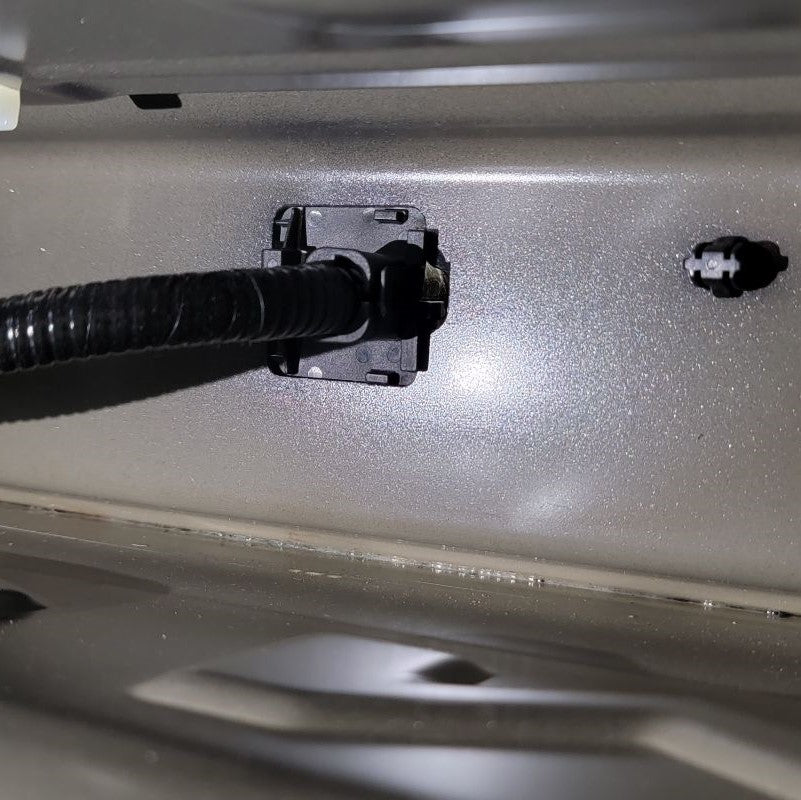
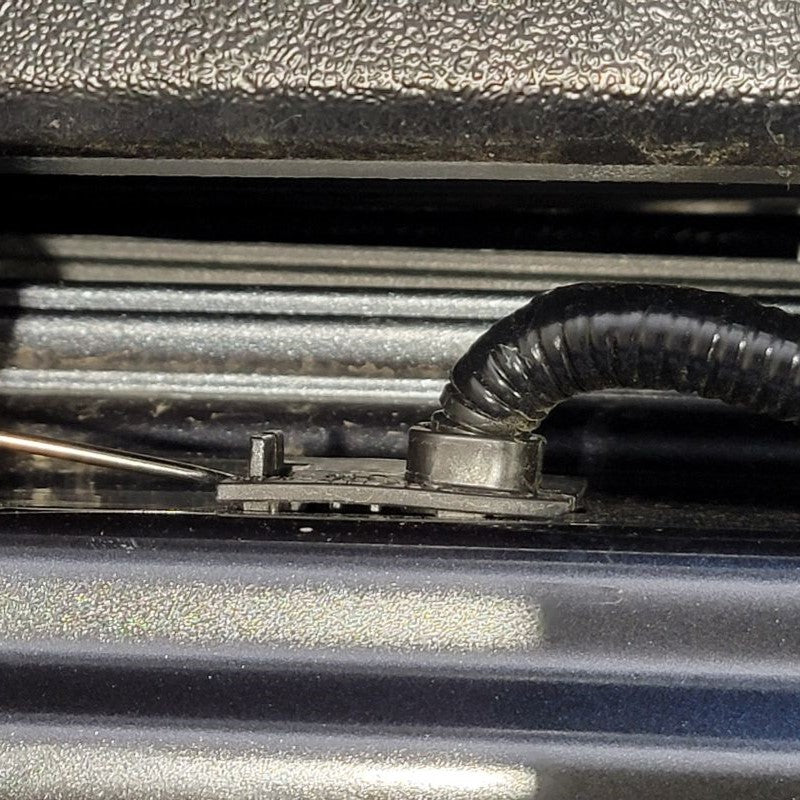
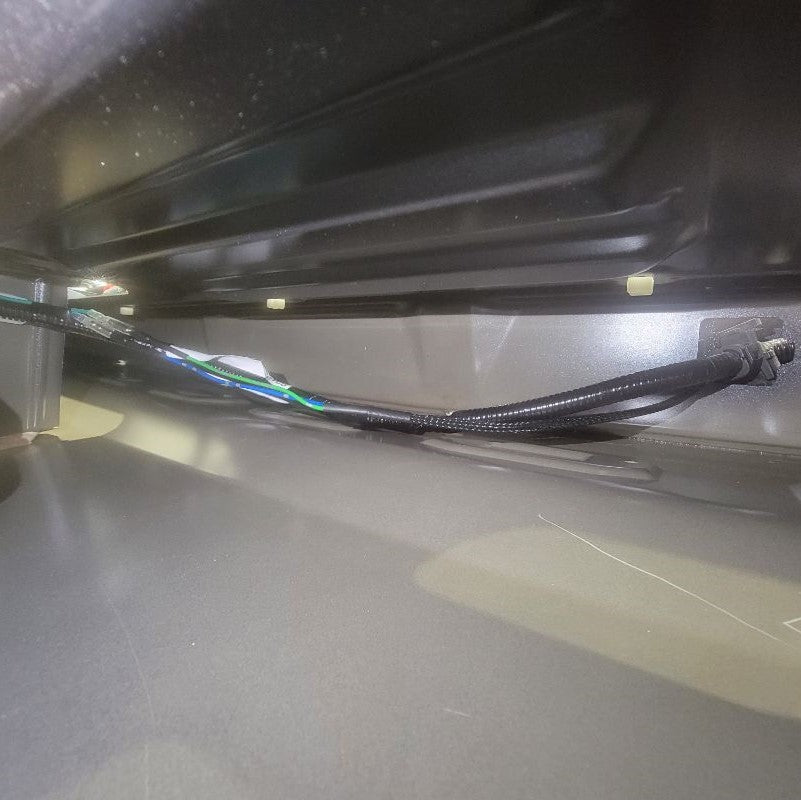
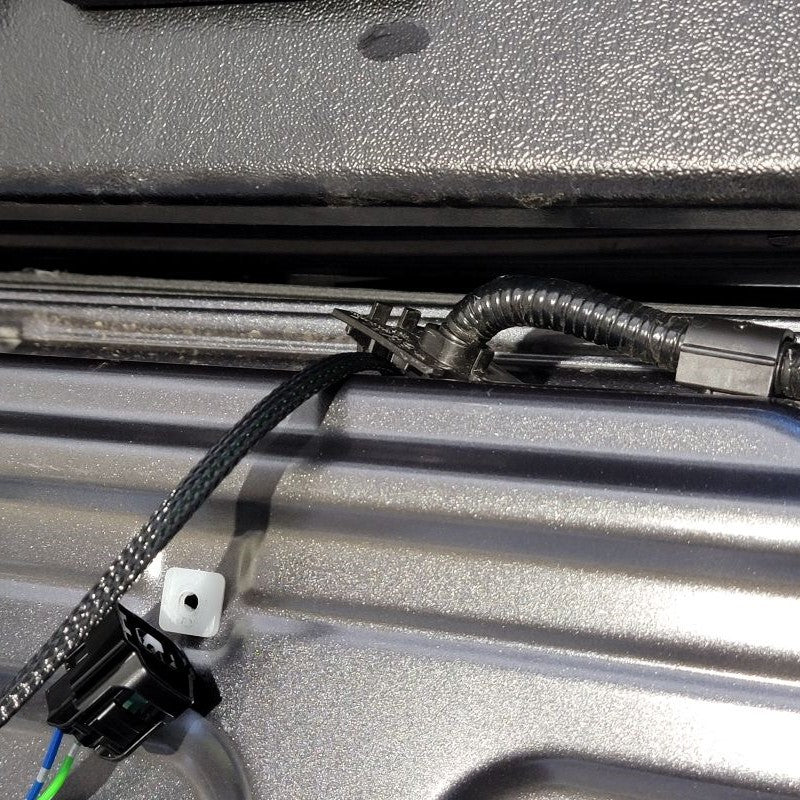
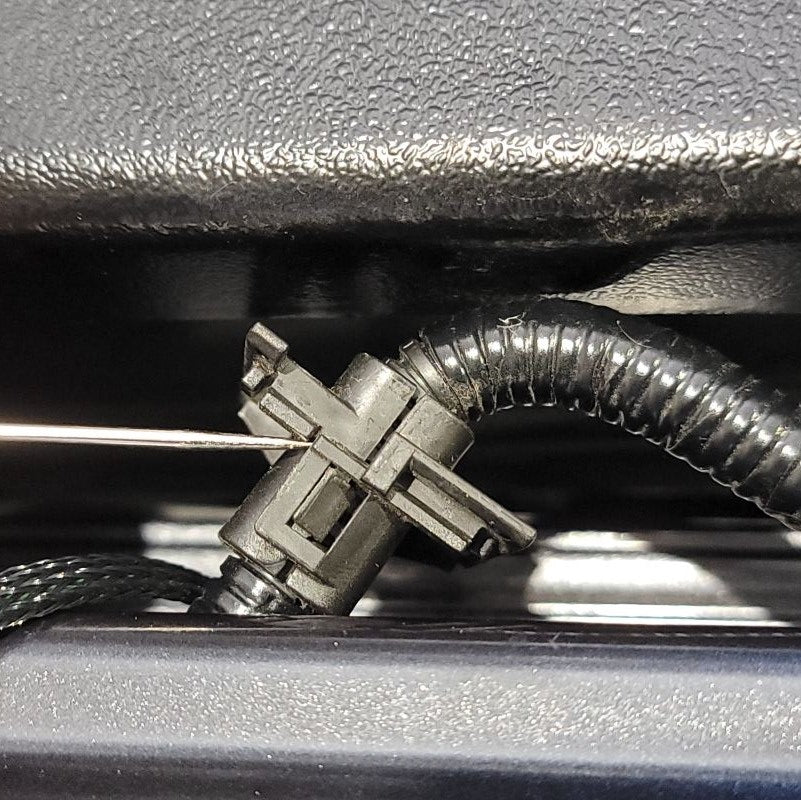
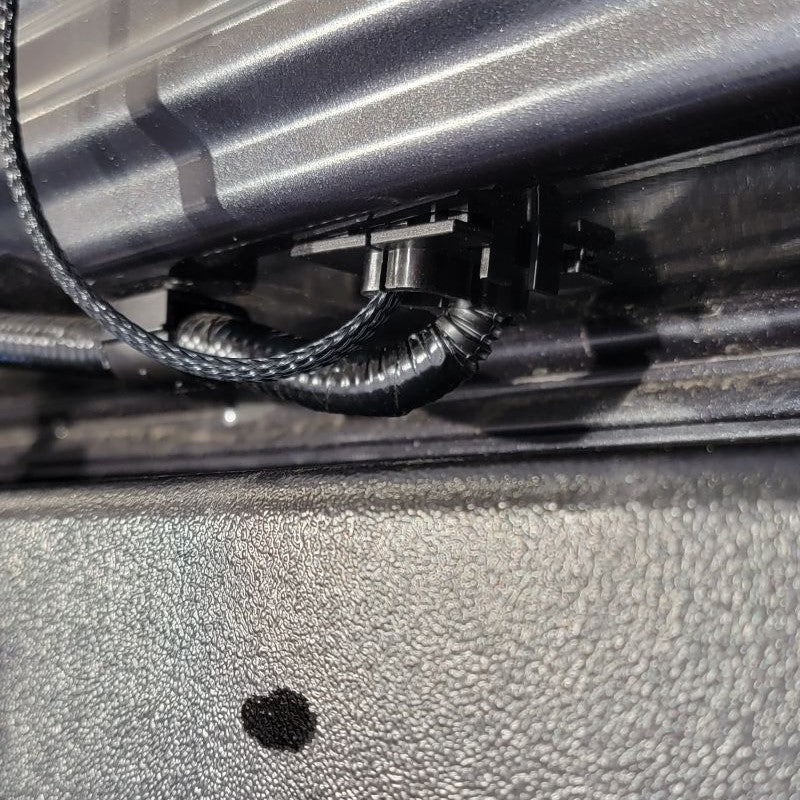
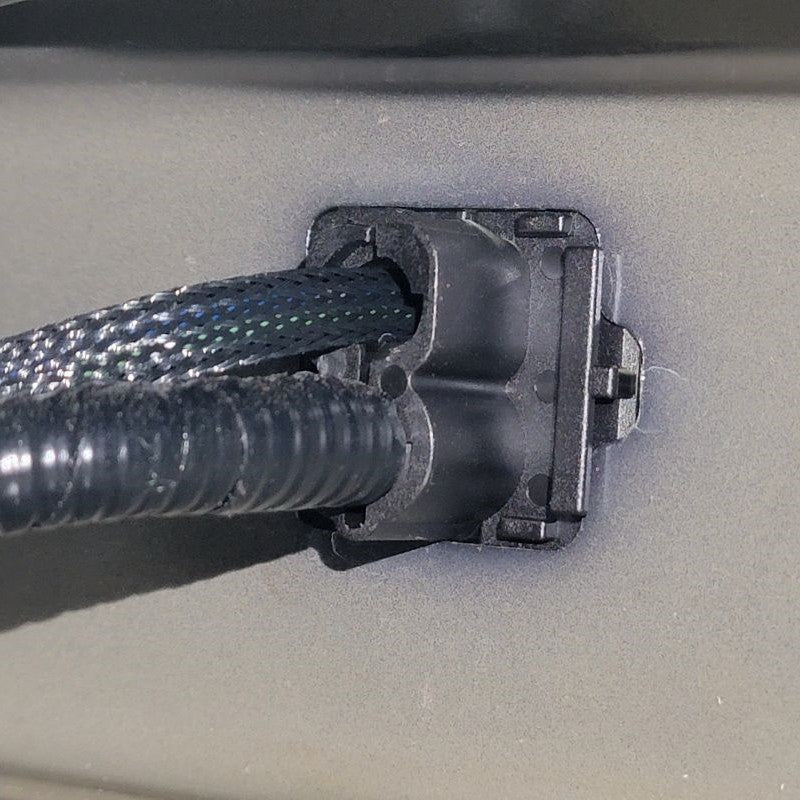
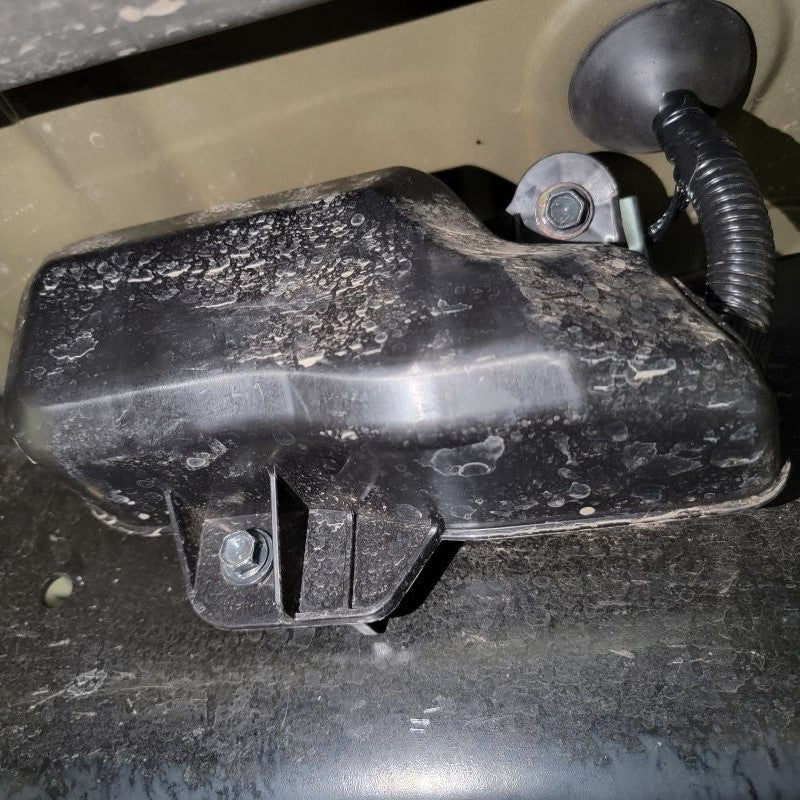
Begin routing the wiring harness along the passenger side frame starting where you left off at the rear bumper. Use the quick-connect that is provided for you in the harness to make it easy to disconnect whenever you may need to in the future. Toyota was very kind and left us a spot to join the factory camera harness disconnect connector.
From here, it is pretty simple, just follow the factory wire harness all the way to the front passenger seat by using zip-ties or electrical tape. In the middle section you will notice a heat shield Toyota installed on their factory wiring harness. Go ahead and use zip-ties or electrical tape here to secure the included Tailgate Lock harness to the side away from the exhaust. You don't need to add it's additional heat sheild protection as the factory one will do just that.
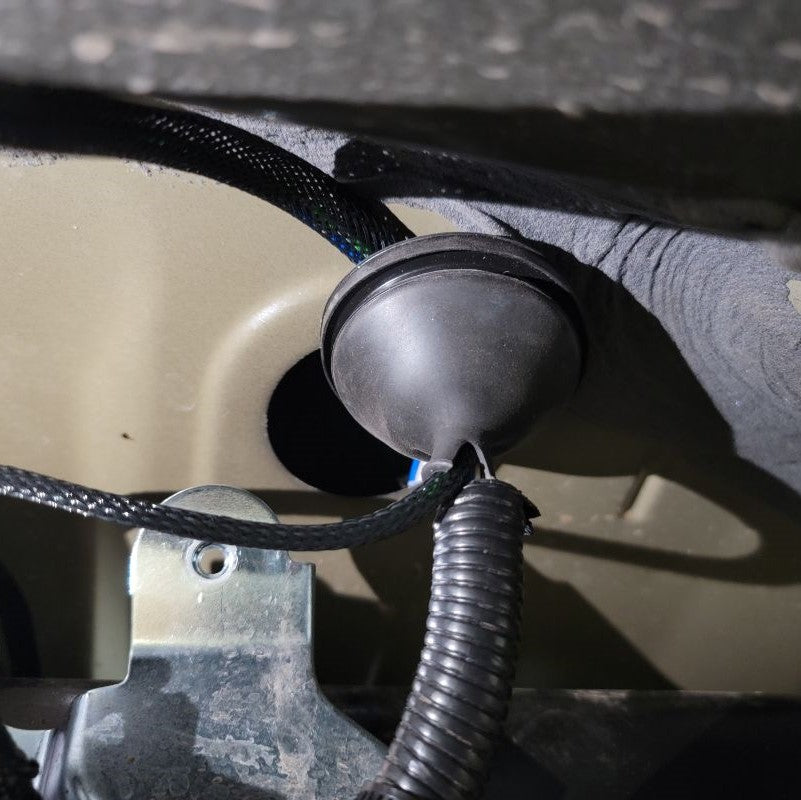
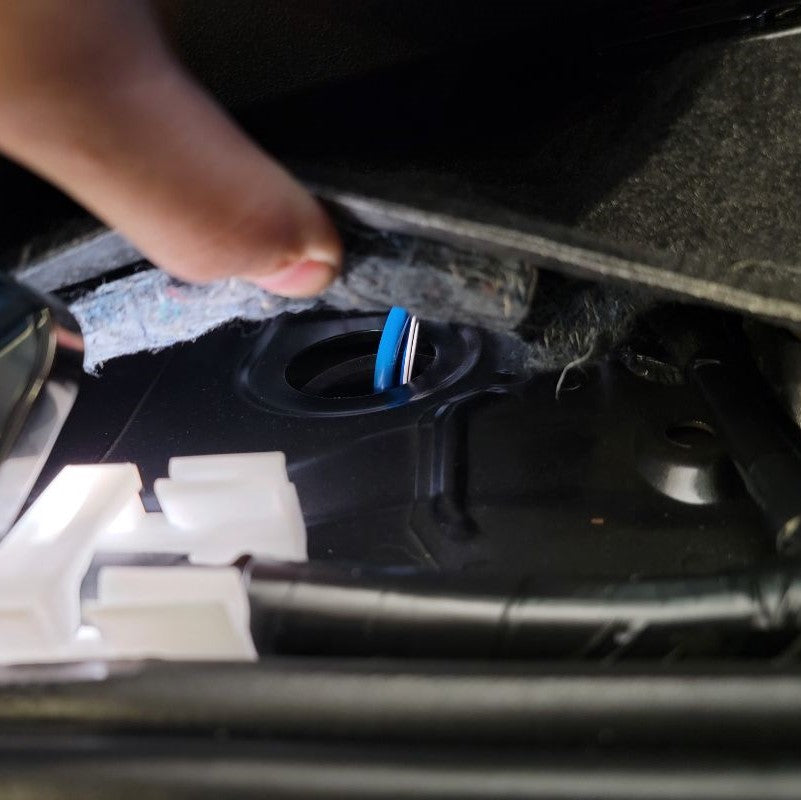
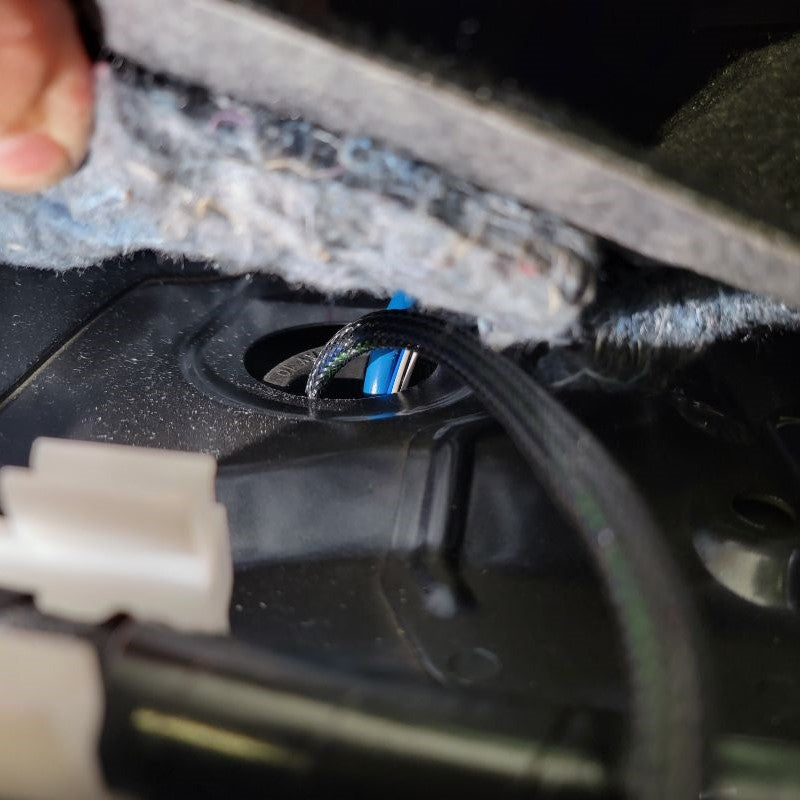
There is already factory wiring and a black grommet that goes inside the cab of the truck in this location. You DO NOT need to puncture any holes in this grommet. Just undo the electrical tape and the wiring harness you can run straight through.
[Please follow pictures that have been provided for you]
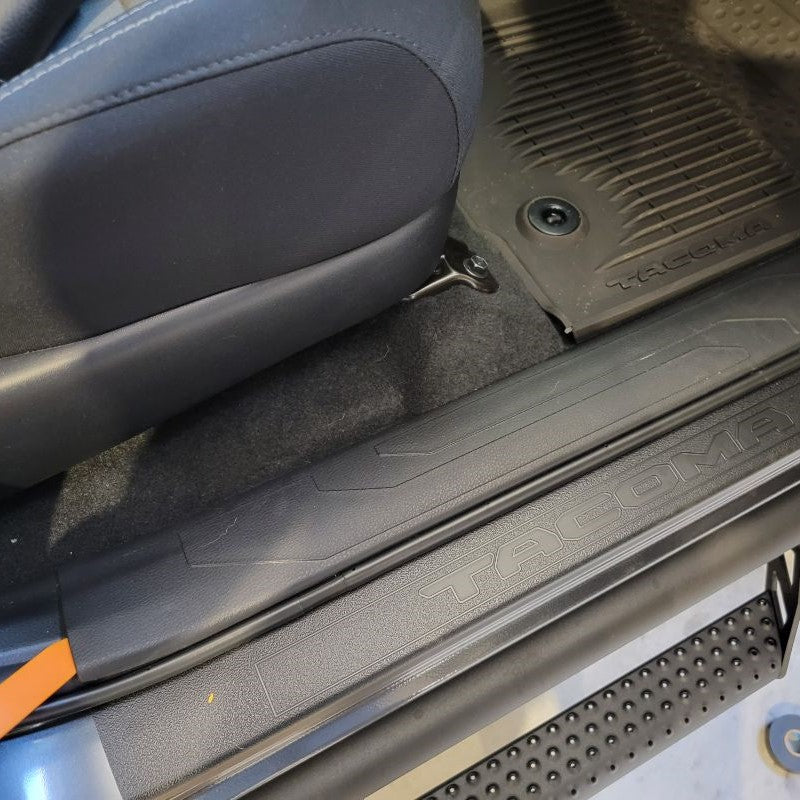
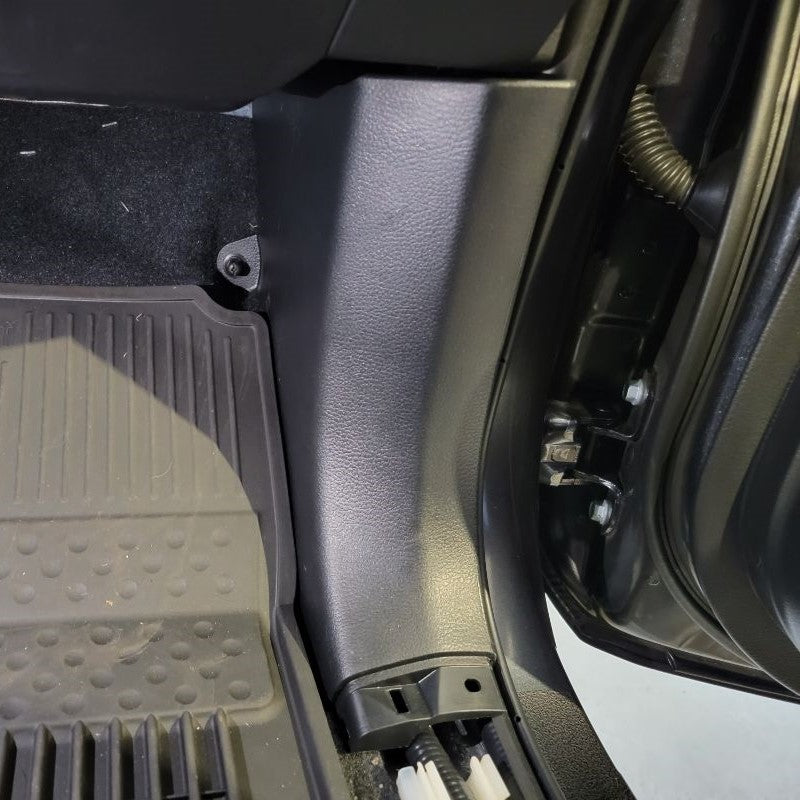
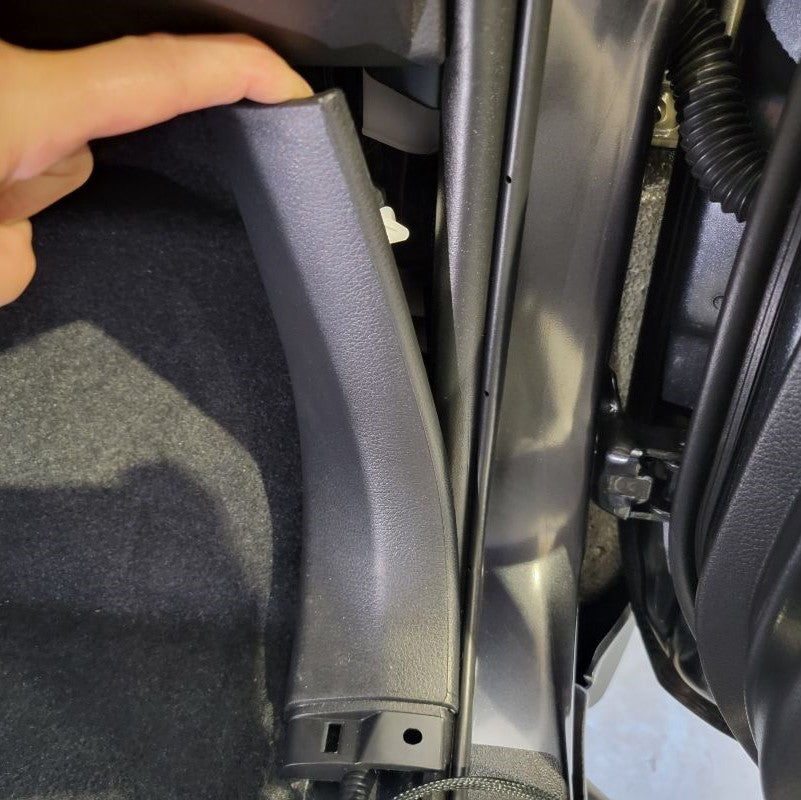
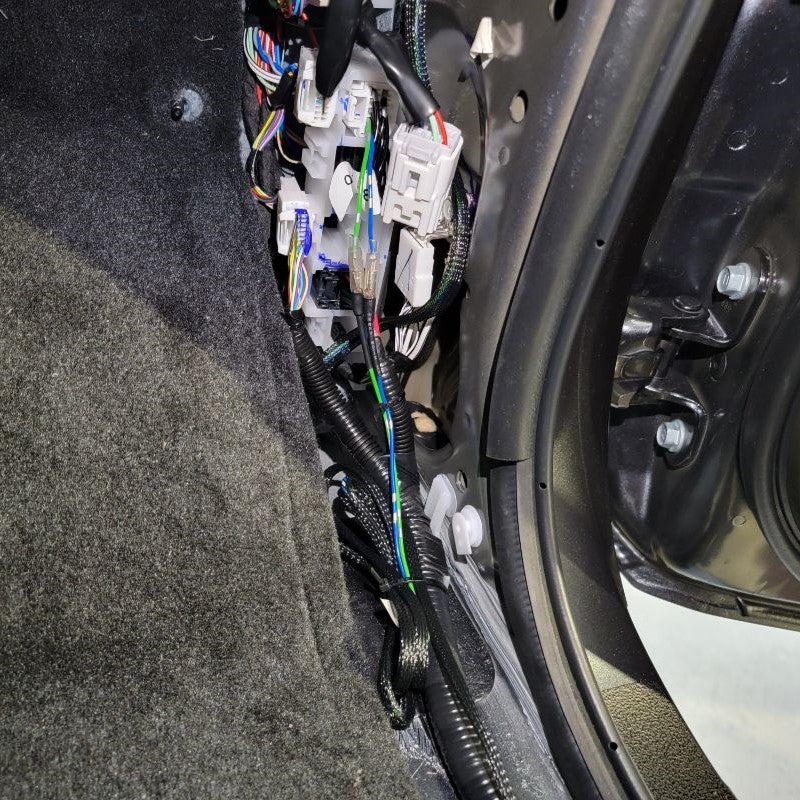
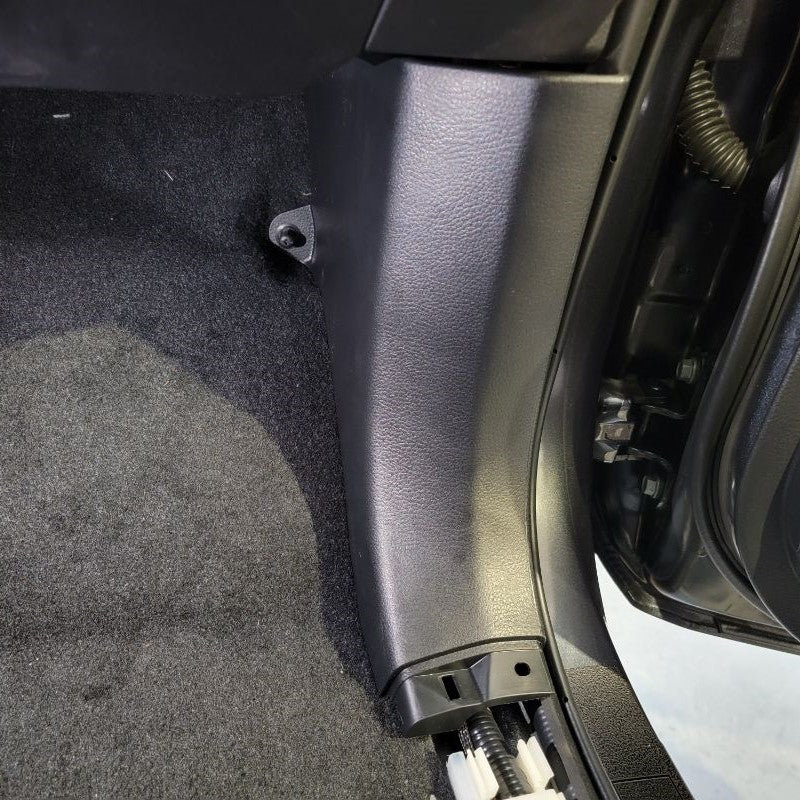
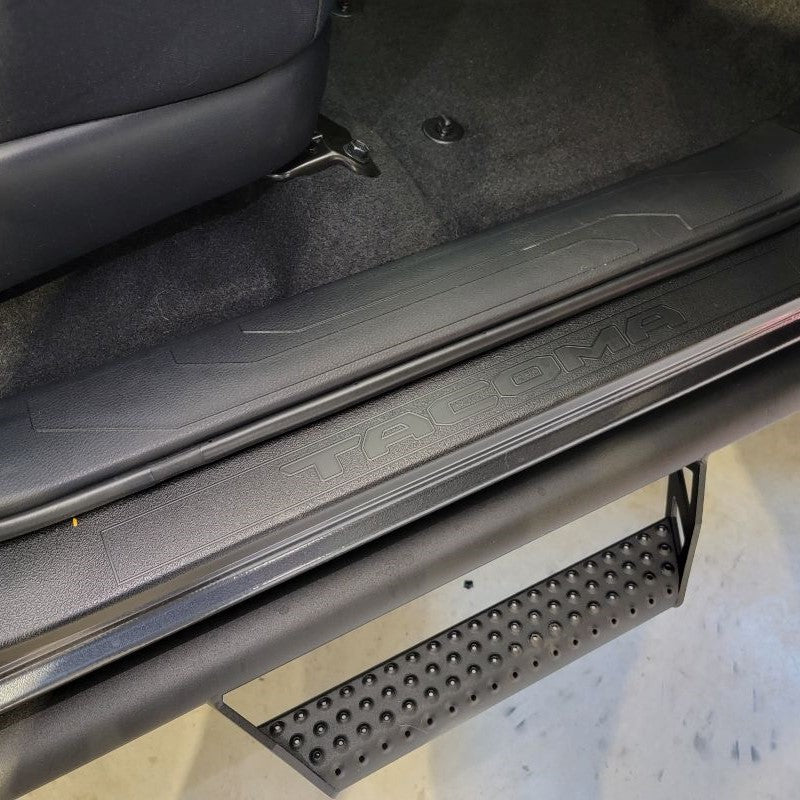
Next, open your passenger door and take up the plastic molding for your door sill on your passenger side. They priy up with a bit of force especially if it is the first time. Reach underneath the passenger seat floor carpet and you will see the top side of that rubber boot through which you just routed that wiring harness through. Go ahead and feed the rest of the harness throgh so that it is nice and clean.
INSTALL IMAGES


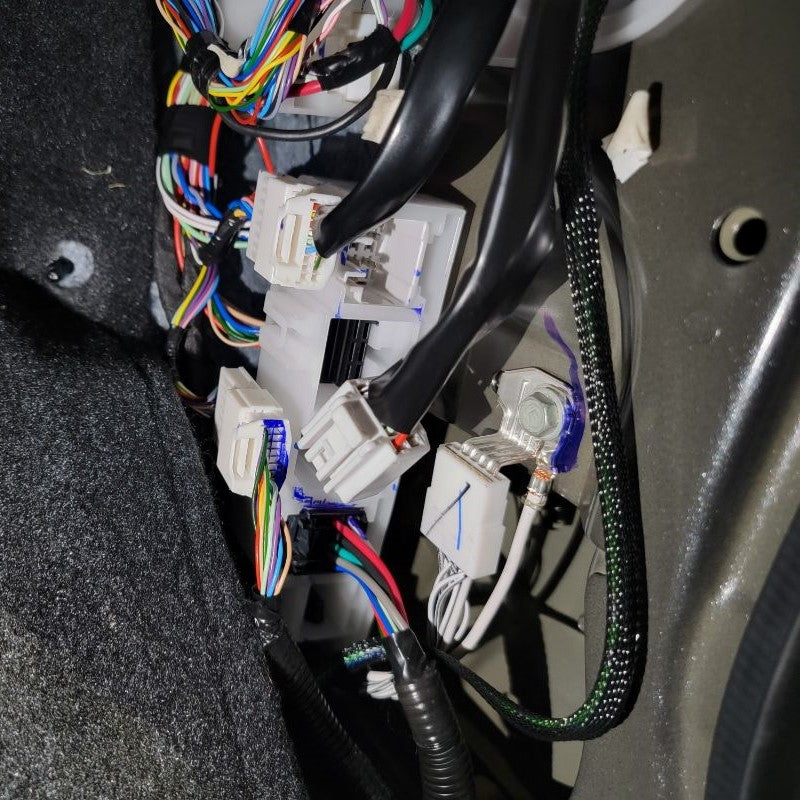
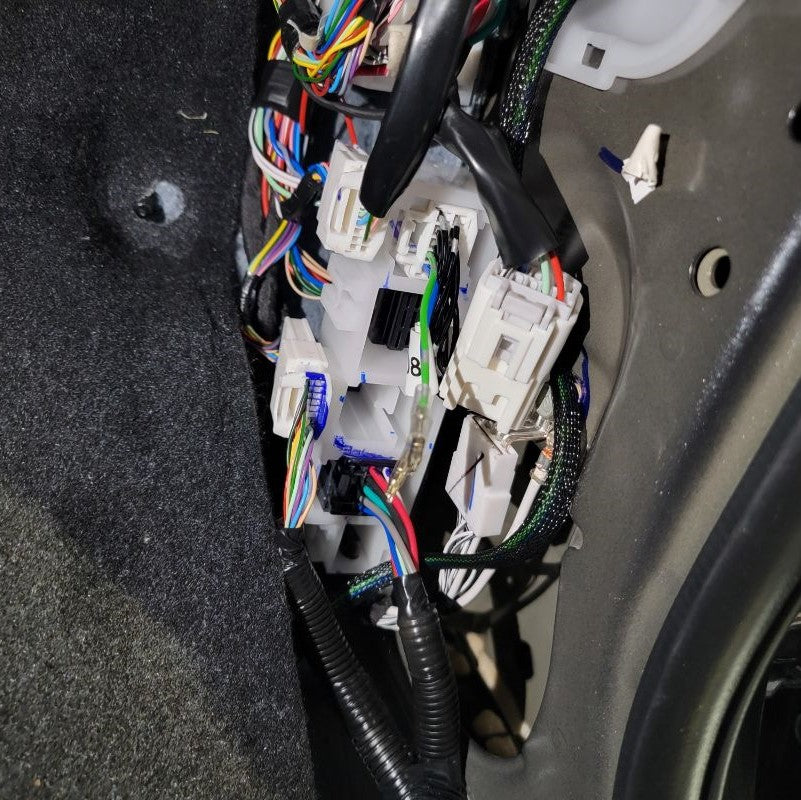
STEP 6
-
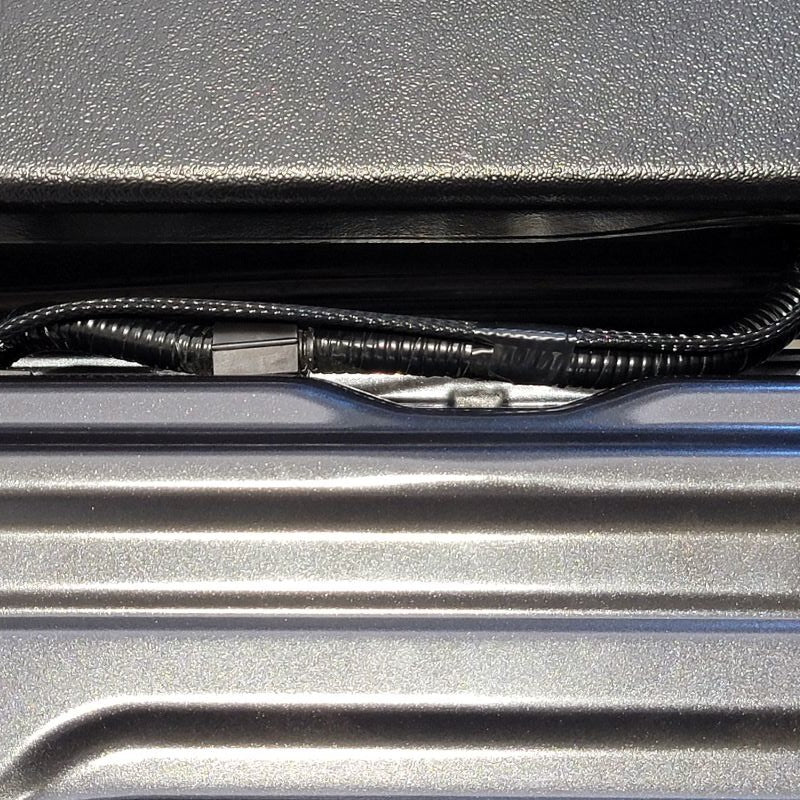
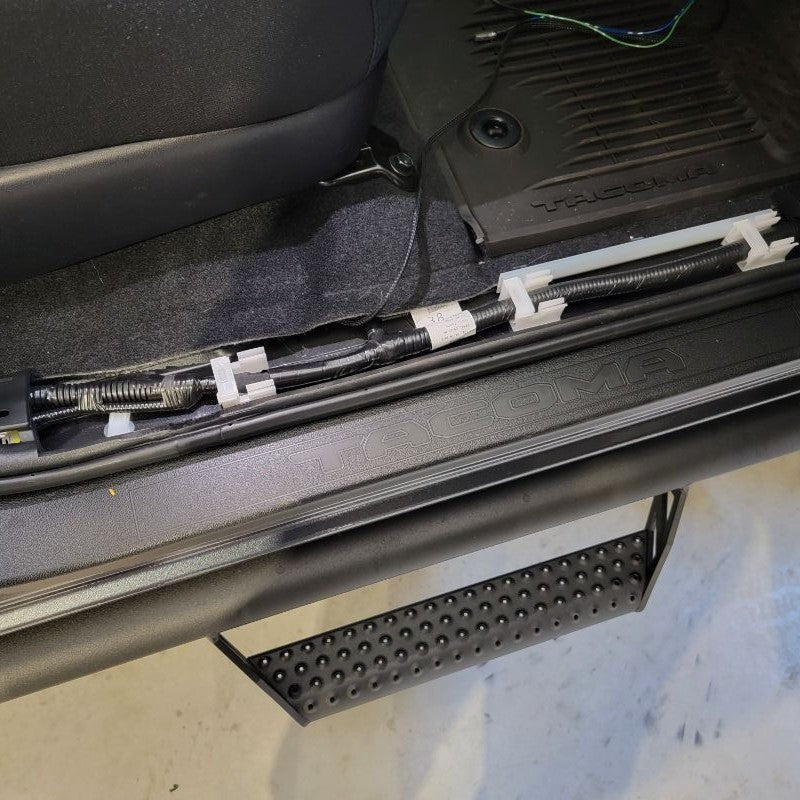
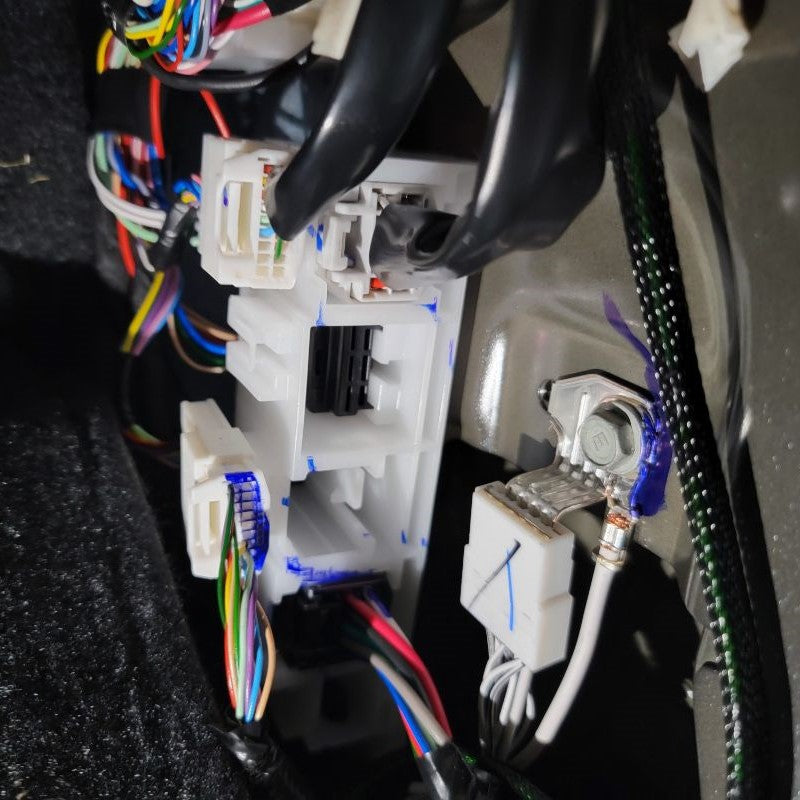
To make it nice and clean, you'll want to run the wiring harness through the white factory clips that are attached to the carpet/frame of the truck. Once you get towards the front of the truck where the side kick panel is located, you will want to match up the Plug-N-Play Harness that is included in the package. Connect the supplied wire harness to the factory connector.
Once you have everything secure and the wire harness is nice and clean, you can go ahead and reinstall the kick panel and floor panel. Now you're ready to test your tailgate lock.
INSTALL IMAGES


STEP 5
-
Enjoy your New Power Tailgate Lock!
INSTALL IMAGES