


FOR TOYOTA 4RUNNER MODEL
PARTS INCLUDED:
2 x Push Button Switch - In-Dash / Tailgate2 x Tailgate Strut with Plug-N-Play Wire Harness - Driver Side / Passenger Side
2 x Mounting Brackets with Hardware - Driver Side / Passenger Side
1 x Tailgate Plug-N-Play Wire Harness
1 x In-Dash Plug-N-Play Wire Harness
1 x Door Lock Mechanism
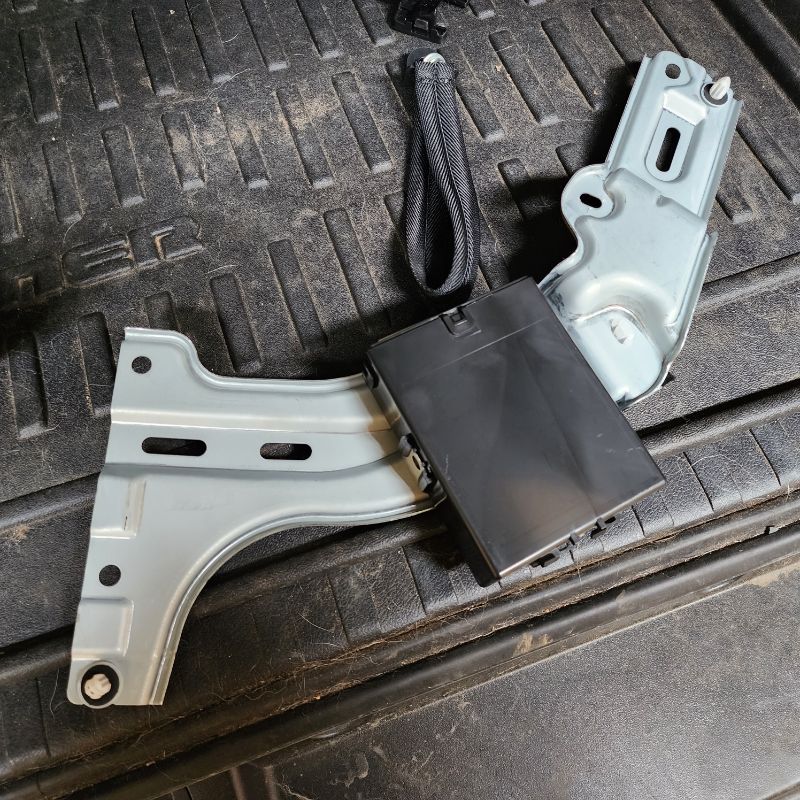
1 x Control Module
1 x Kick Sensor
Zip Ties
TOOLS NOT INCLUDED BUT ARE NEEDED:
Installation Instructions - Power Tailgate Lift (Located on Website)1 x 1/2-in Socket (10 mm)
1 x 1/2-in Socket (12 mm)
1 x 1/2-in Drive Ratchet
1 x Phillips Screwdriver
1 x Small Flathead Screwdriver
1 x Wrench (12 mm)
1 x Tool, Rotary Dremel
1 x Tool, Trim Removal
1 x Tool, Door Panel Remover
1 x Fish Tape Wire Puller
1 x 6-in C-Clamp (optional)
1 x Adhesion Promoter (optional)
Electrical Tape (optional)
FREQUENTLY ASKED QUESITONS:
1. How to do you operate the liftgate?
There are four methods: Factory Remote (3x unlock to open & close), Rear Tailgate Button (pressing 0.5-1 second to close only), Front Push Botton (pressing 1.5-2 seconds to open & close), or Foot Sensor (quick kick under rear bumper to open & close).
2. How to setup the Tailgate Height?
Lift door to desired height using any of the features above, press rear tailgate button to stop at desired height. Long press rear tailgate button until you hear 2x short beep and a long beep. New desired height is now set.
3. Why is there two beeps when door is closing?
The two beeps means anti-pinch feature is in action. If something or someone should be in the way of the door closing, it will stop and go back up.
4. Tailgate is not closing and not locking?
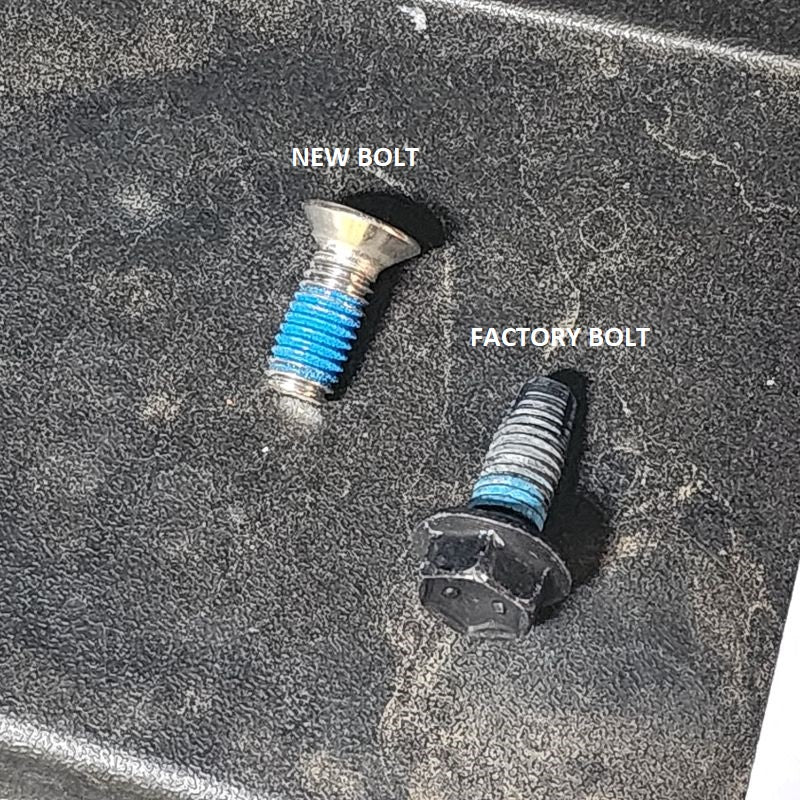
This could be a few things:1) switch out factory screws/brackets in locations that were given in package,
2) Try to slightly adjust the striker position of the New Tailgate Latch,
3) remove the buffer rubber blocks on both sides of the door panel.
5. Tailgate can only open to half the height?
This could be a few things:1) reverse the left and right strut plug in control box, or
2) reset tailgate height.
DISCONNECT THE BATTERY BEFORE YOU BEGIN INSTALLATION
Must Press + to see the narrative on each Step
-
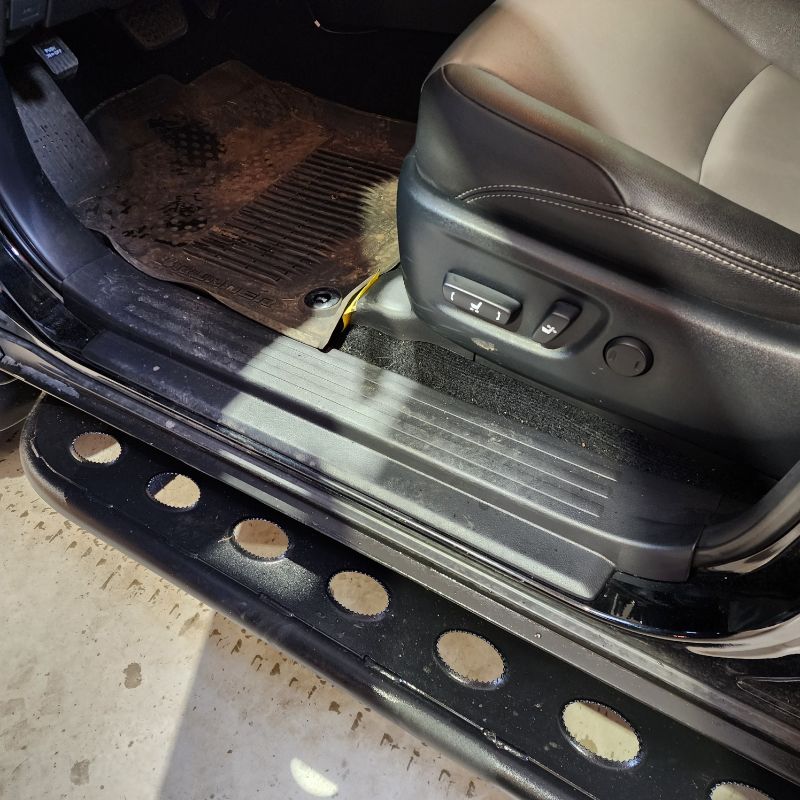
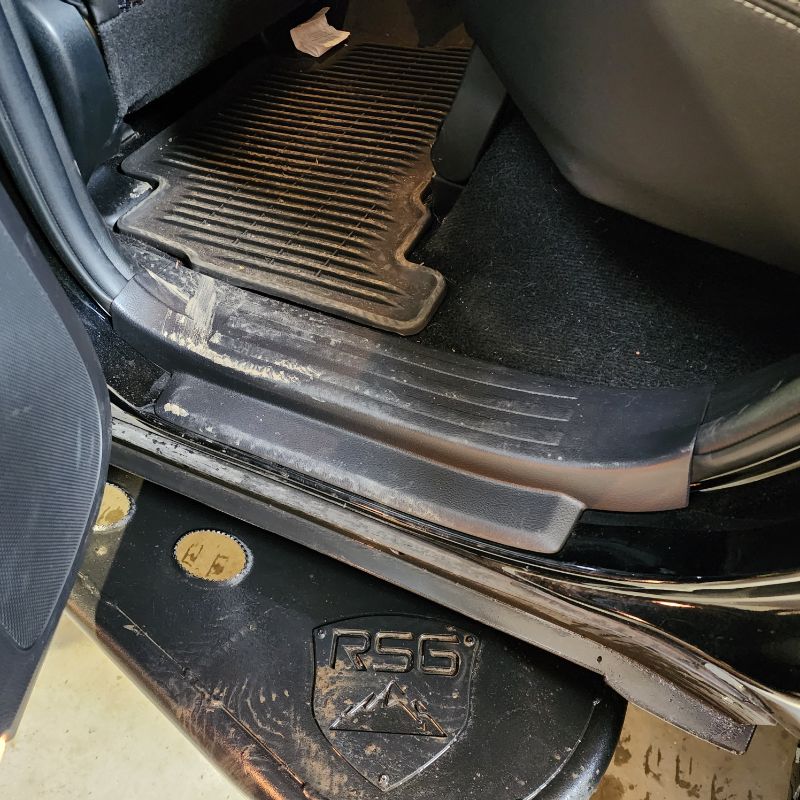
It makes it easier if you prepare the vehicle for installation by removing the interior panels first. Start with the front of the cab and work your way back to the tailgate. Open the driver's front door and remove both the door sill and kick plate panels. Set them aside to be re-installed at the end. The panels pull up easily with a gentle tug, but you can use a trim removal tool if necessary.
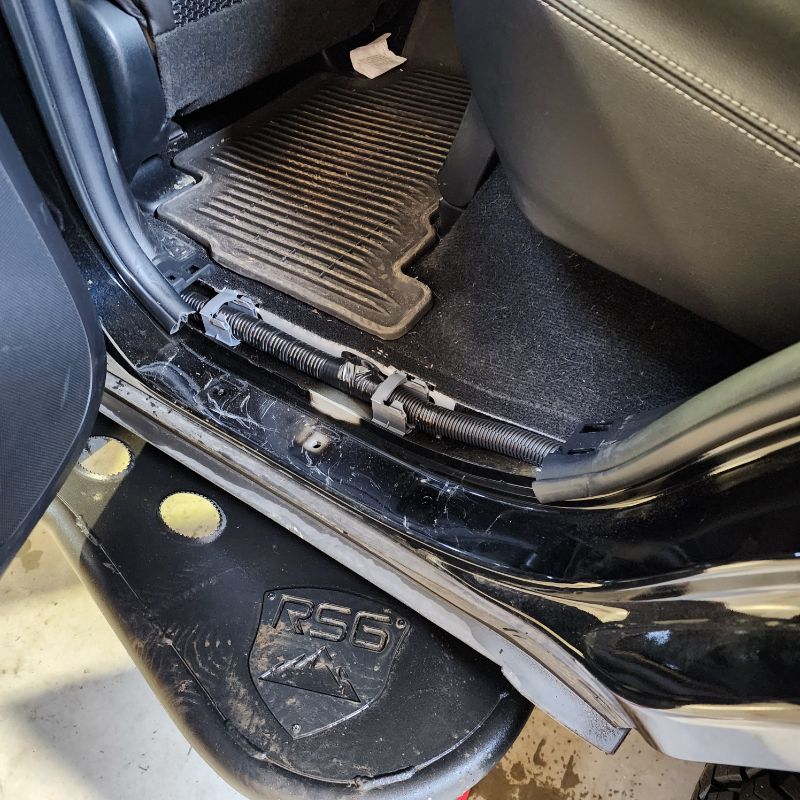
Next, move to the rear driver side passenger door. Remove the door sill panel. Again, just pull up easily with a gentle tug. If it is the first time removing these panels in your vehicle it can be pretty snug. The tabs are secured inside the plastic wire harness and carpet clips, as well as two plastic push pin retainers on each end. Once you have removed the door sill panel, set it aside with the other two panel sections you removed from the driver's front door.
NOTE: There is no need to remove the bottom center b-pillar trim as you can fish the New Wire Harness right underneath the plastic cover.
STEP 1
INSTALL IMAGES


STEP 2
-
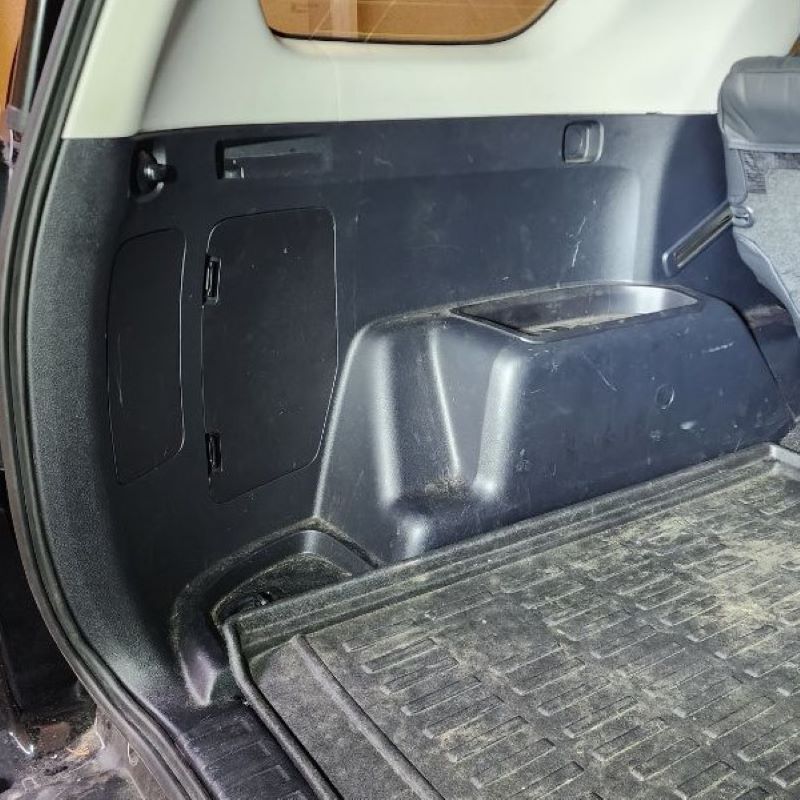
Now, move to the back of the vehicle and start removing the rear driver's side left corner / wheel well interior trim panel.
NOTE: You do not need to completely remove this panel from the rear of the vehicle. This left corner panel / wheel hub panel only needs to be loosen from the top to fish the New Wire Harness through to the front.
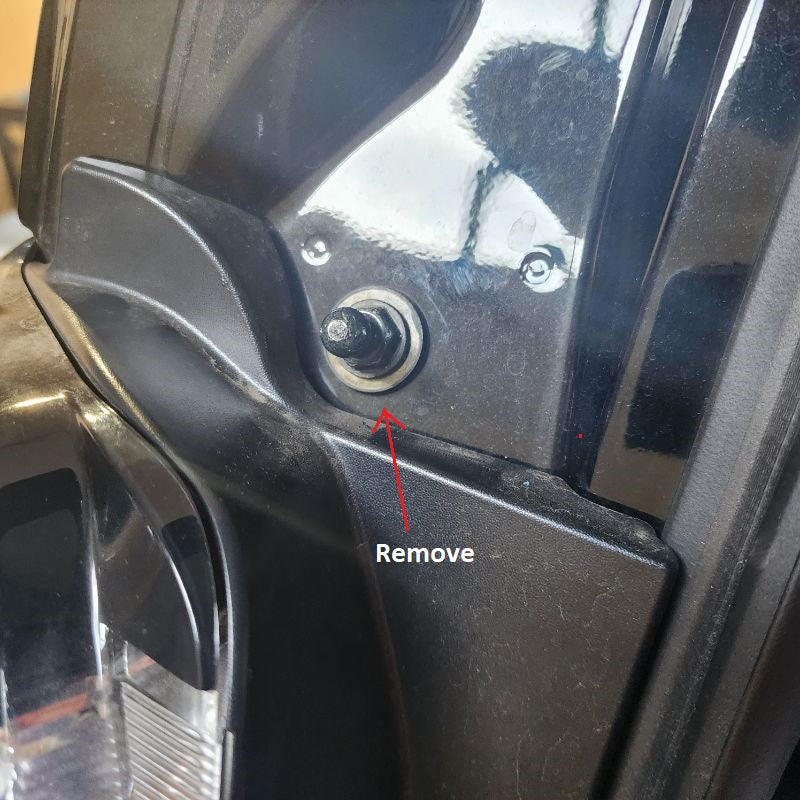
Start by turning the factory cargo tie-down 90 degrees and then pull it straight out. You will now see a hidden screw. Use a phillips head screwdriver hand tool and remove.
Next there are two circular panel covers located on the right side of the trim panel. One is at the top right and the second one is in the middle of the wheel well. Use a small screwdriver or trim removal tool to pop-up the panel covers. This will reveal two 10mm bolts. You can use a 10mm socket or a phillips head screwdriver (P3 head if you have it). Go ahead and remove both bolts. Make sure to set the hardware and panel covers aside together so you know what goes with what at the end to secure the panel to the frame again.
INSTALL IMAGES


STEP 3
-
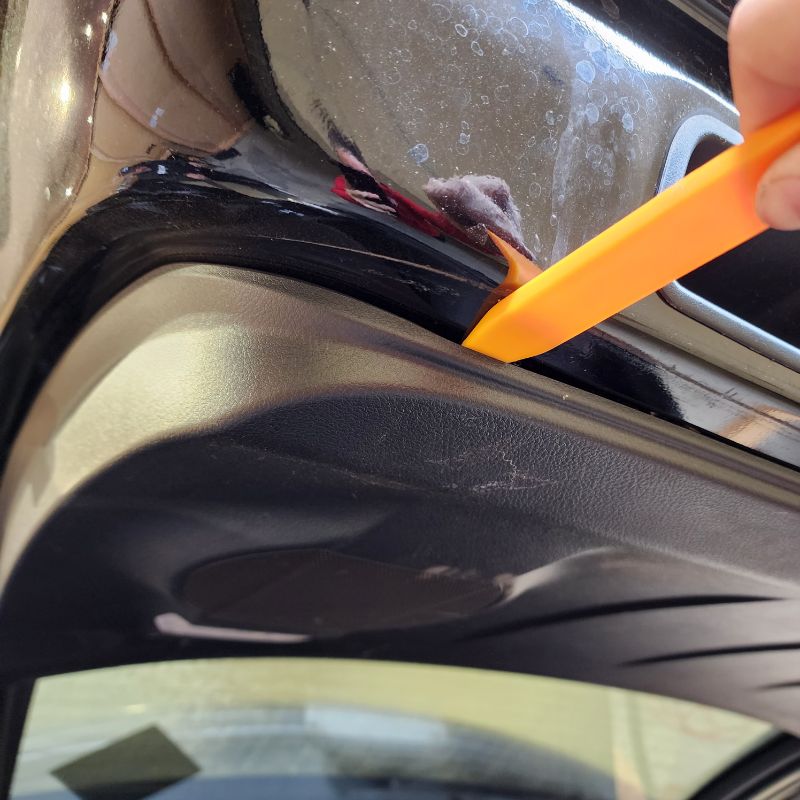
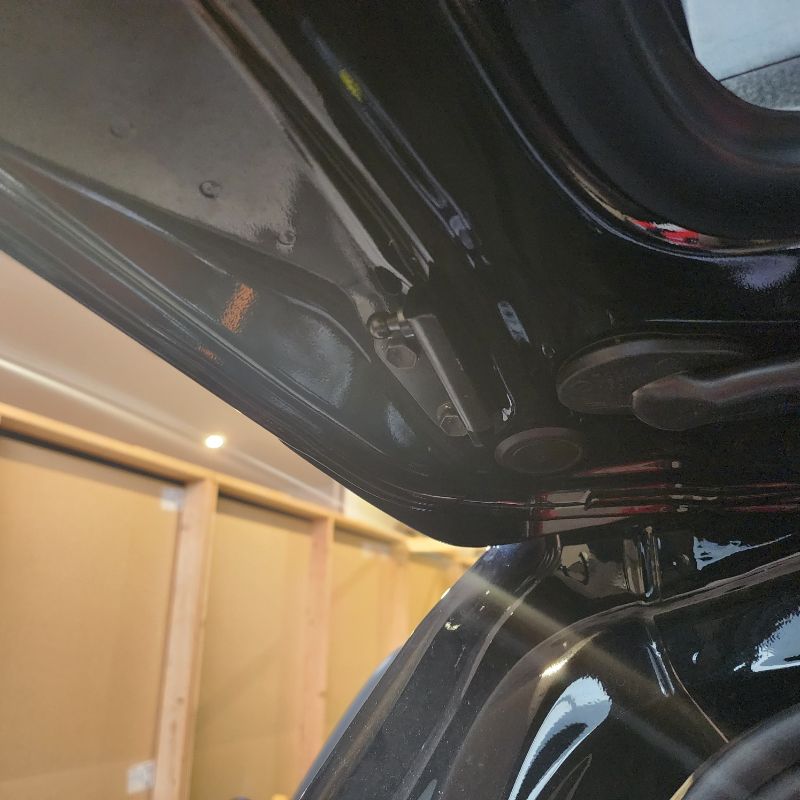
Using your plastic trim removal tool, locate the liftgate strap and remove the square panel cover. Once this is removed, you will see the hidden 10mm Bolt. Use your 10mm socket to remove.
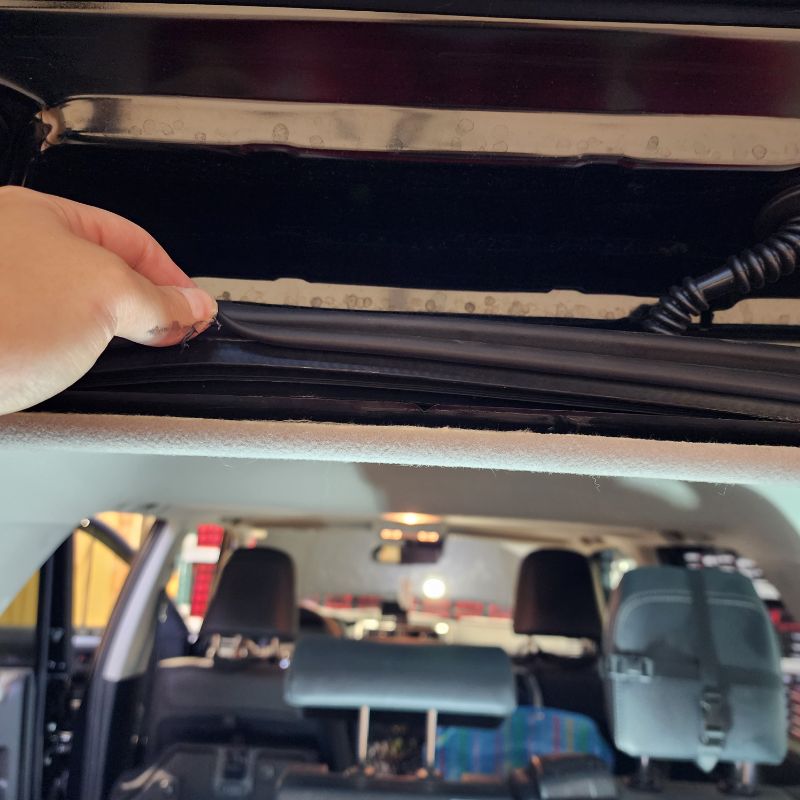
Now, start prying the panel away from the frame of the tailgate. You can use your hands or a trim removal tool. Start on the edge and work your way all the way around from left to right or vise versa. There are a series of retaining plastic fasteners around the sides and bottom of the panel, but none on the top as the panel's rear window interior seal sits on the liftgate ledge. Before you try to pull the panel off, you will notice that it is still held in with the factory wire harnesses going to the right and left lights. Push the tab on the top of the white connectors to remove.
Finally, once those two wire harnesses are disconnected, you can push the panel forward (towards the inside of the cab) to remove from the top edge where the window seal is located. Make note of how you removed this panel for when you re-install it at the end. Place the liftgate interior panel out of the way as you won't replace it until the very end of this install with the other interior panels you removed in Step 1 & 2.
INSTALL IMAGES


STEP 4
-
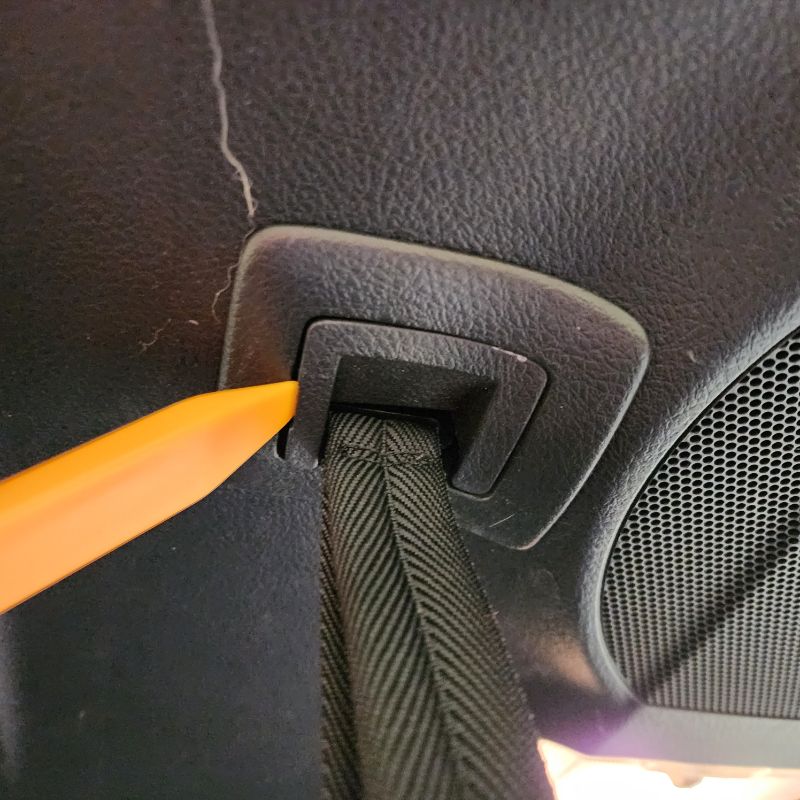
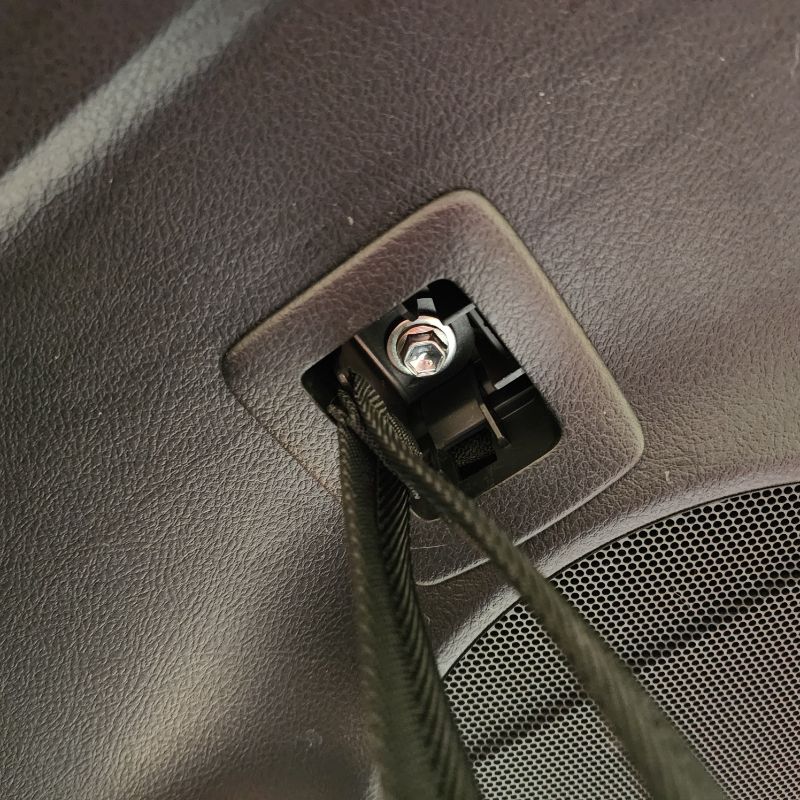
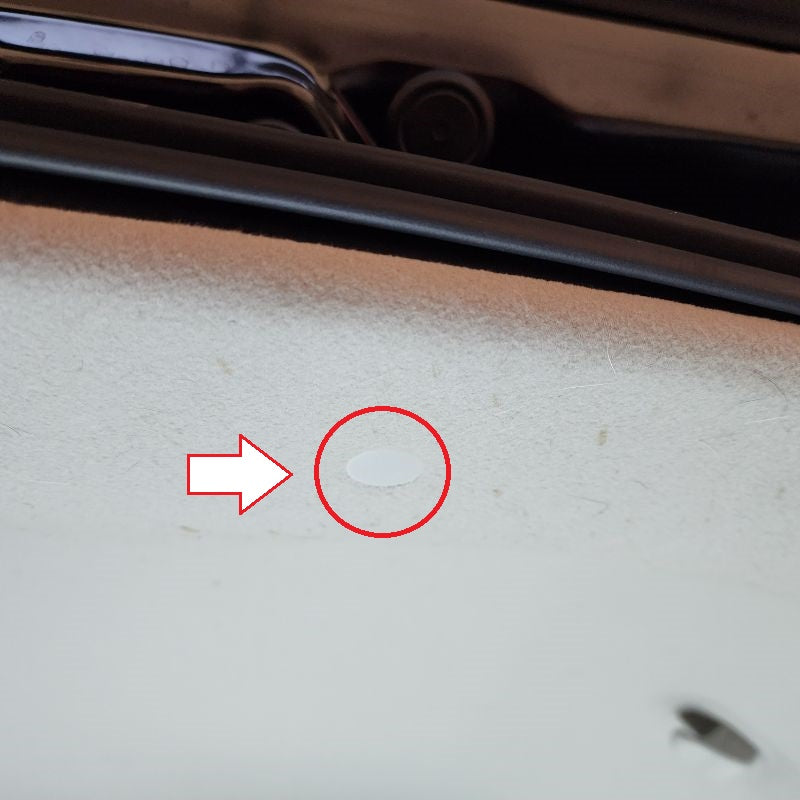
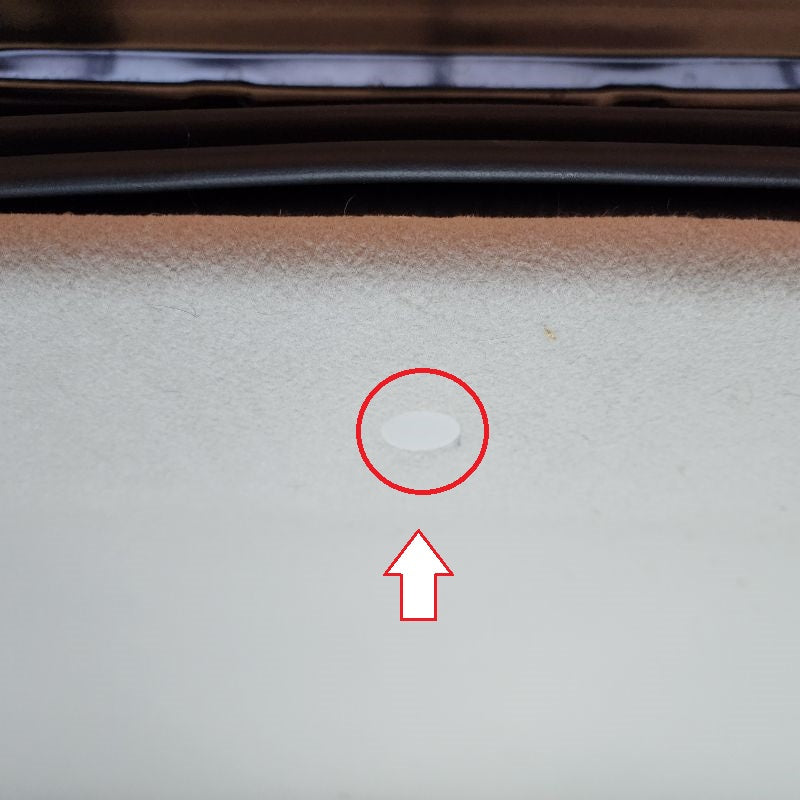
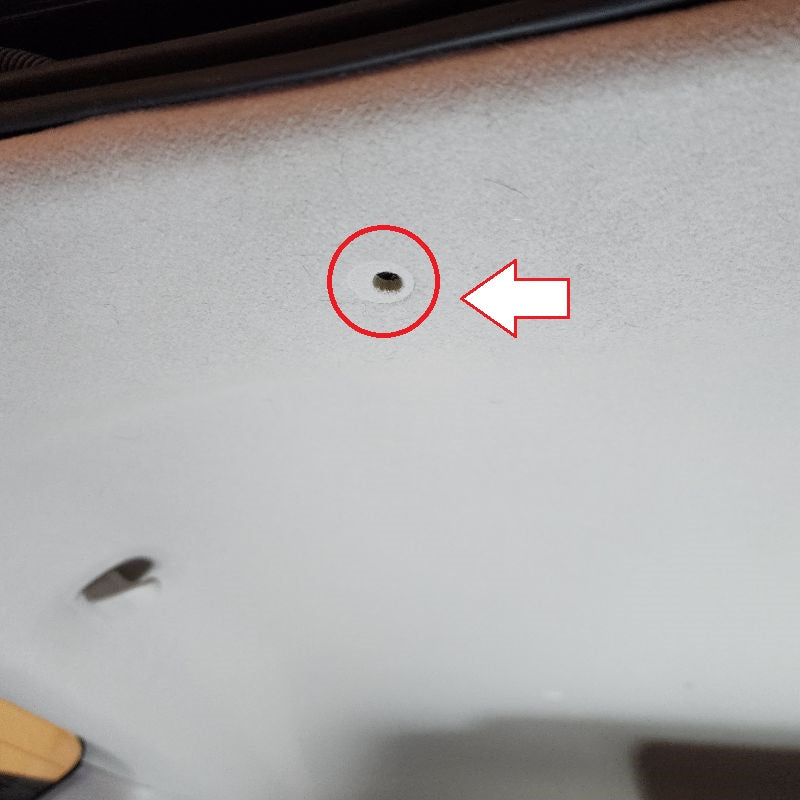
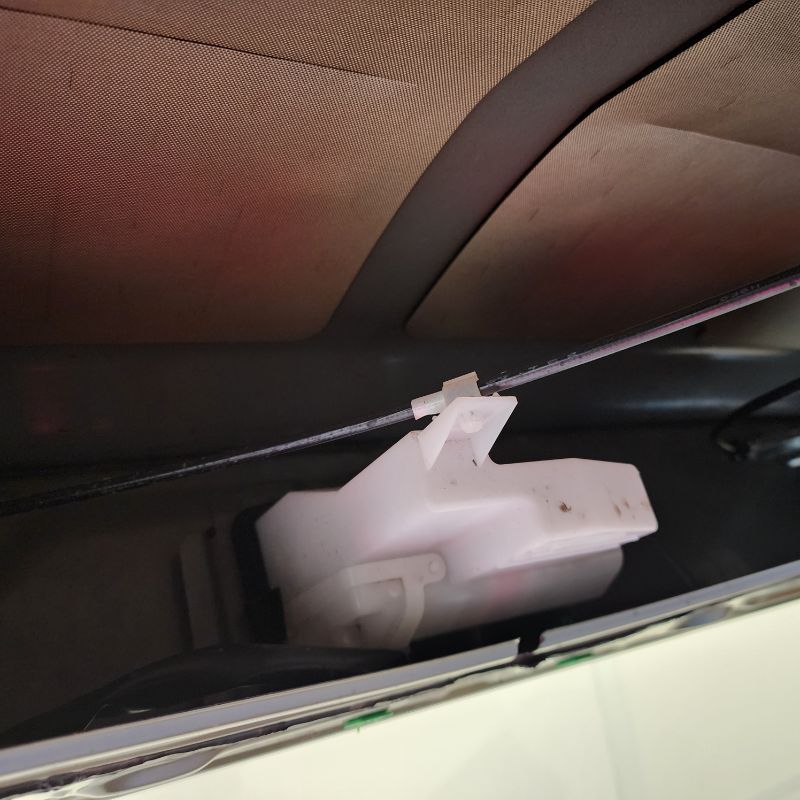
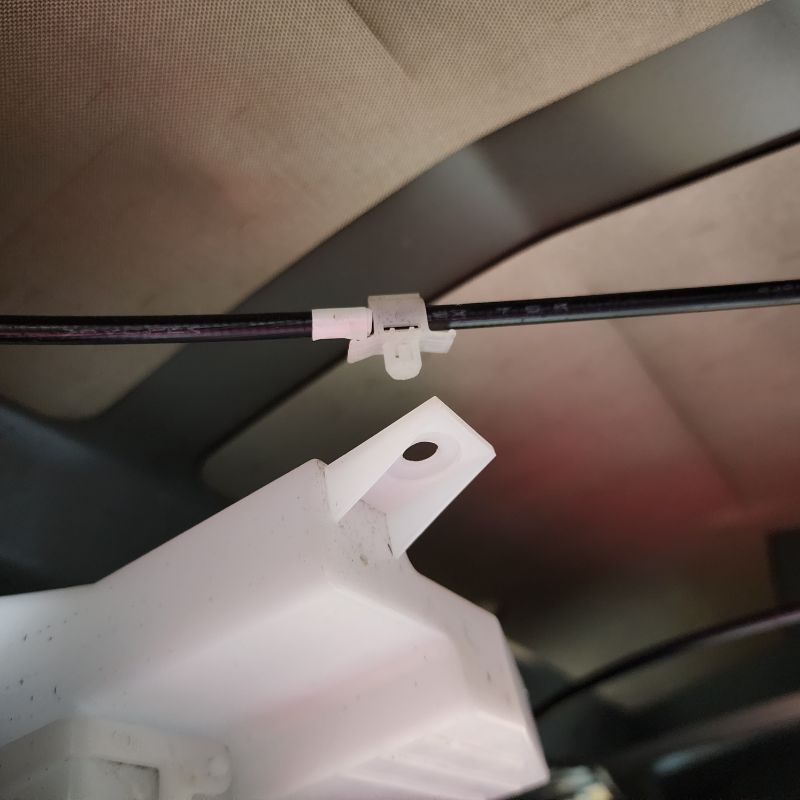
Using a door panel remover, slip it between the headliner and grey push pin retainer. Repeat for all three located in headliner.
INSTALL IMAGES


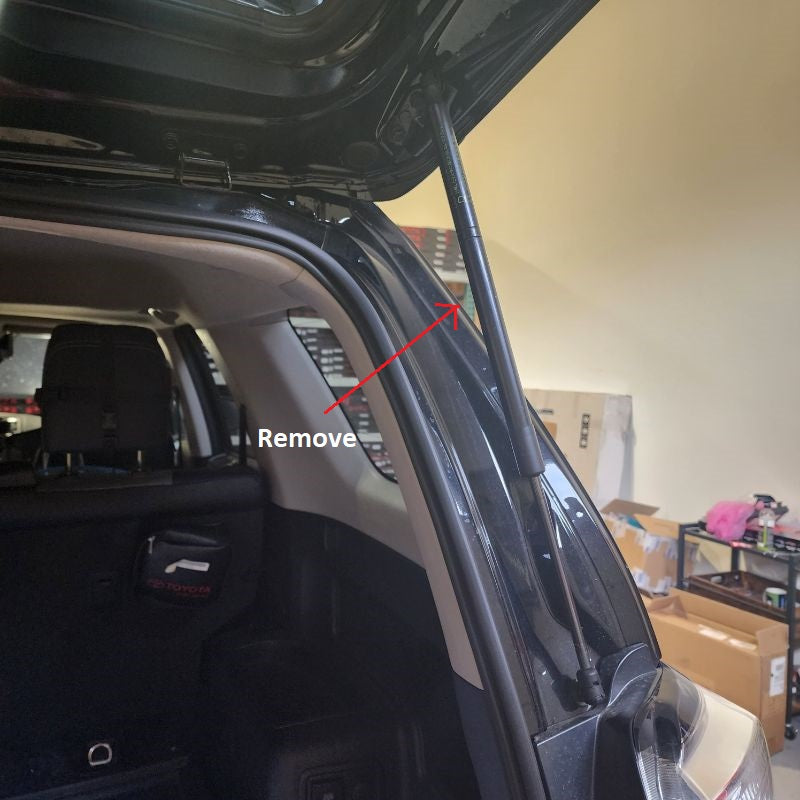
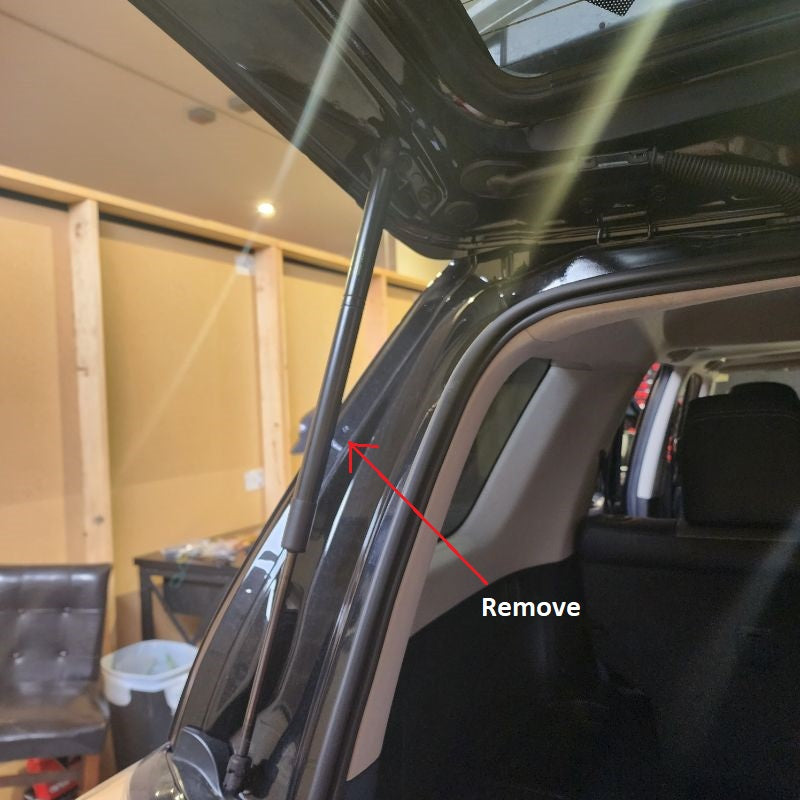
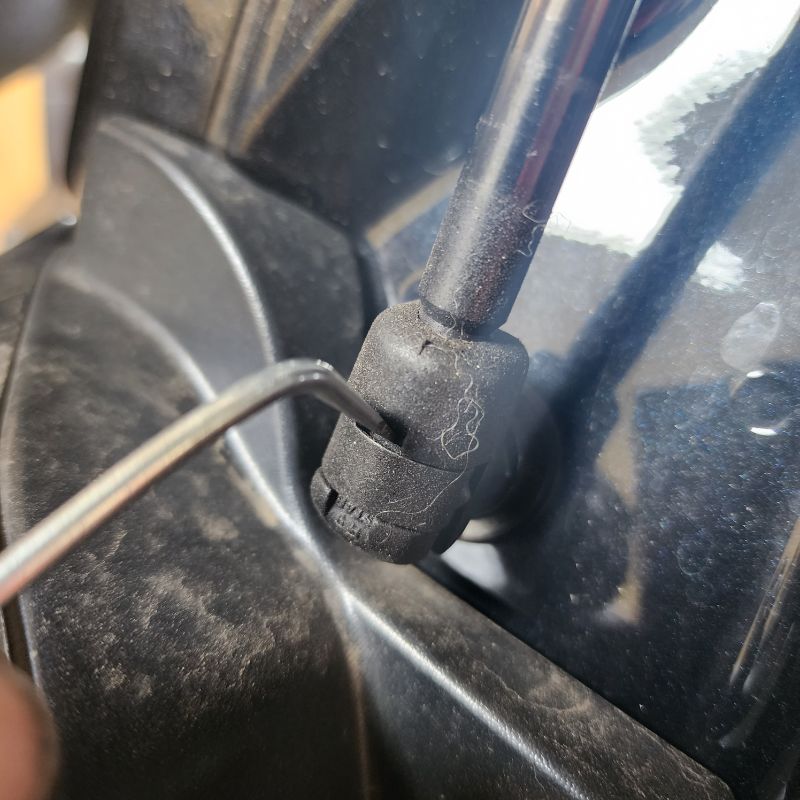
STEP 5
-
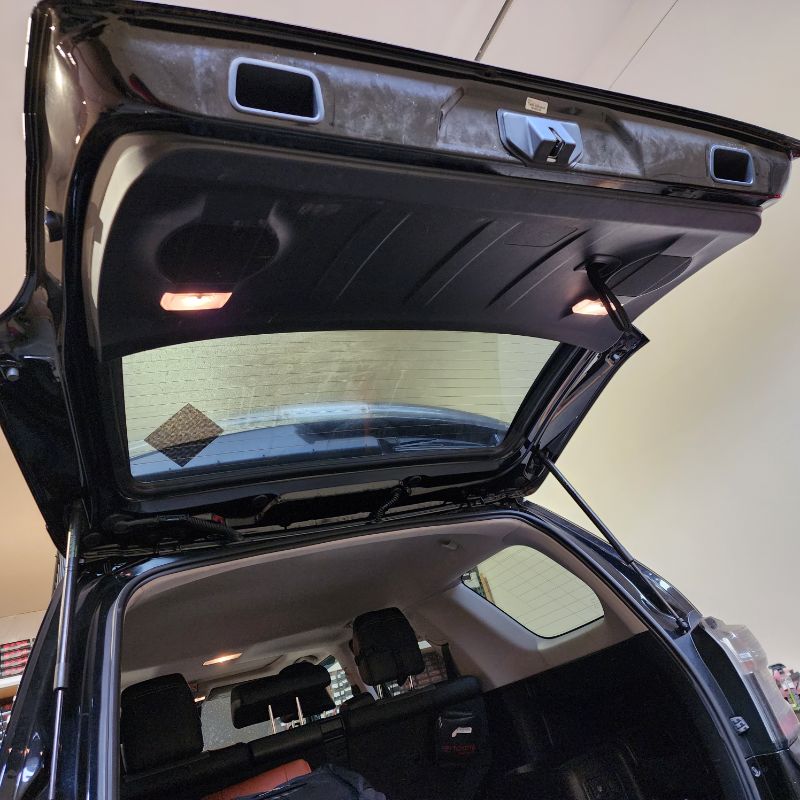
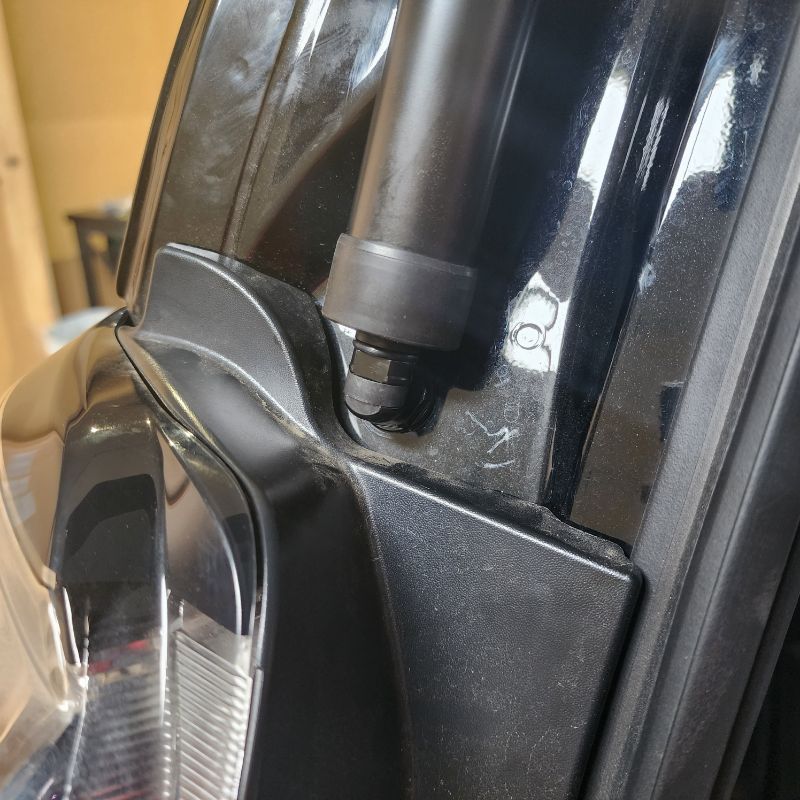
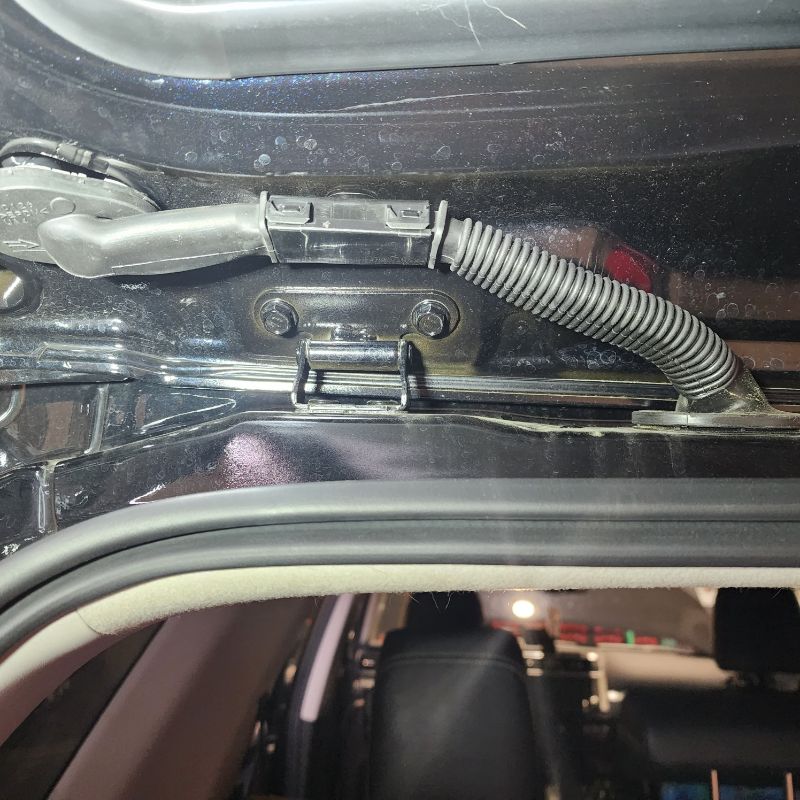
Loosen factory gas spring clips by using a small screwdriver, pull the gas spring out gently. You will need assistance to HOLD THE DOOR when removing the gas springs.
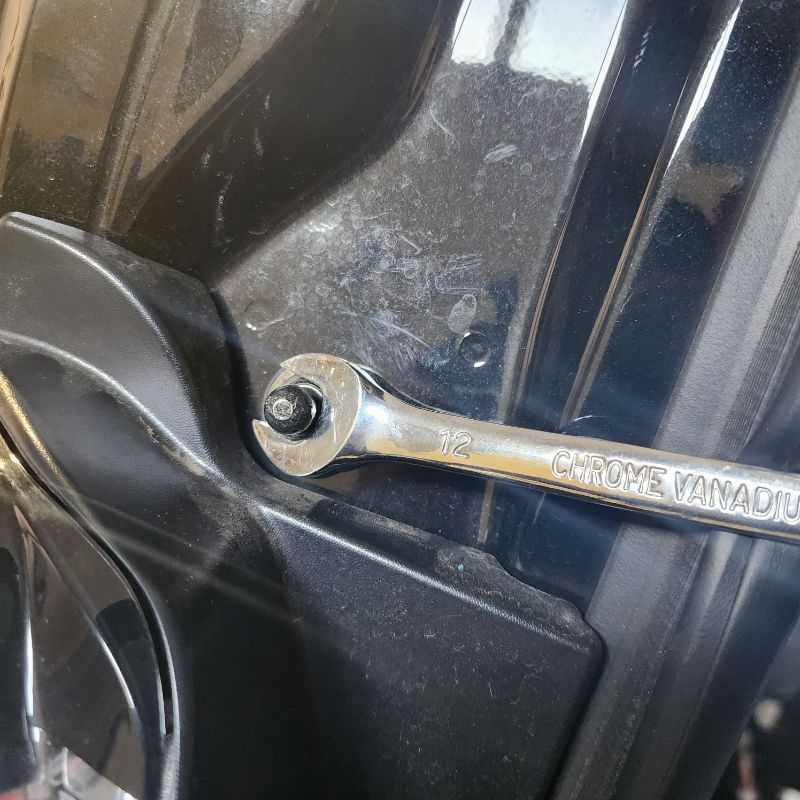
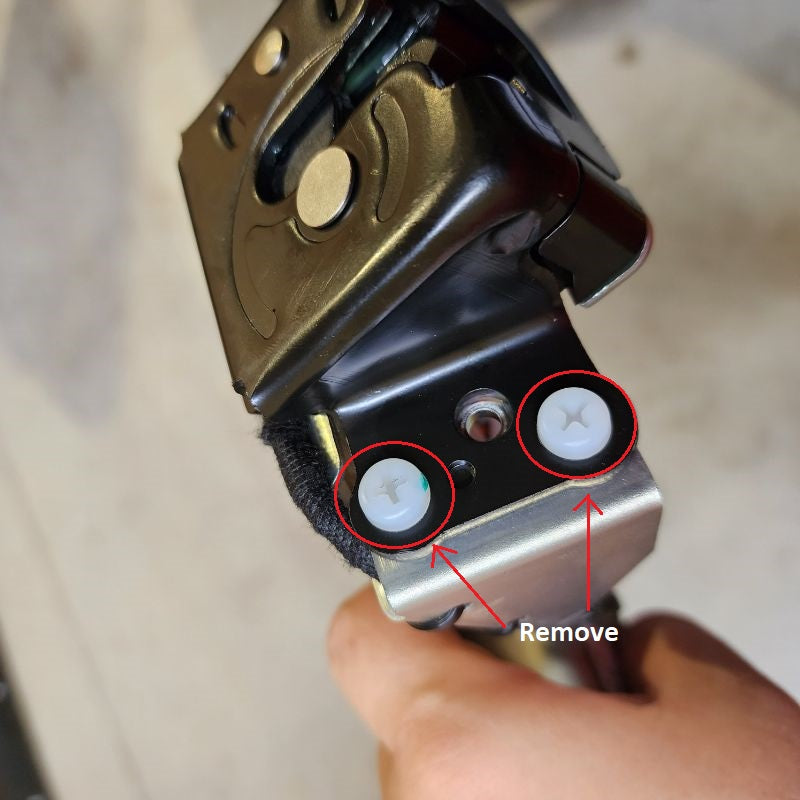
Use the new top door brackets included in package to replace the factory ones. You can use the original screws, or the new ones included. It is personal preference. You will need a 12mm.
INSTALL IMAGES


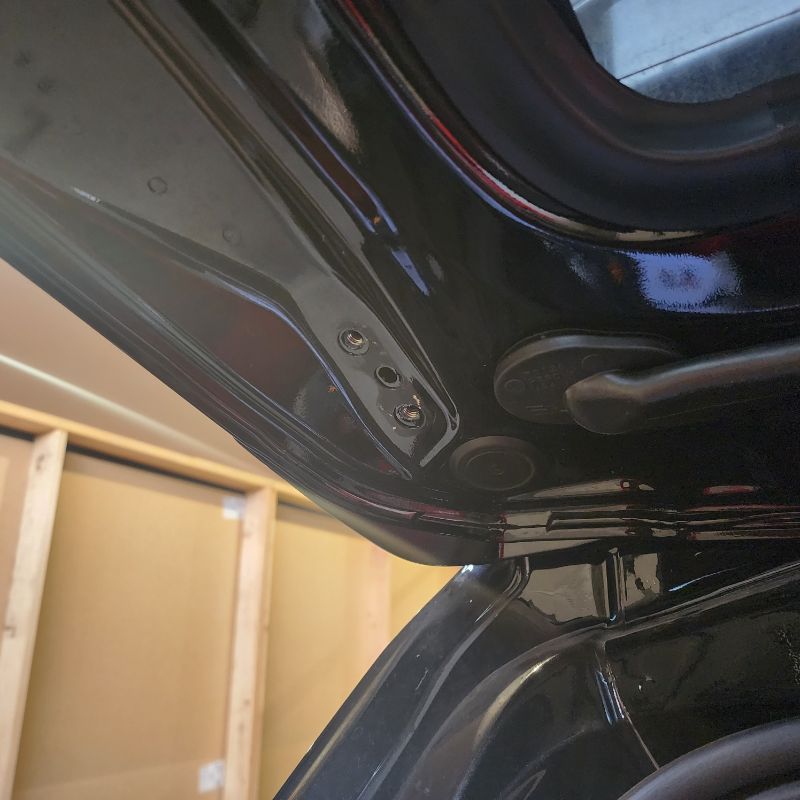


STEP 6
-
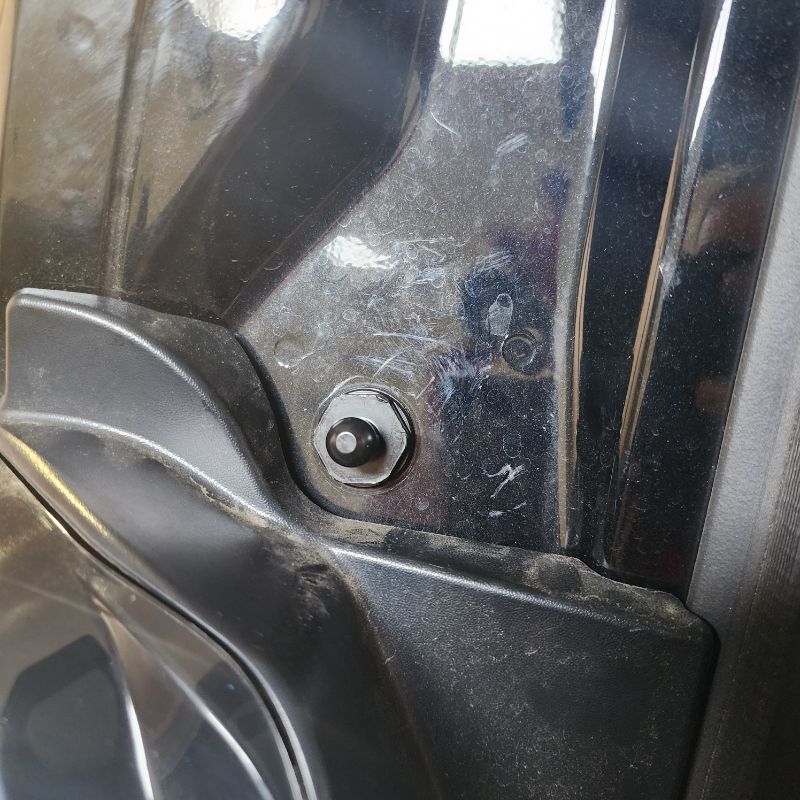
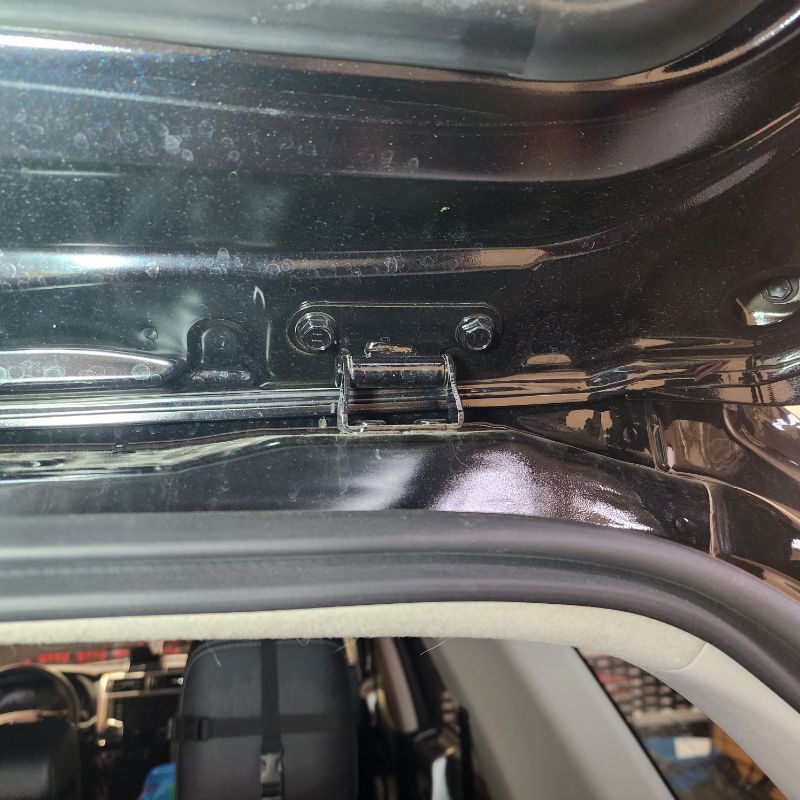
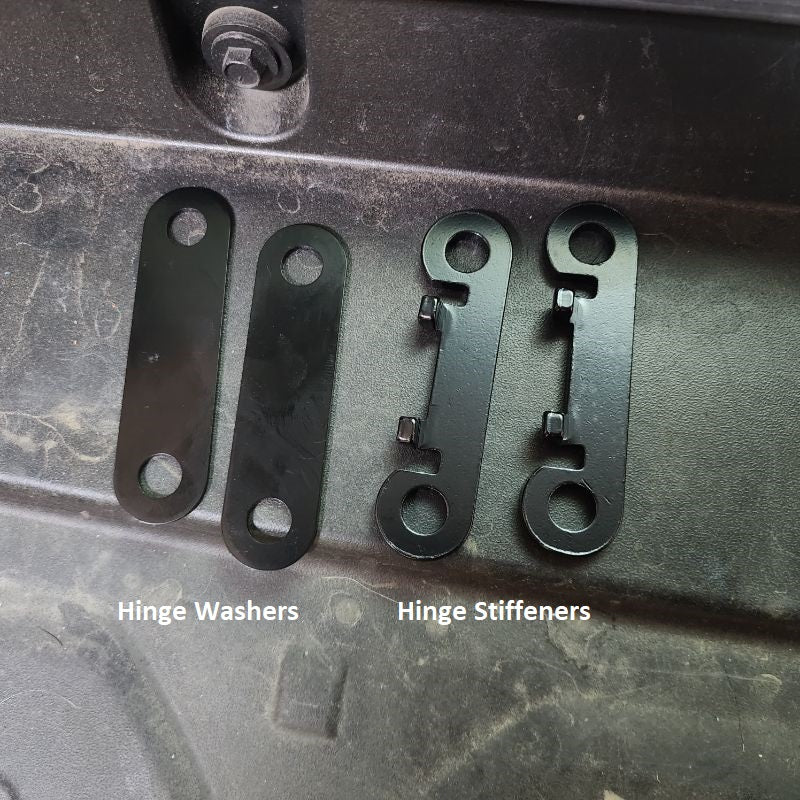
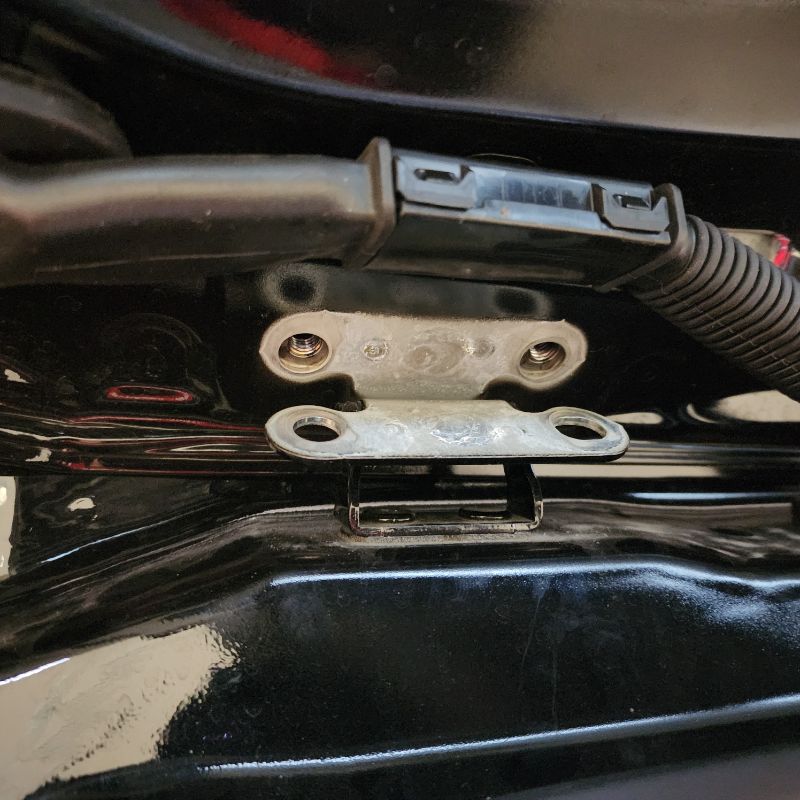
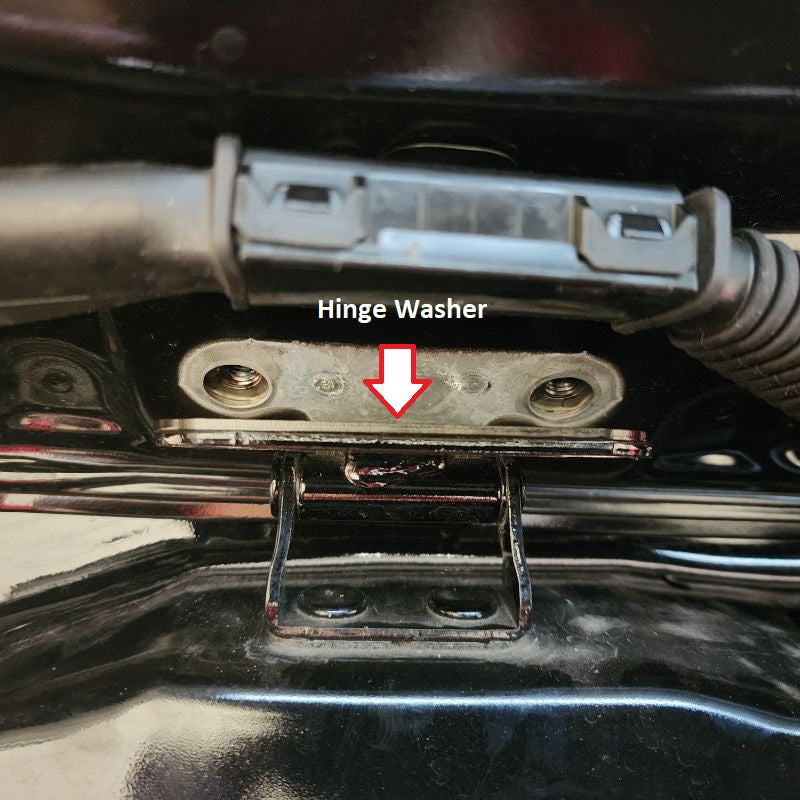
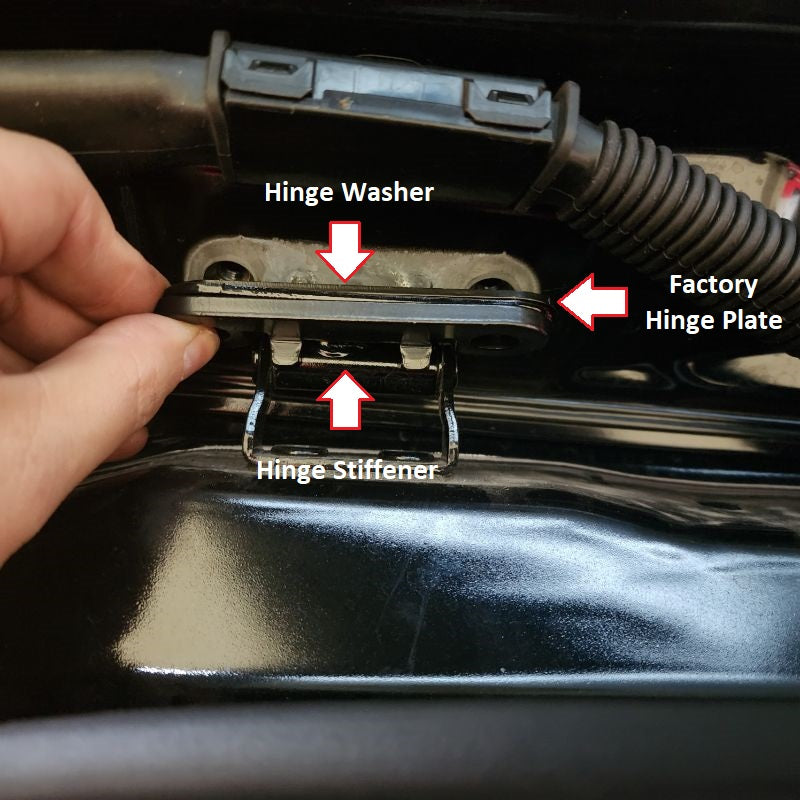
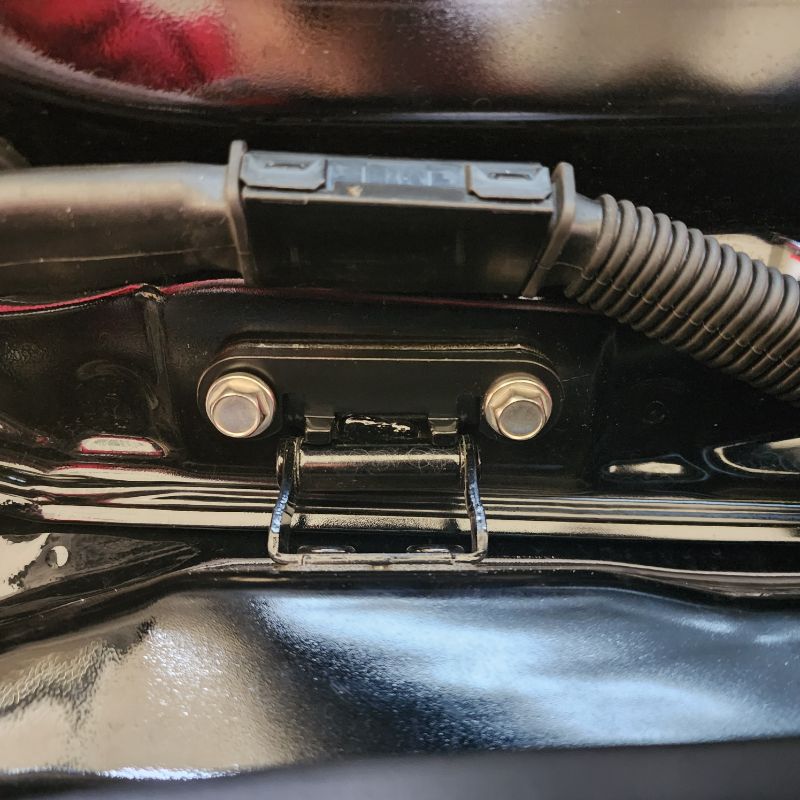
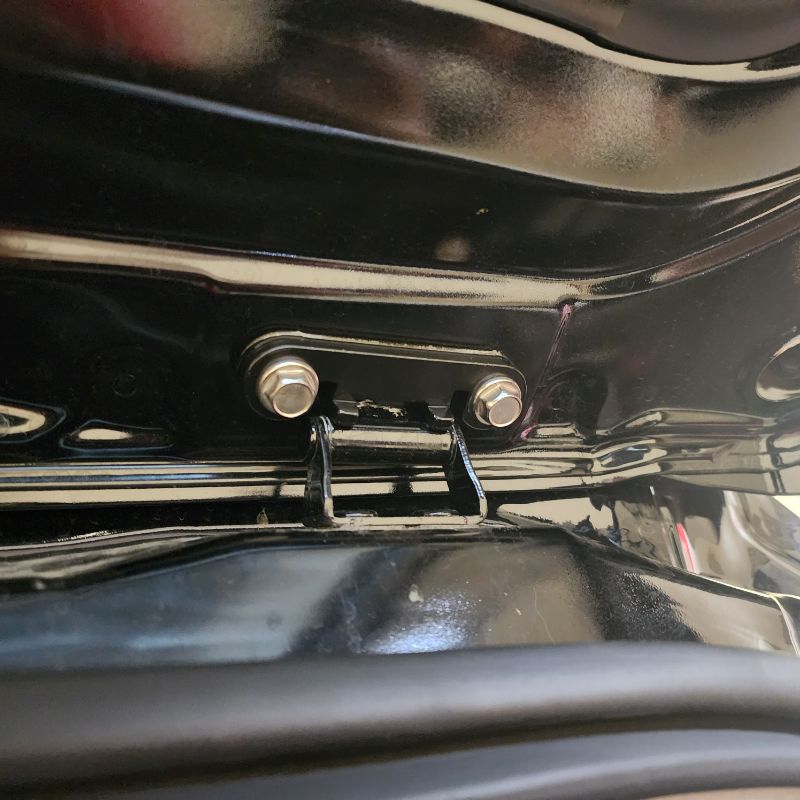
Use the hinge washer & stiffener to reinforce the factory door hinge. This step requires assistance to hold the door panel in place. Remove the two screws and then you will have to pry the factory hinge plate loose. Place the new hinge washer between the door panel and hinge plate. Next, place the new hinge stiffener outside the hinge plate. For reinstalling the hardware, you can use the new M8 bolts or reinstall your black factory hardware. It is personal preference as some do not like the silver and would like to keep the black look.
INSTALL IMAGES


STEP 7
-
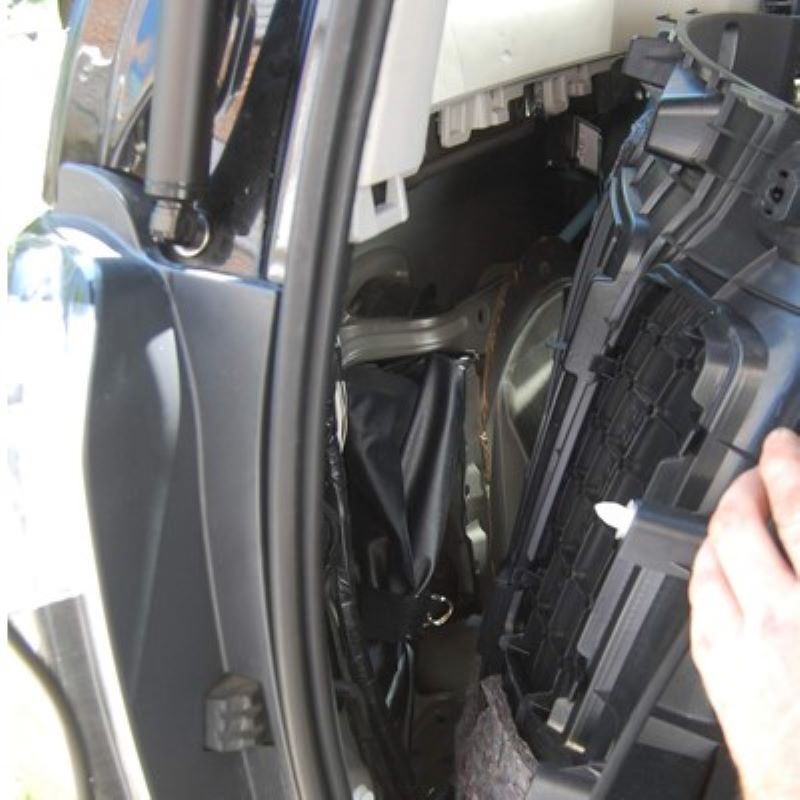
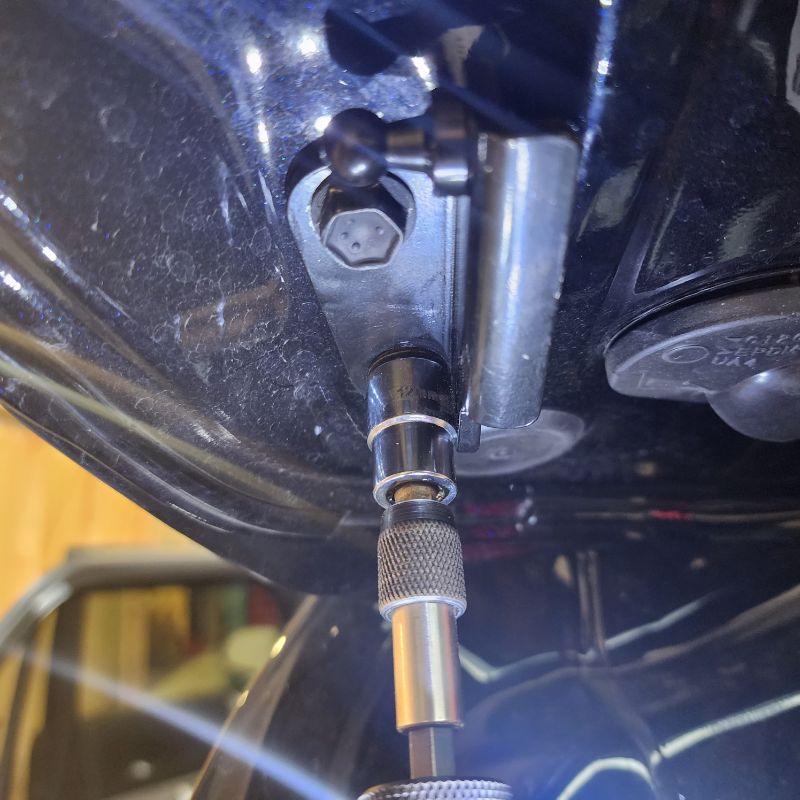
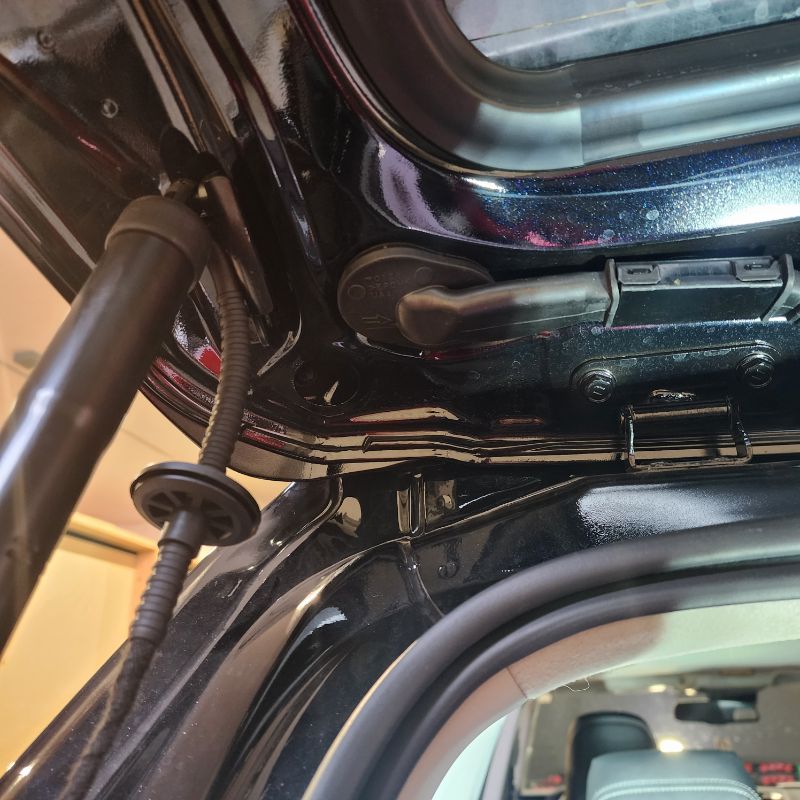
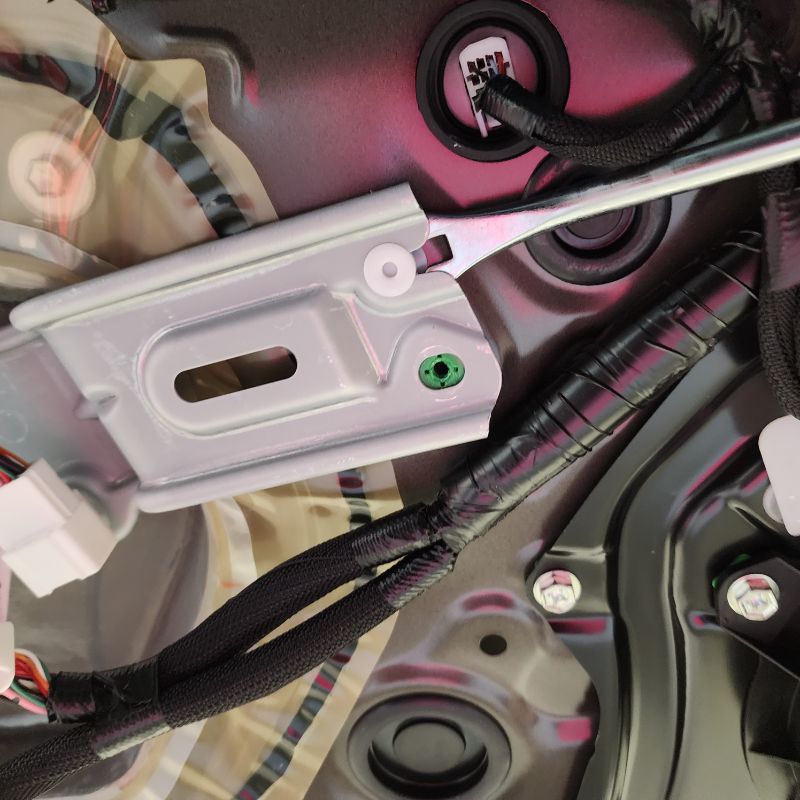
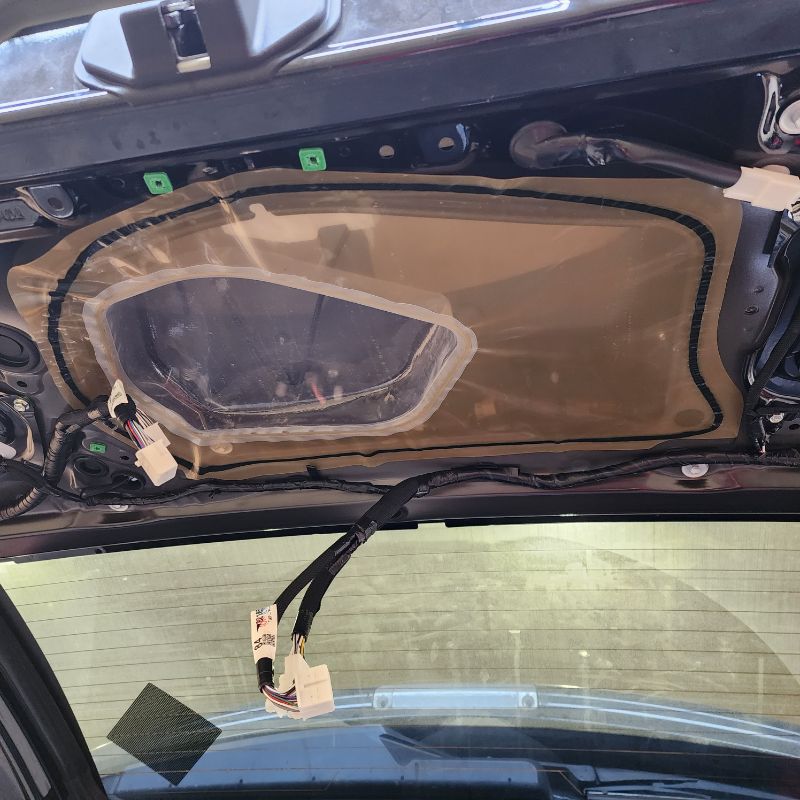
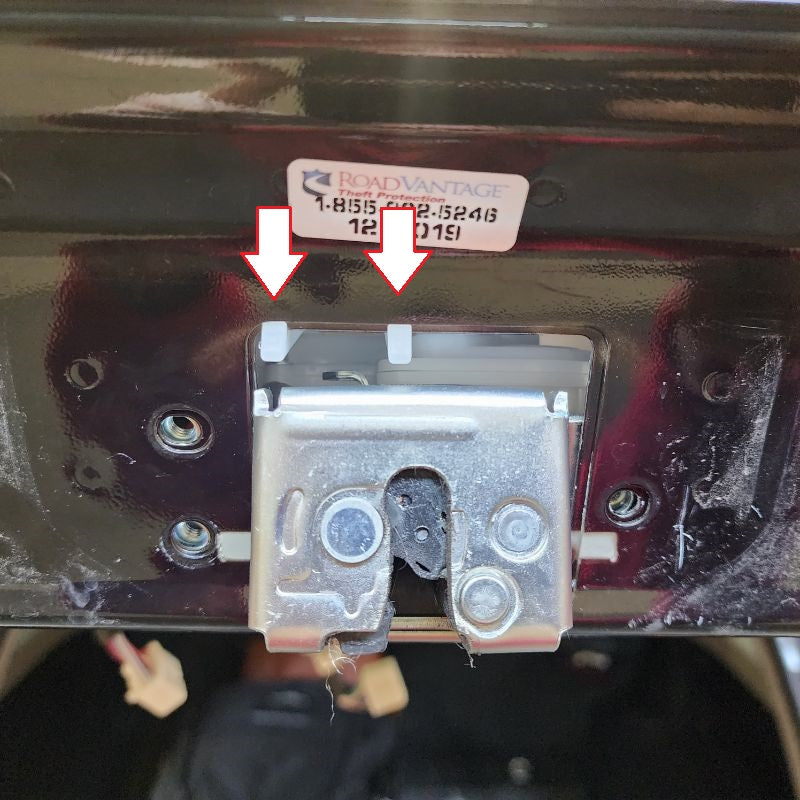
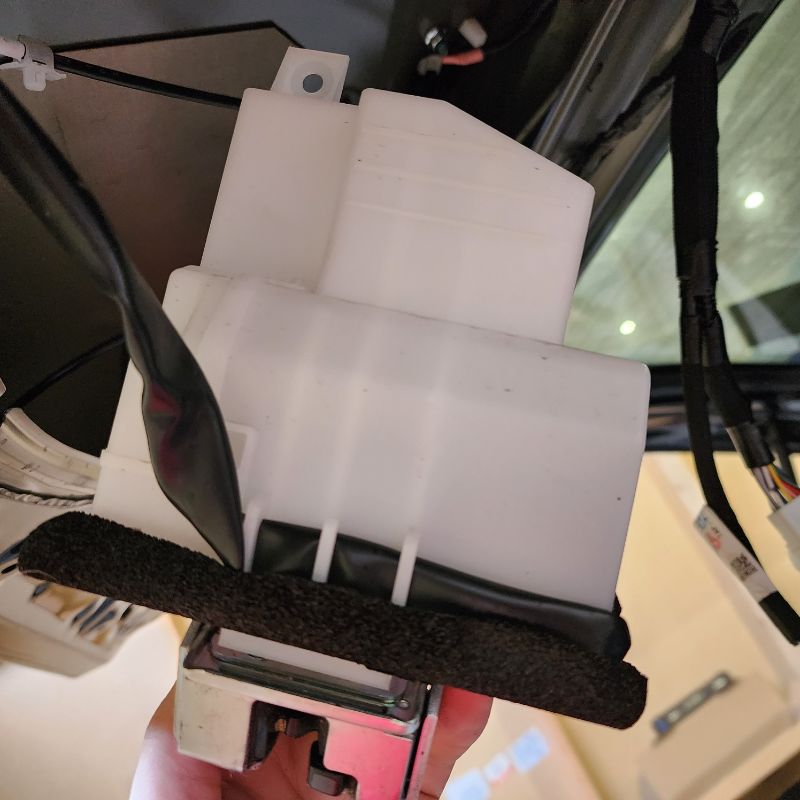
Here you will need to disconnect three factory white connectors, three 10mm bolts, and two white retainer fasteners. To remove the white retainer fasteners, it makes it easy if you have a Door Panel Remover Tool. Once you have disconnected everything holding the bracket to the tailgate, go ahead and set it aside for later.
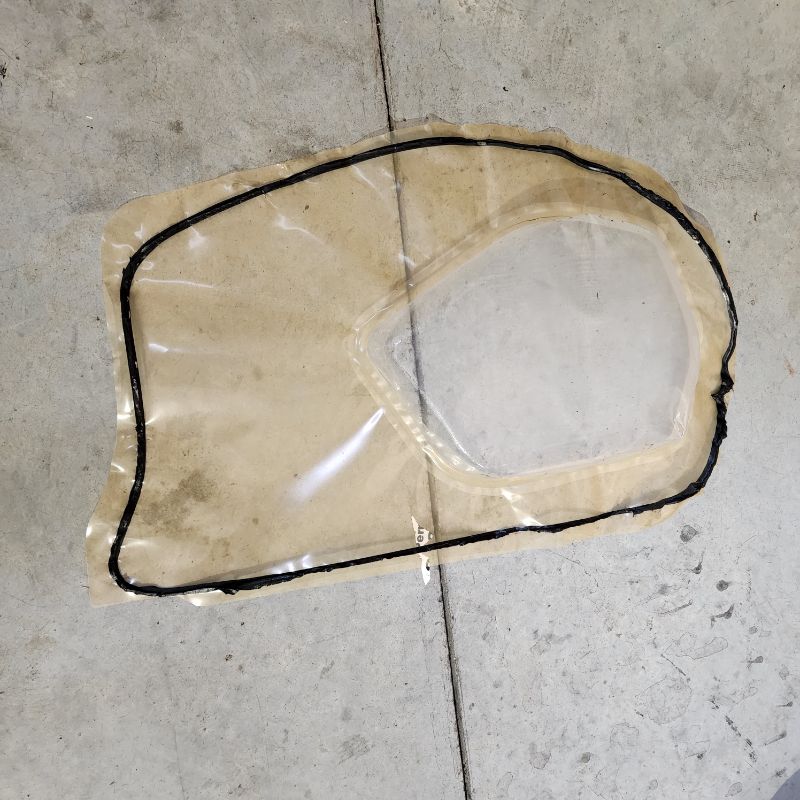
Before moving on to the next step, remove the waterproof protection cover. You will need access to inside the tailgate area.
INSTALL IMAGES


STEP 8
-
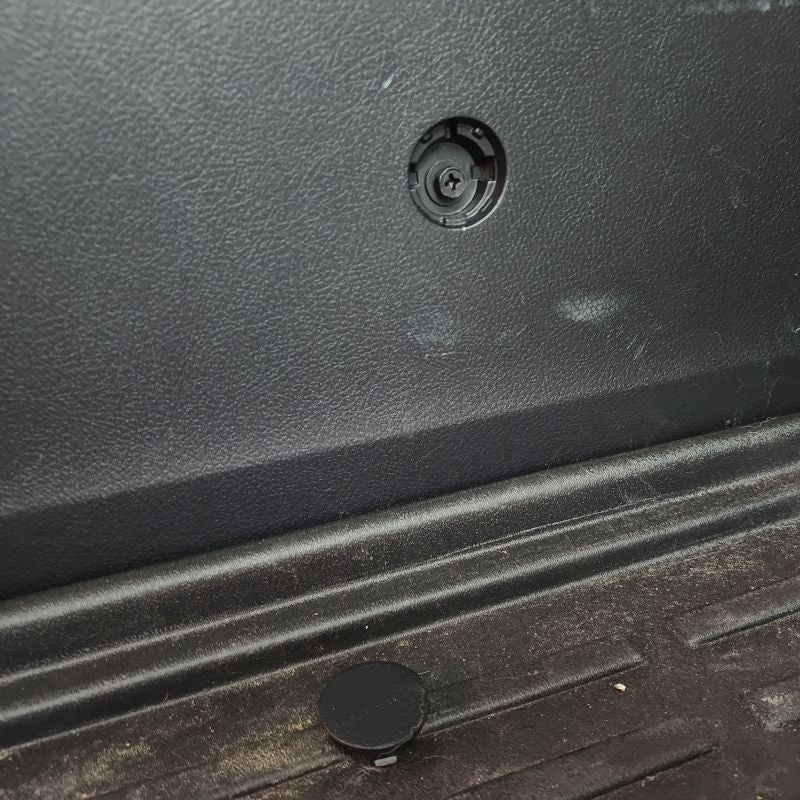
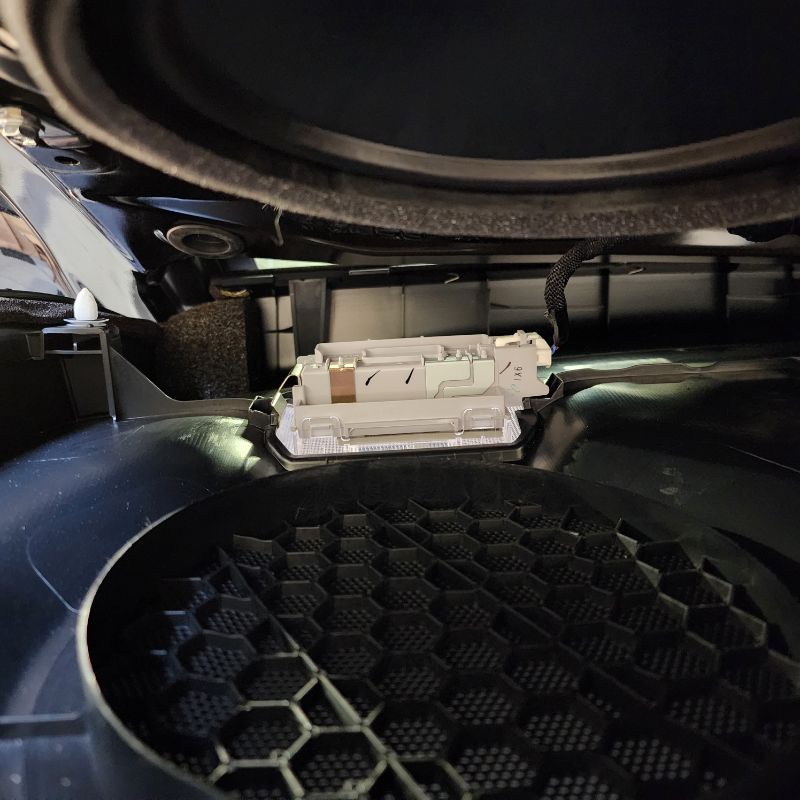
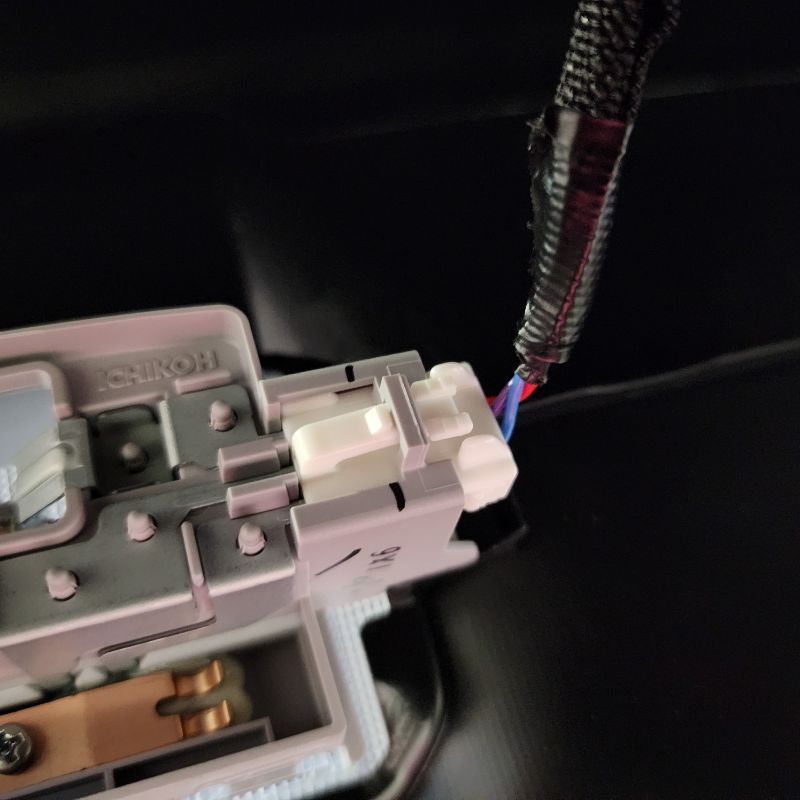
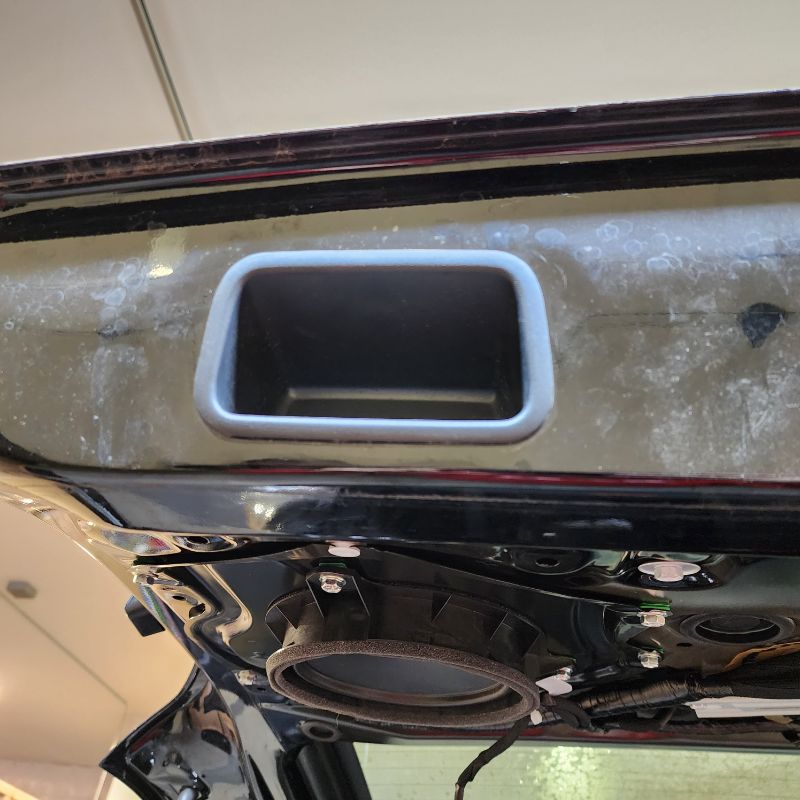
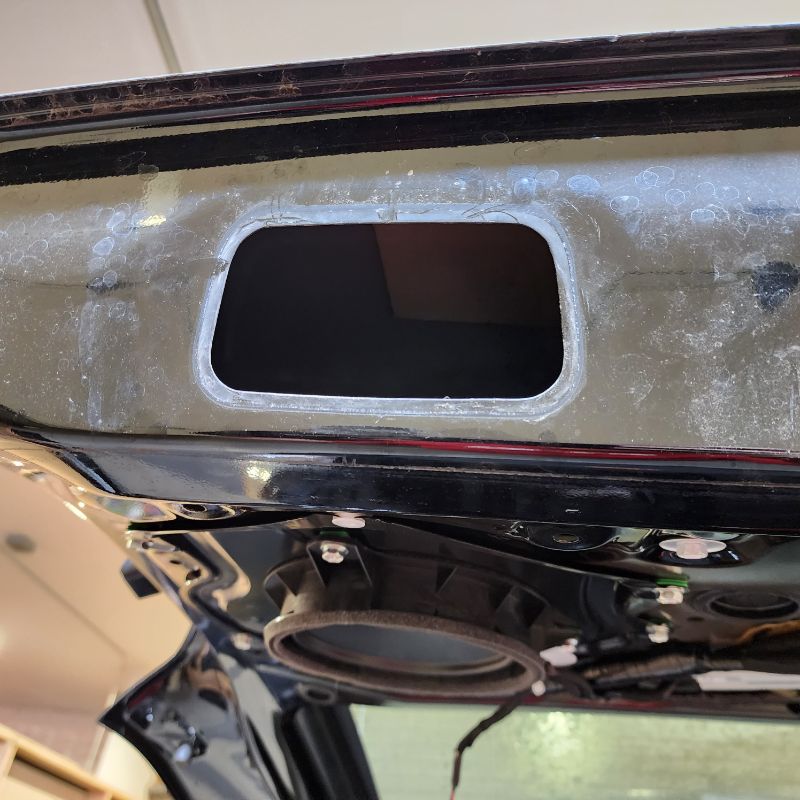
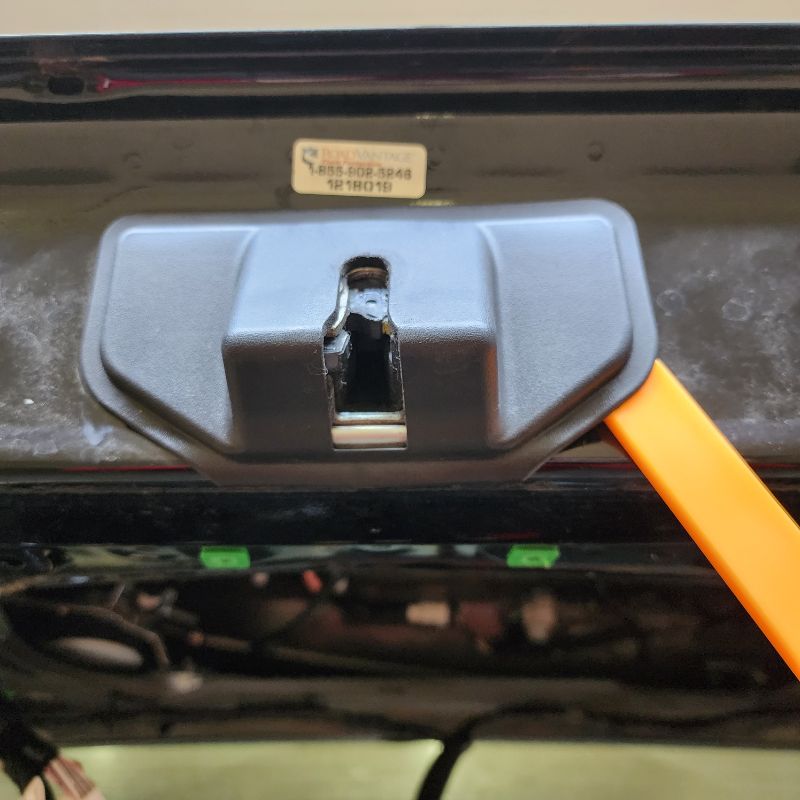
Using a Dremel or something similar, cut a rectangle the size of the New Rear Push Button in the factory door pull handle to install the New Rear Push Button. Make sure you trace the backside of the push button so it will lock in place with the two side tabs. Restore the factory plastic door panel with push button back on the tailgate when finished.
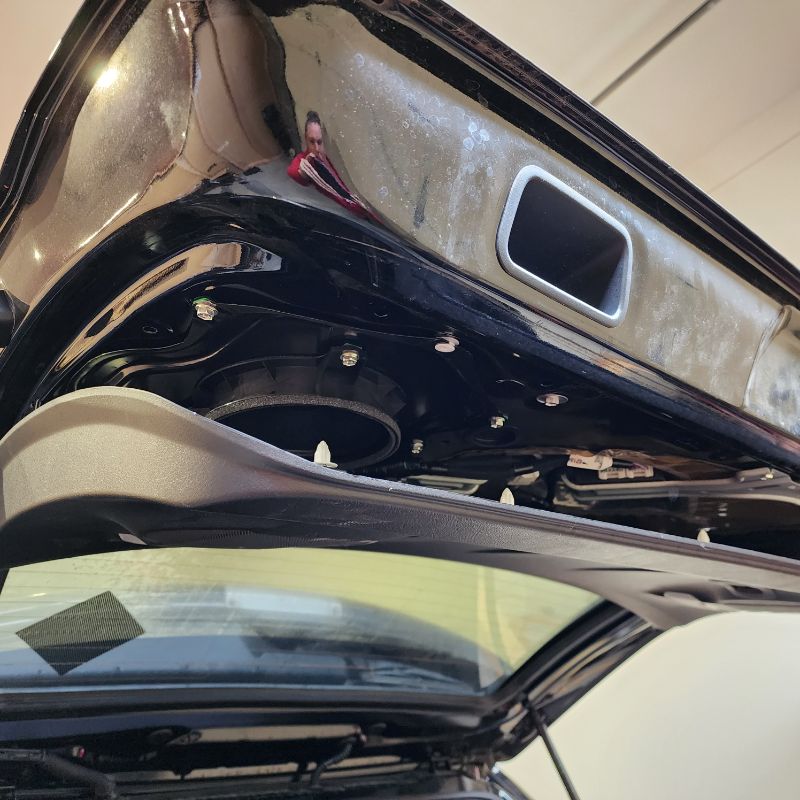
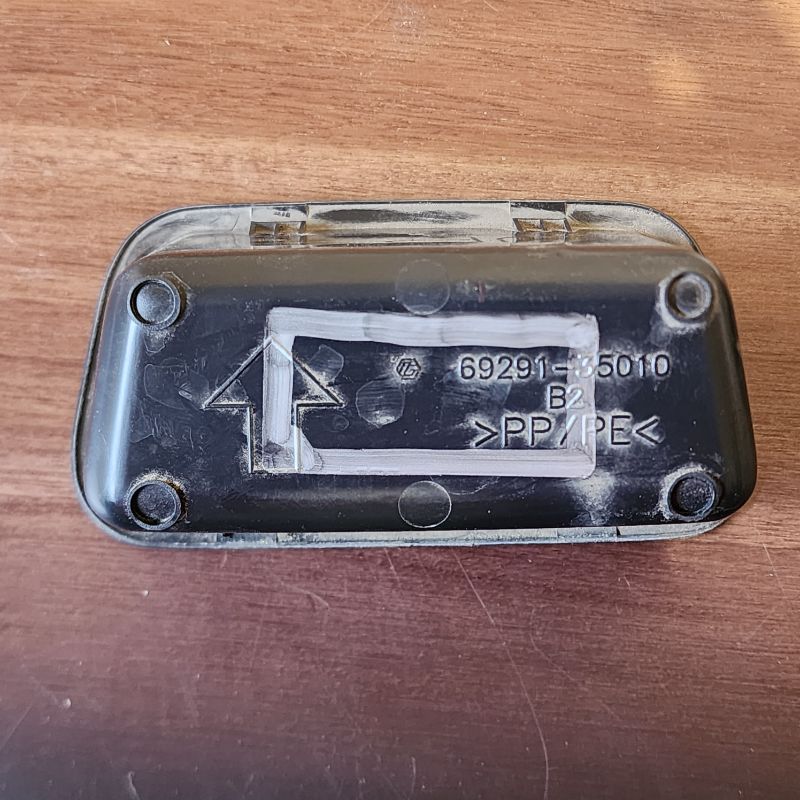
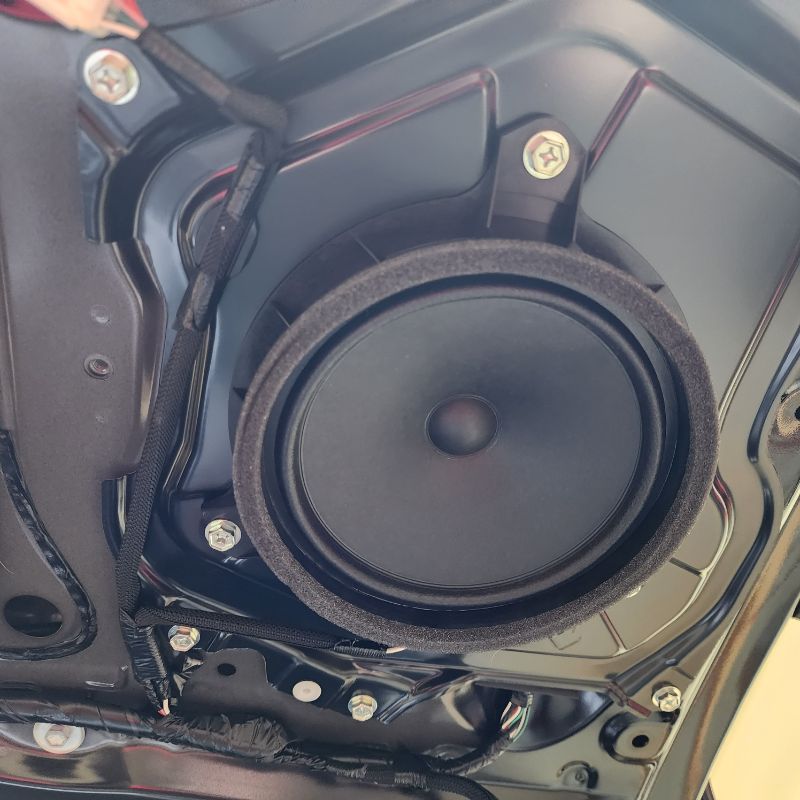
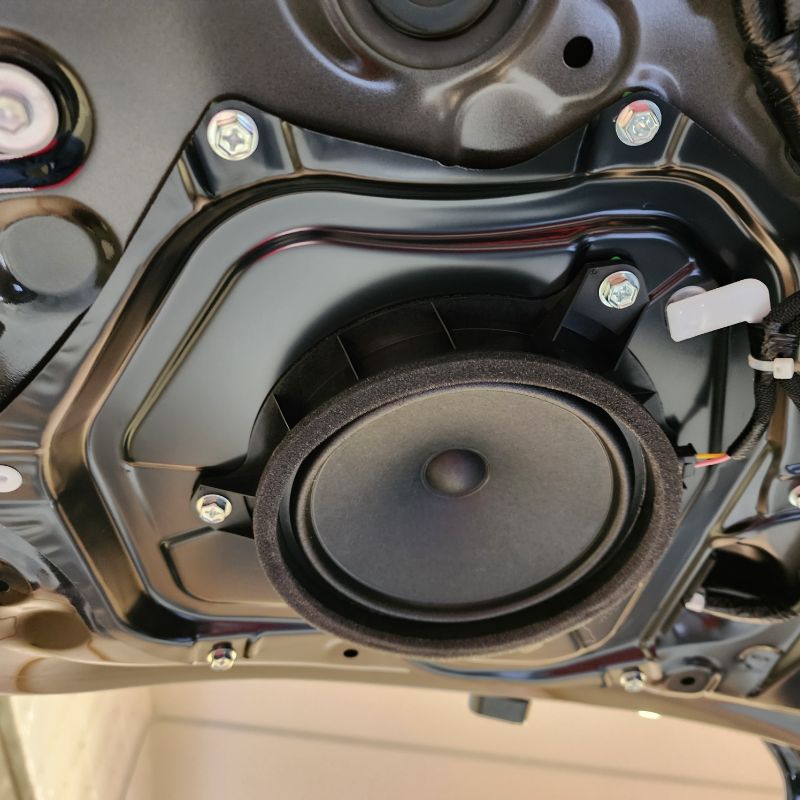
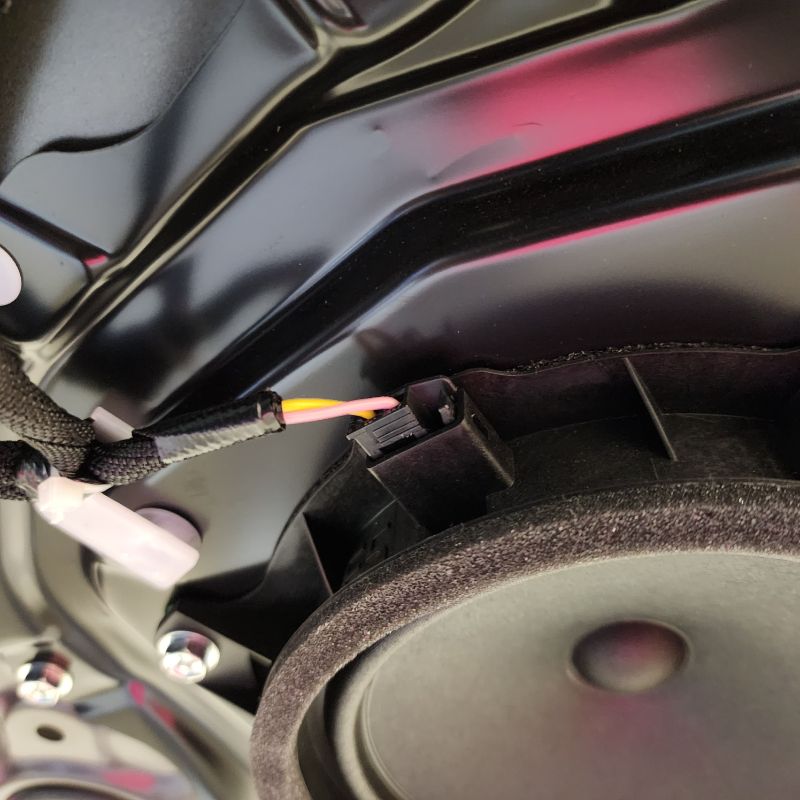
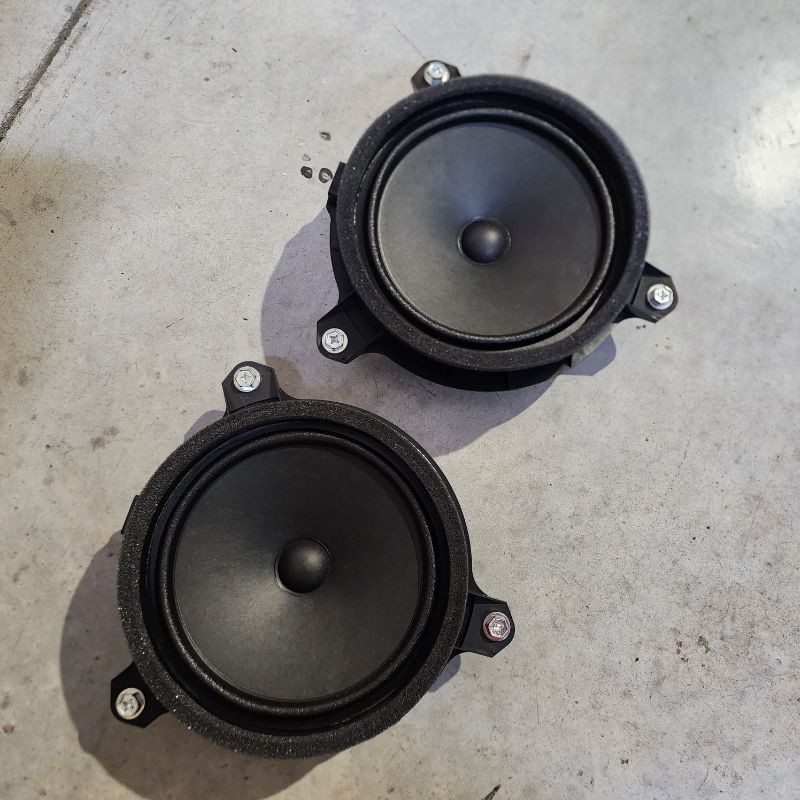
Next, go ahead and remove the two speakers in the tailgate with either a 10mm or Phillips Screwdriver. This will allow more access while routing the new wire harness through the liftgate.
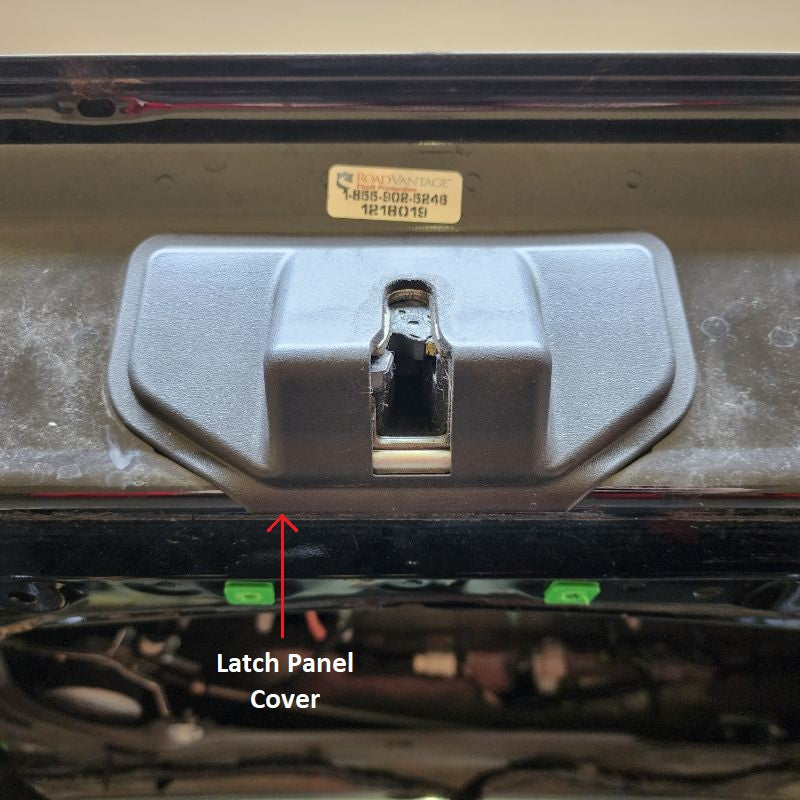
Last, remove the Factory Latch Panel Cover. This is just held on with some glue so a plastic trim removal tool should work. To reinstall, it is recommended to use adhesion promoter with a C-Clamp to hold it in place.
INSTALL IMAGES


STEP 9
-
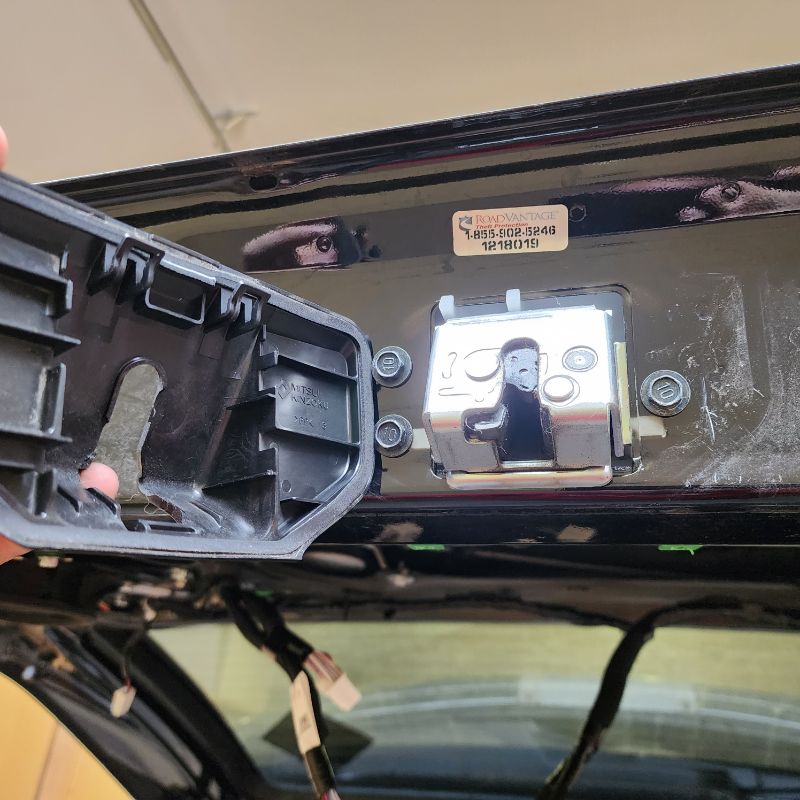
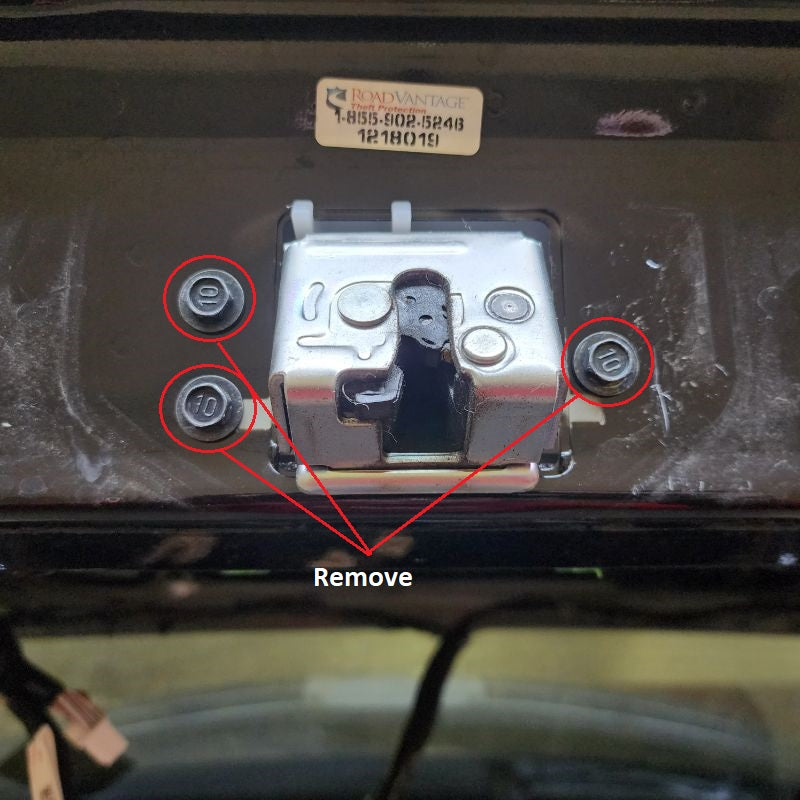
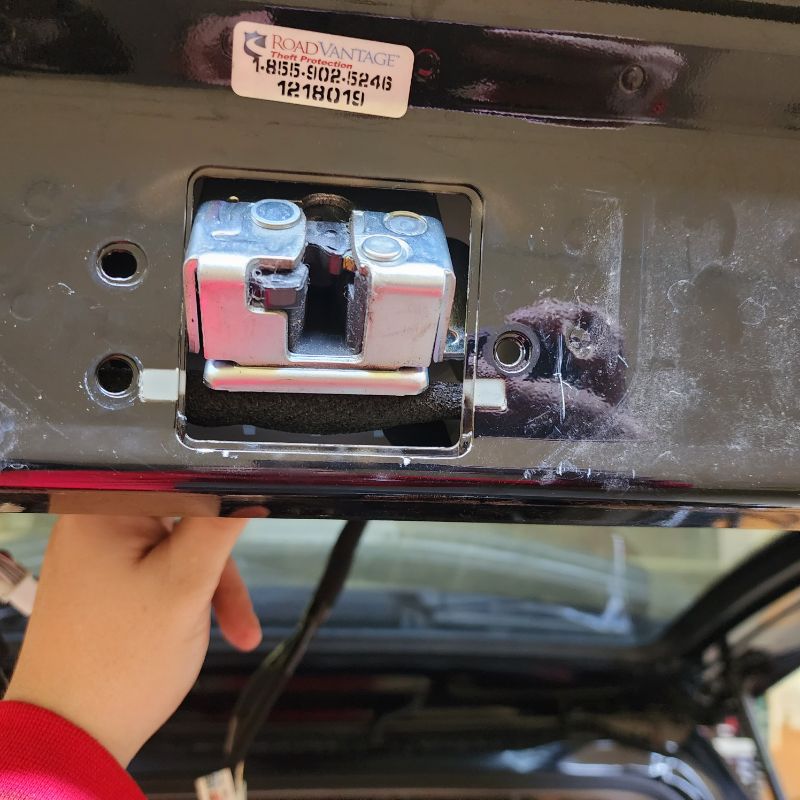
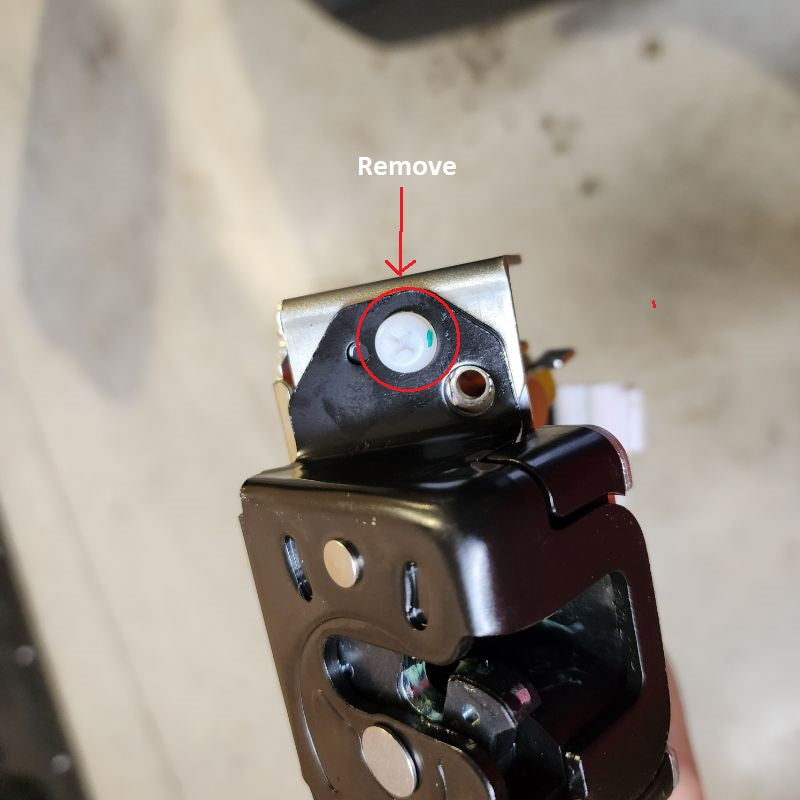
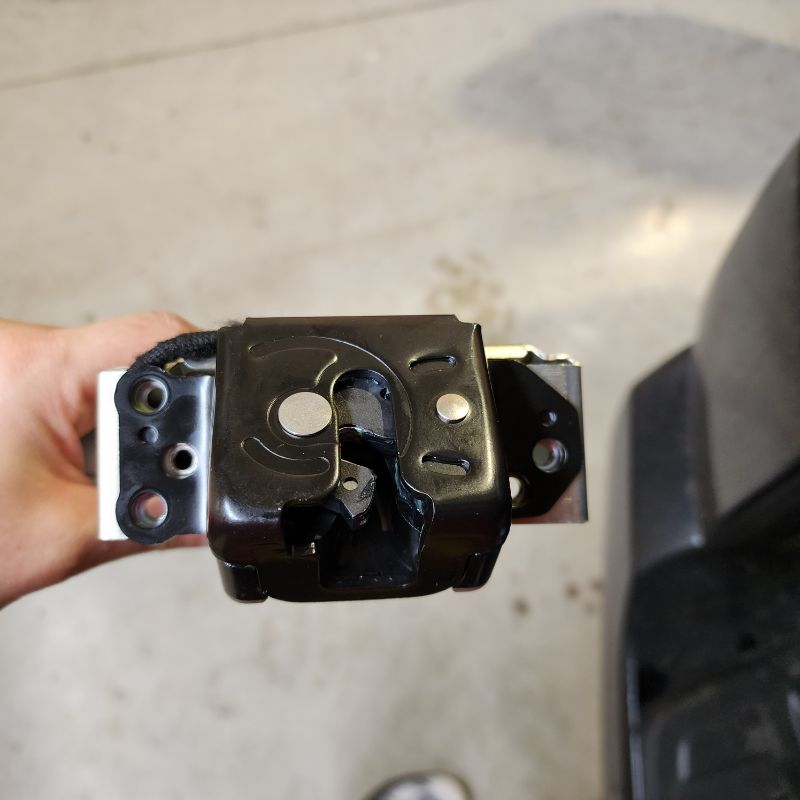
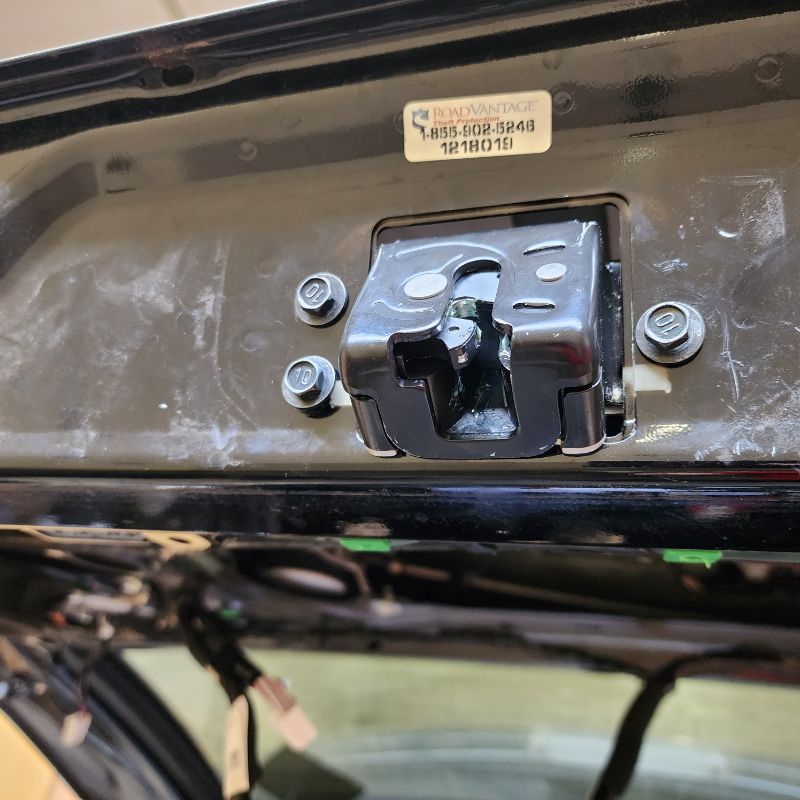
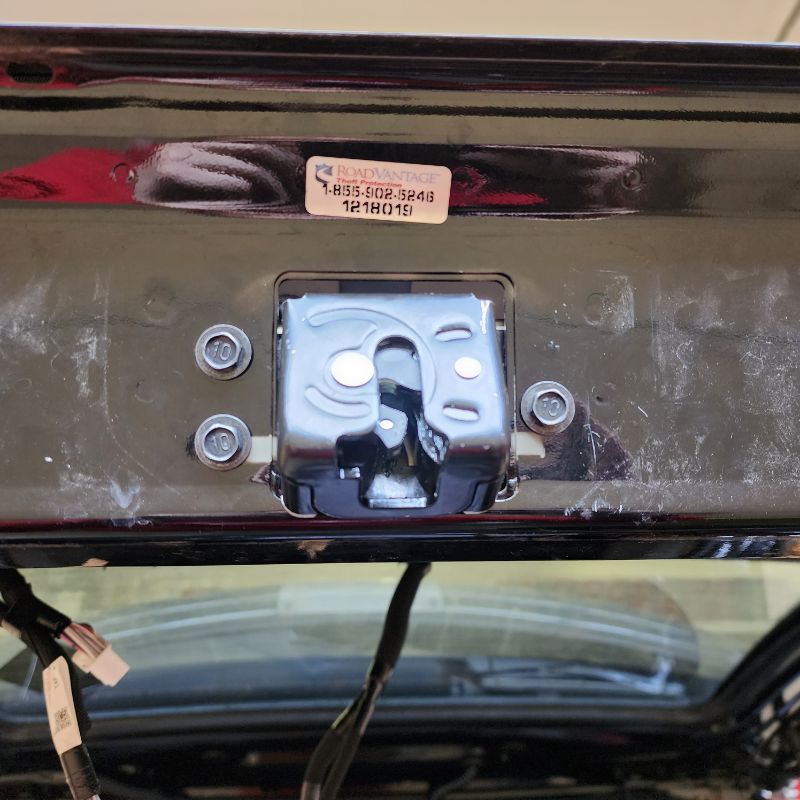
Using a 10mm socket or wrench, remove the three black factory bolts. In order to push the locking latch inward, there are two white tabs on the top. Press these down while pushing in towards the middle of the tailgate. The last thing you will need to do, is go on the inside of the latch and release the plastic white retainer holding it secure at the top. Go ahead and disconnect the latch factory harness and remove it from the tailgate. You can reuse the black grommet from the factory wire harness if you would like with the new latch.
Next, you will see three white plastic screws on your New Tailgate Latch. Remove those with a Philips Screwdriver. Now you are ready to install the New Black Tailgate Locking Latch. Do so in the same way as you removed the factory latch, just reverse.
INSTALL IMAGES


STEP 10
-
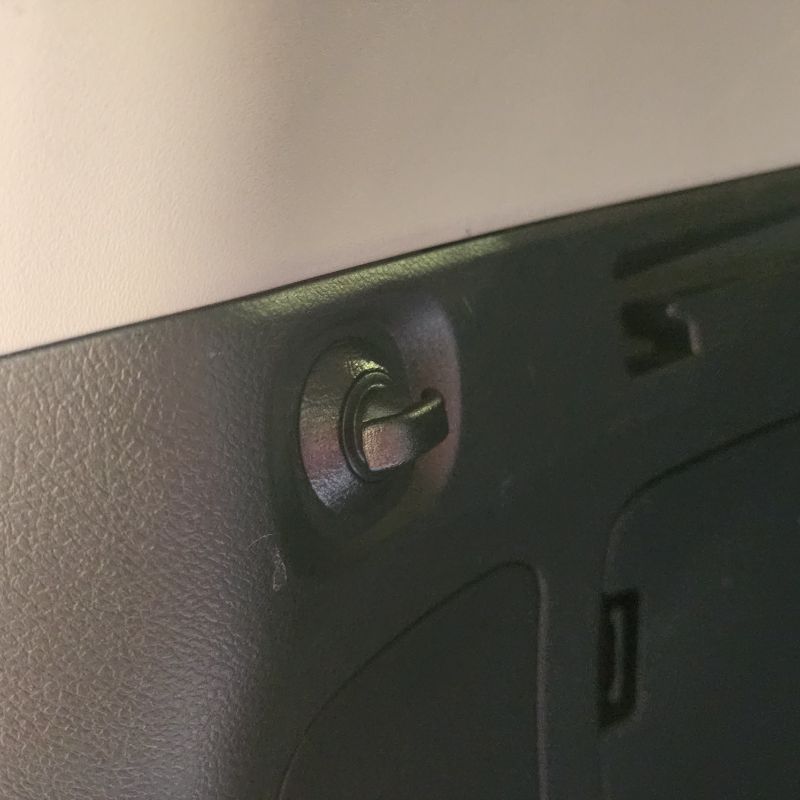
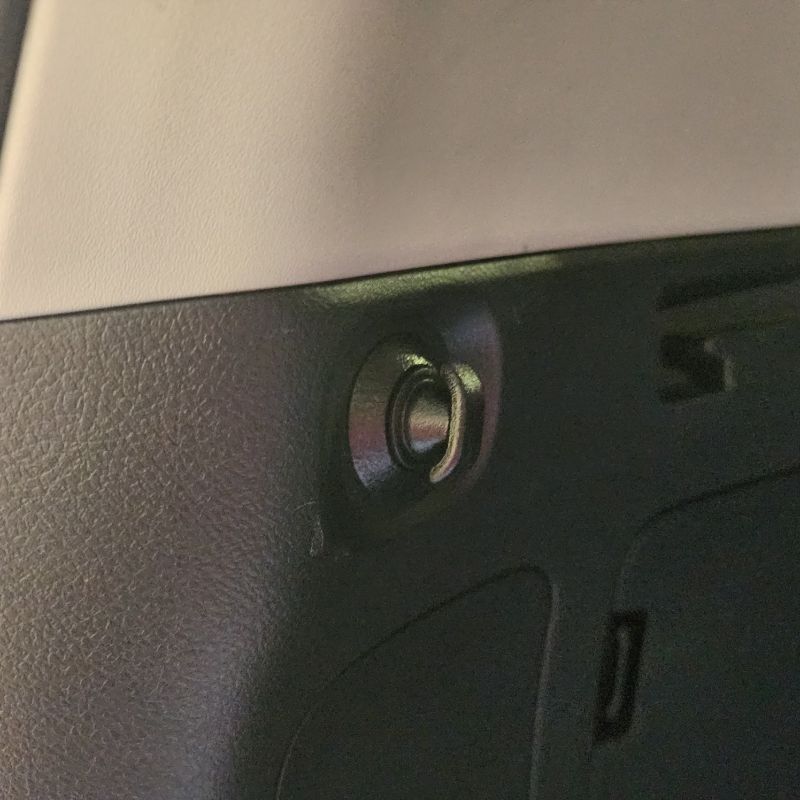
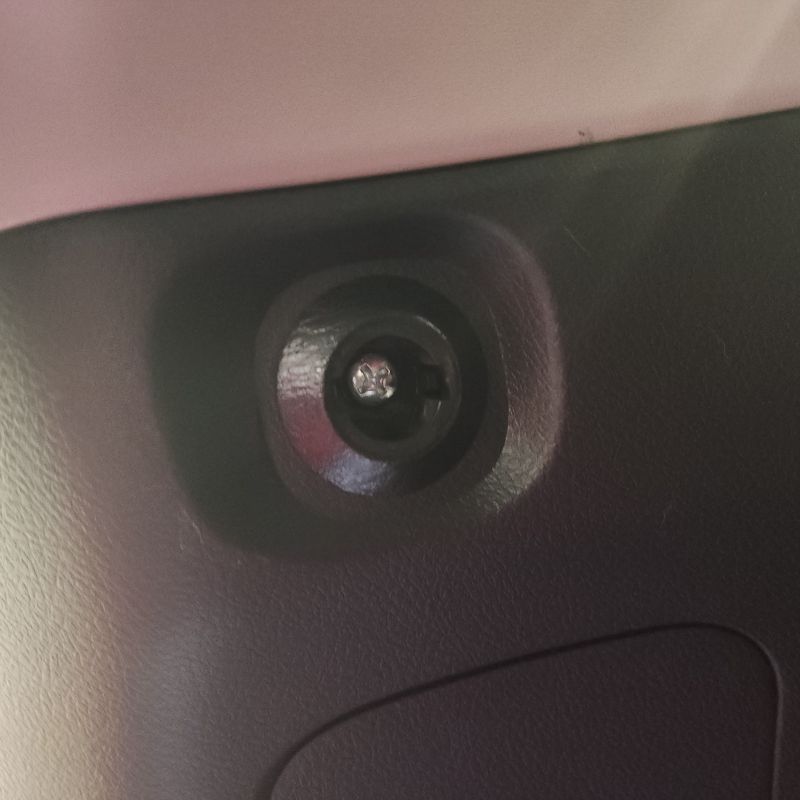
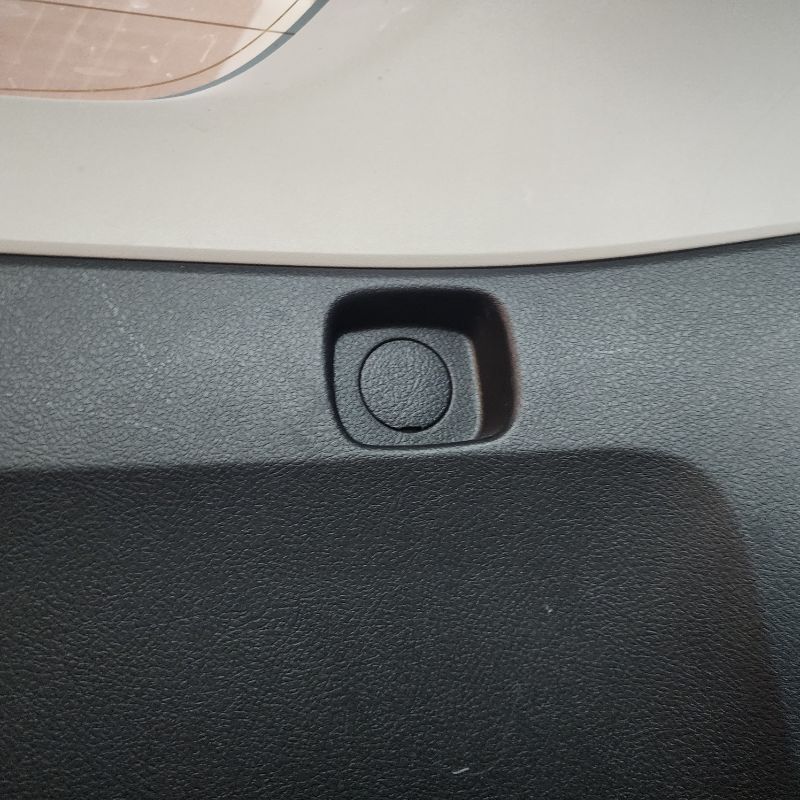
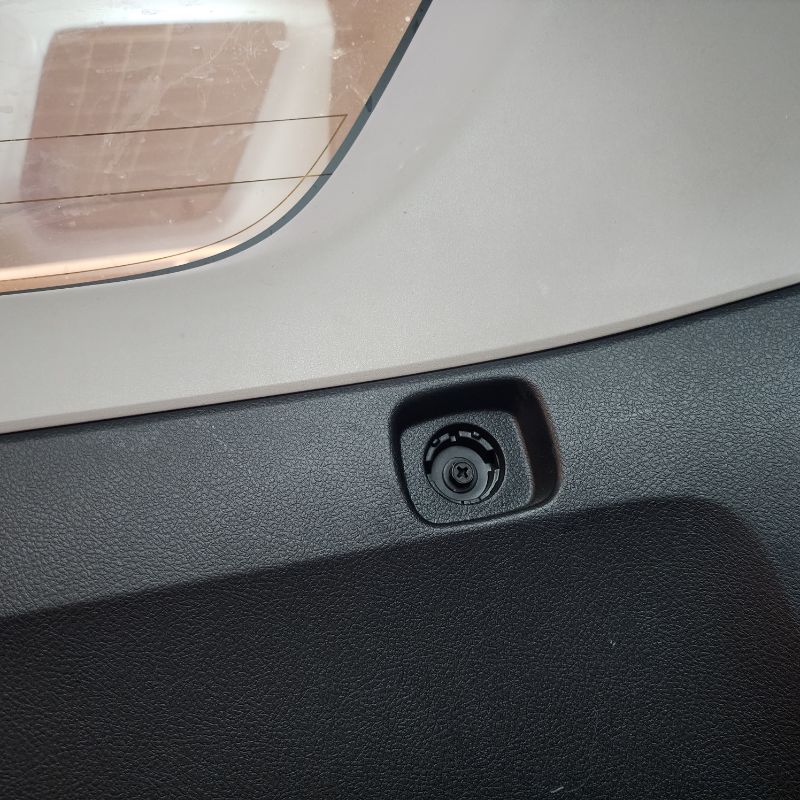
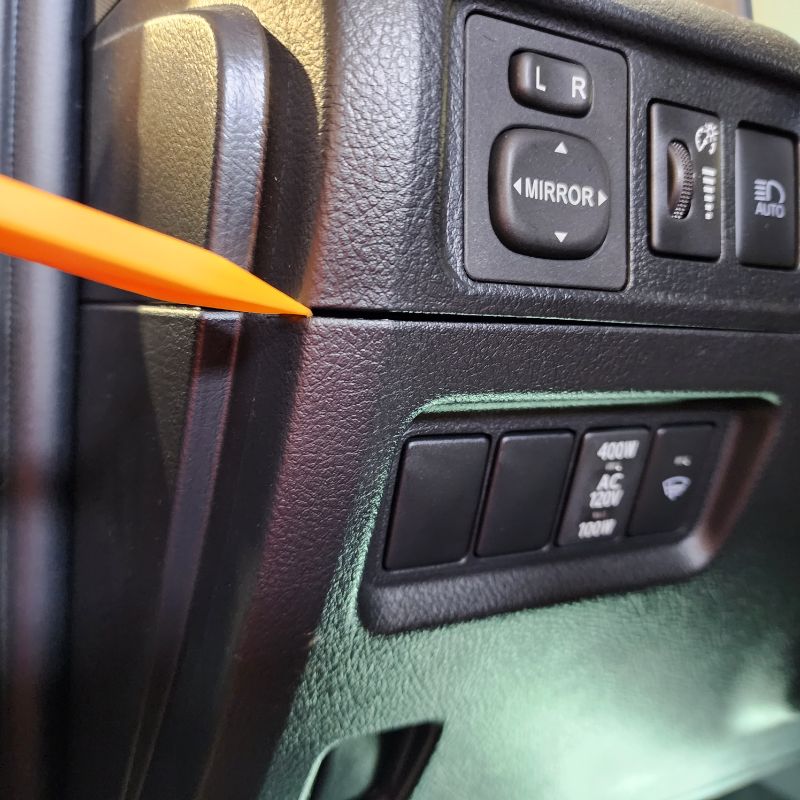
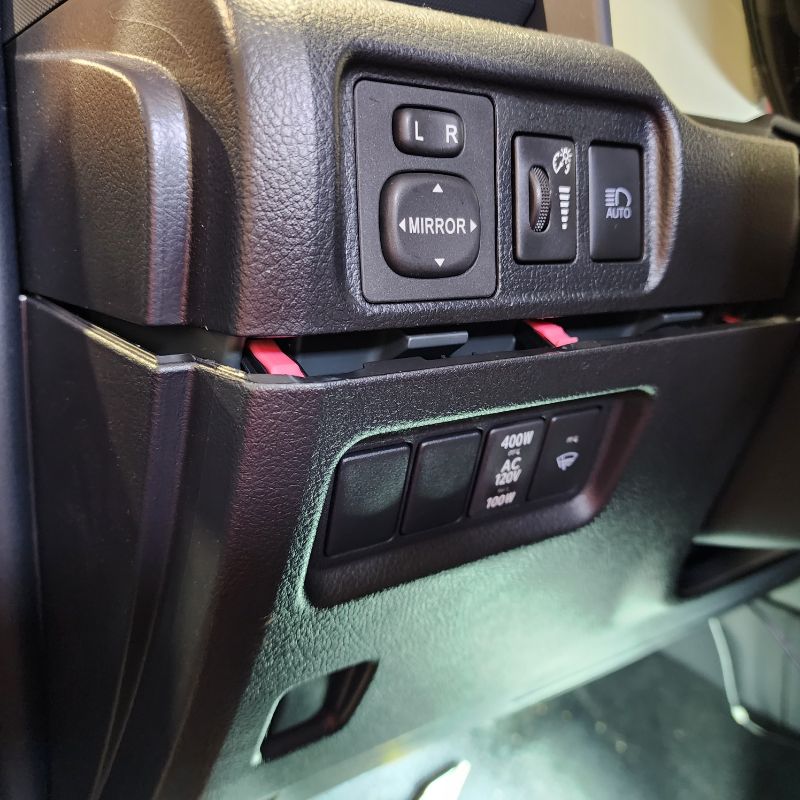
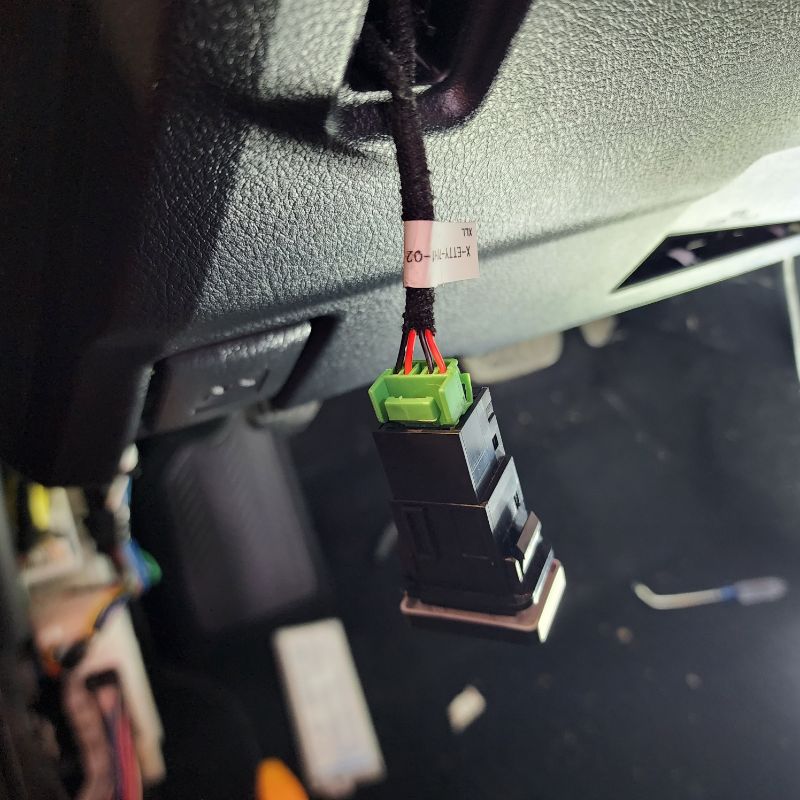
Replace factory button holder (unused button) with New Front Push Button (your choice on which blank to use). Grab the Front Button Harness that was included and connect the green connector to the New Switch, the remaining pigtail harness can be connector to one of your Factory Front Push Buttons for the backlighting power. Find the correct Push Button connector that fits with the New Pigtail Wire Harness.
NOTE: Depending on your trim model, this could be an unused harness just located behind this area. Toyota left all connector in this location even if you didn't opt for it at purchase.
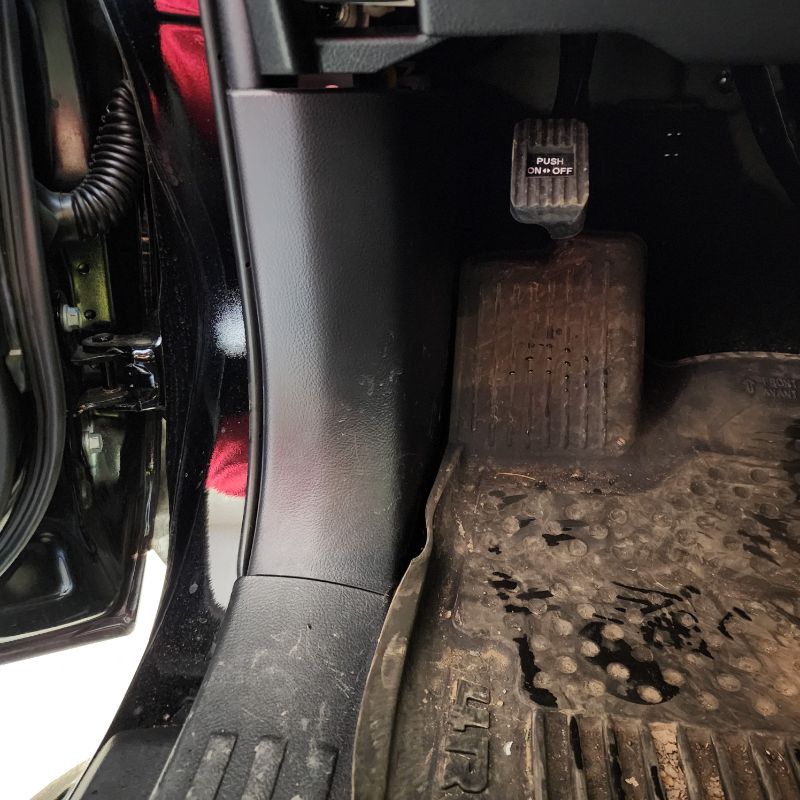
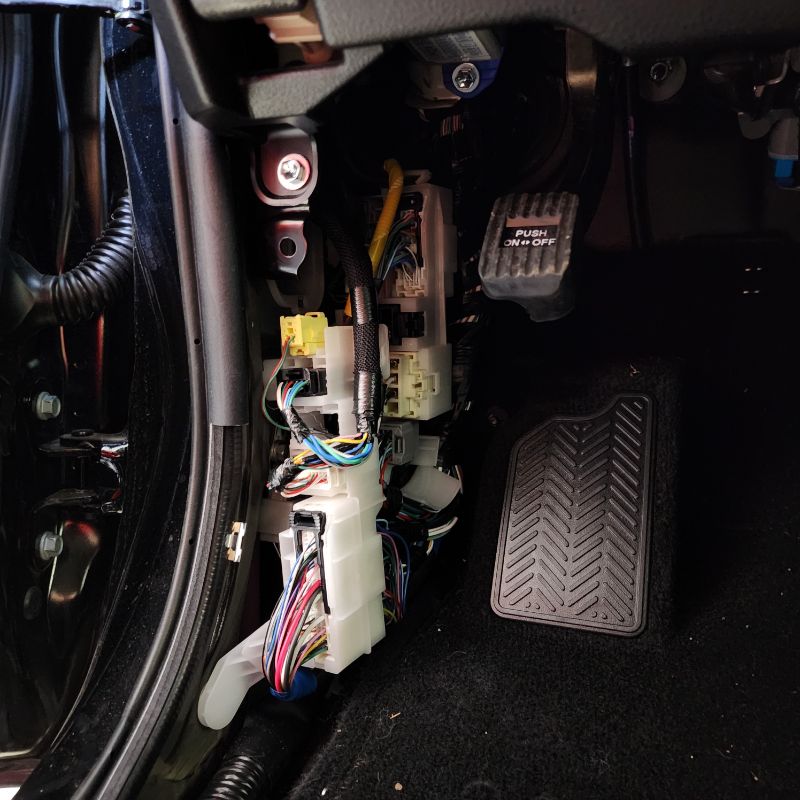
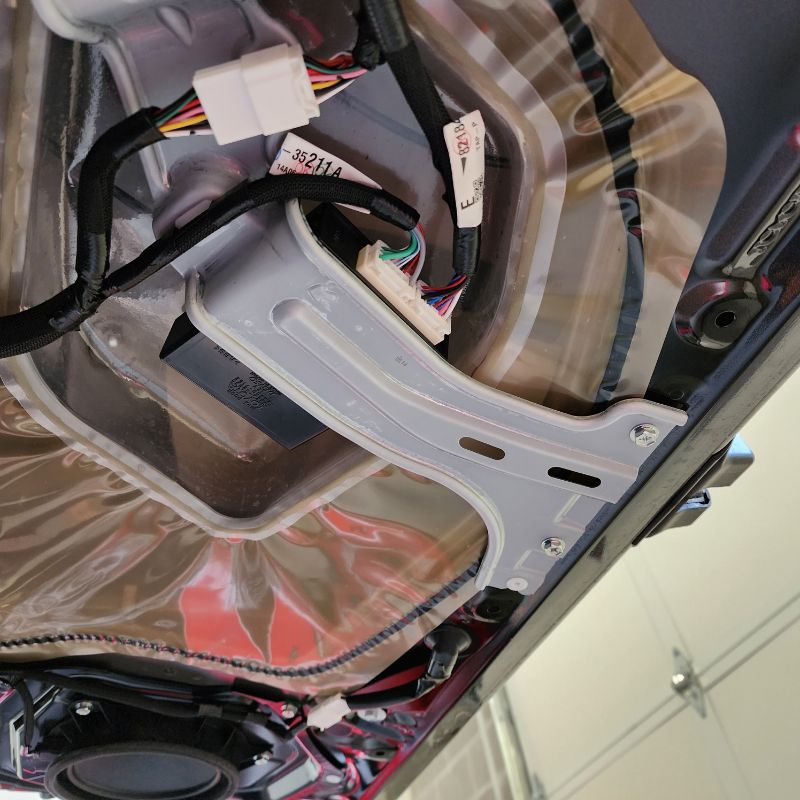
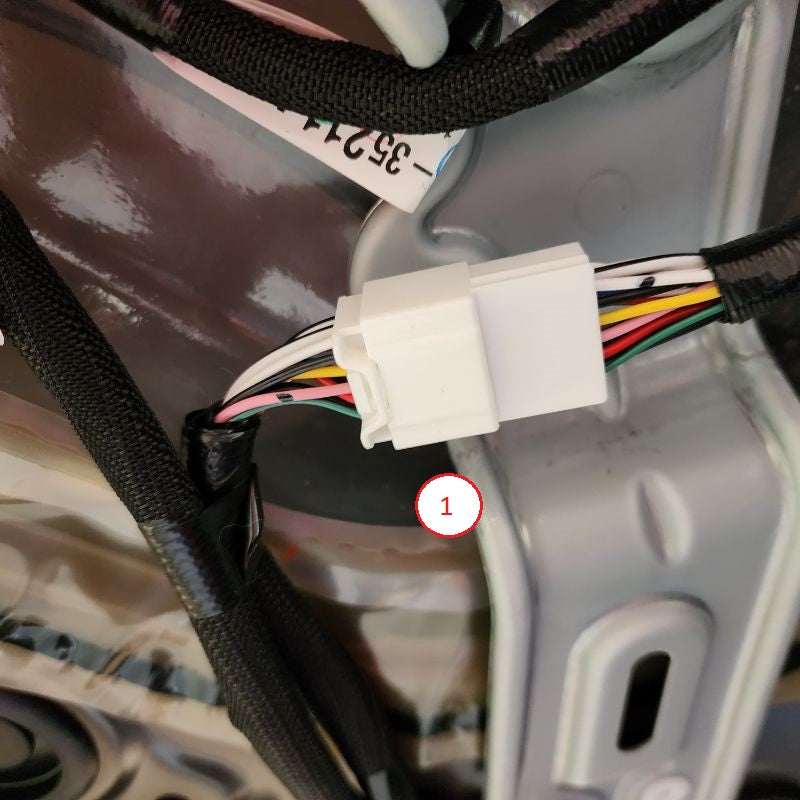
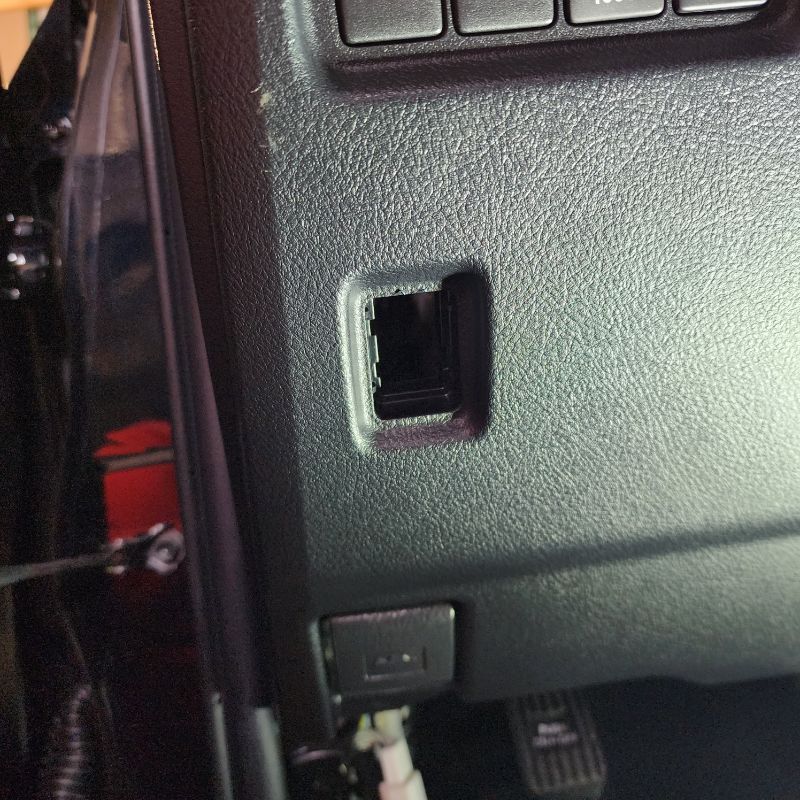
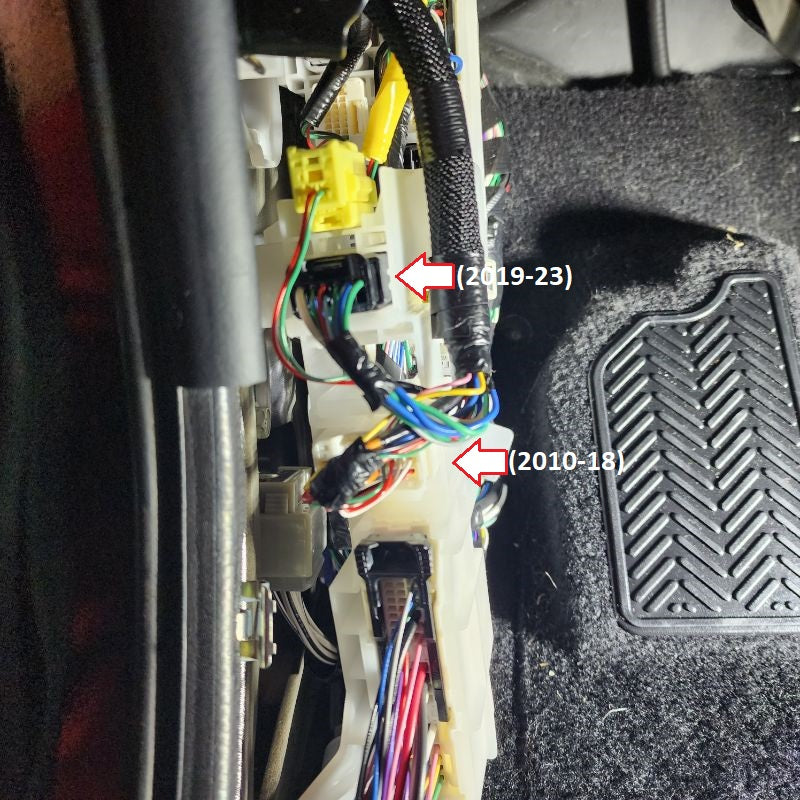
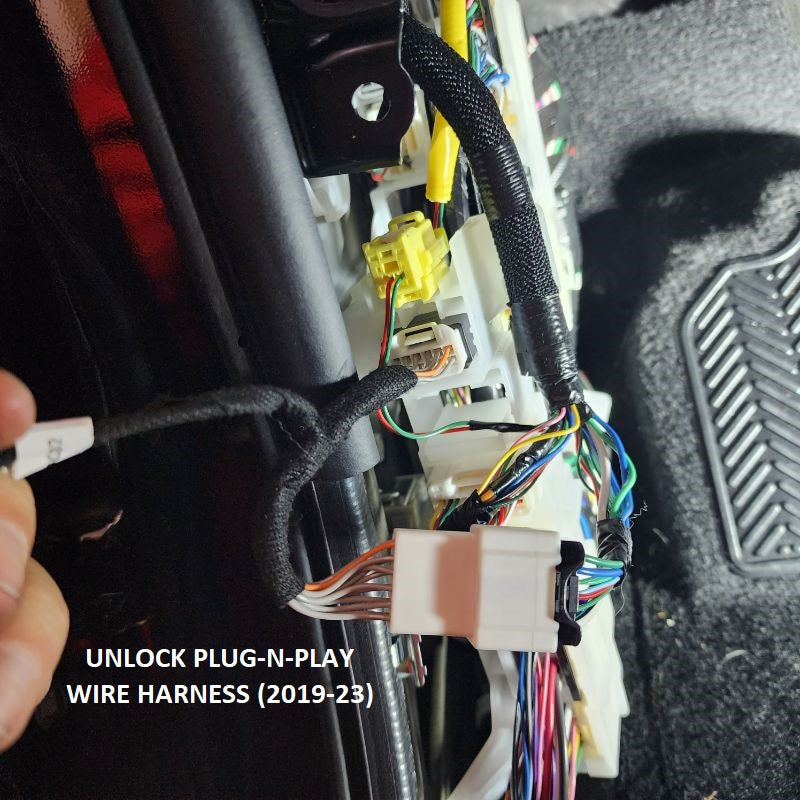
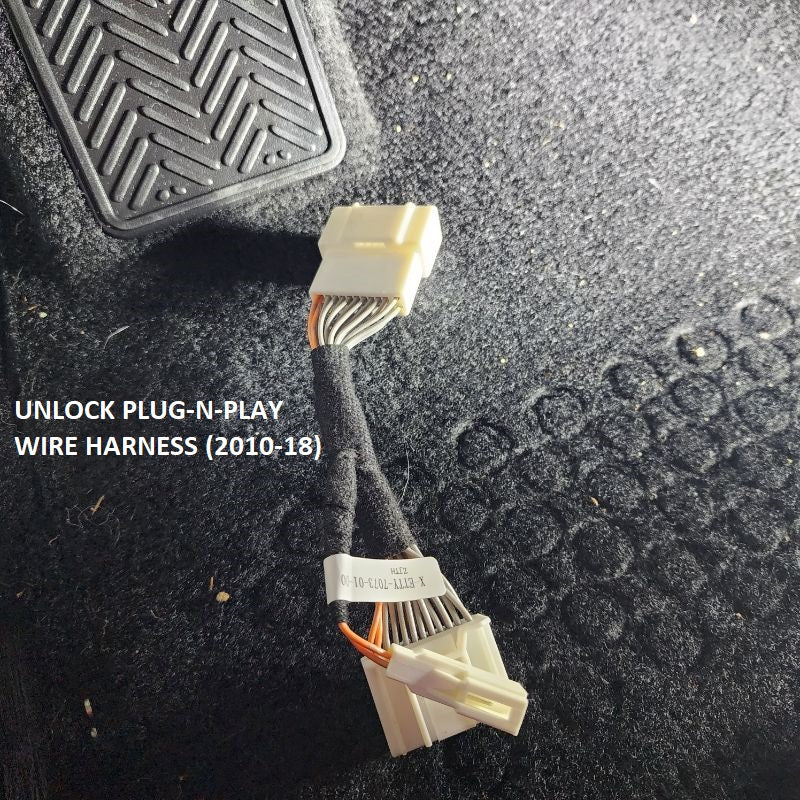
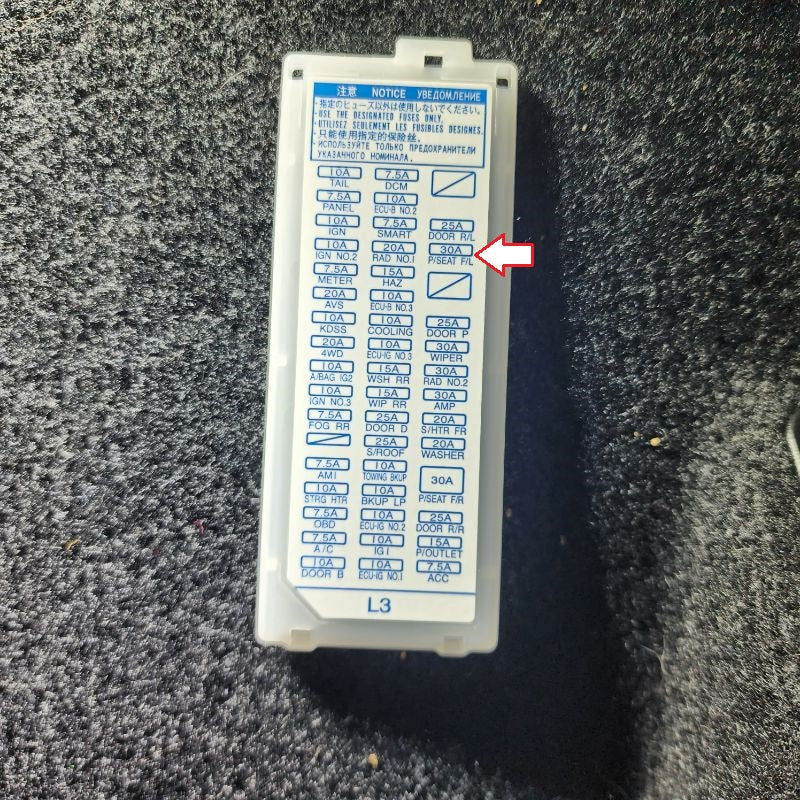
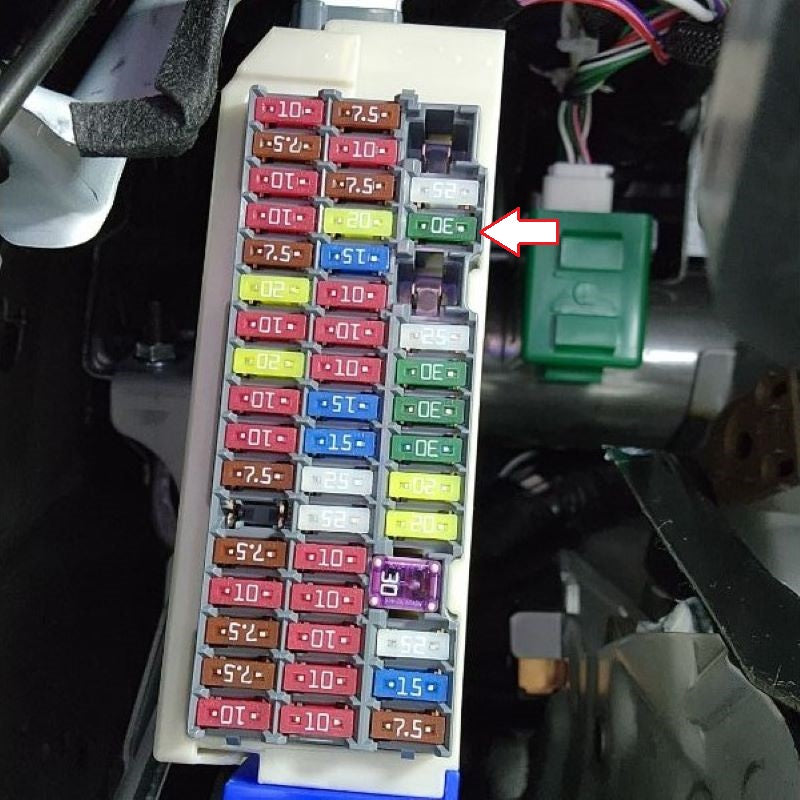
Next, connect the Unlock Plug-N-Play Wire Harness that pertains to your vehicle. There is one connected and an extra harness included. Look below for images on placement. Following that, you will need to locate a constant 12V+ source in your dash fuse panel. A good one to use is P/SEAT F/L fuse.
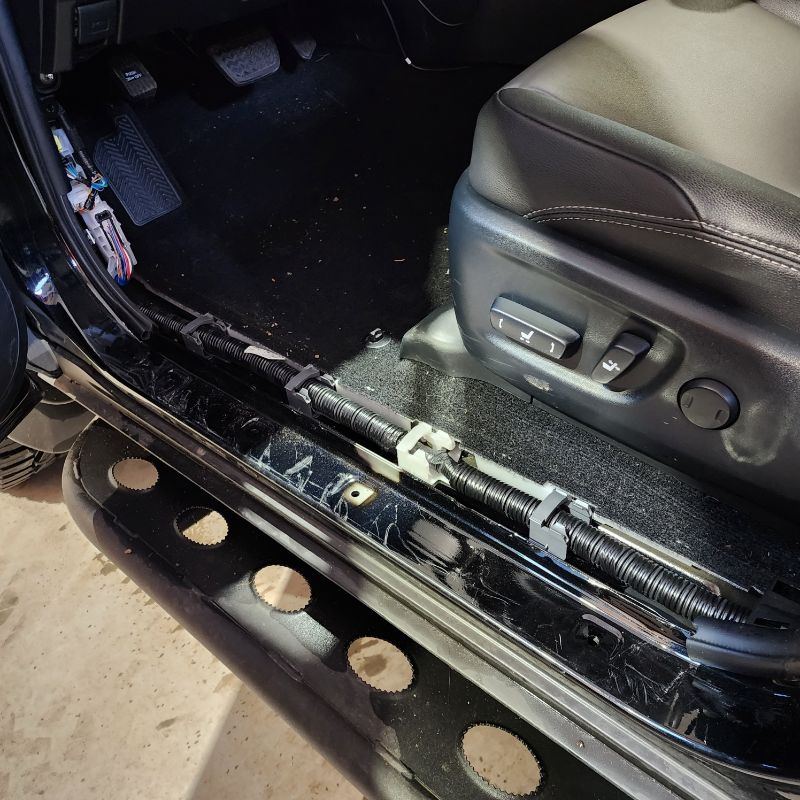
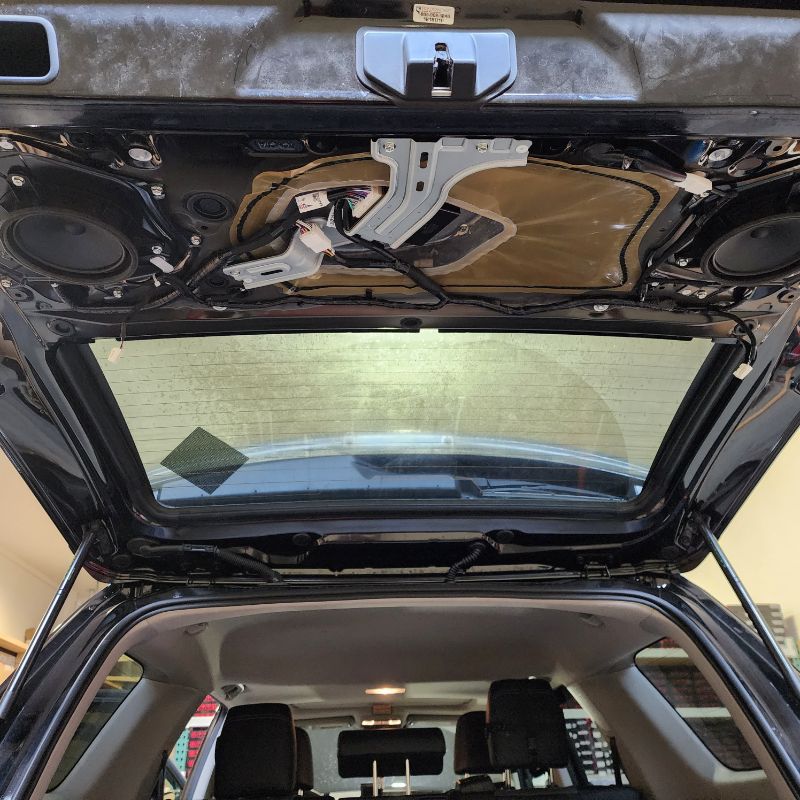
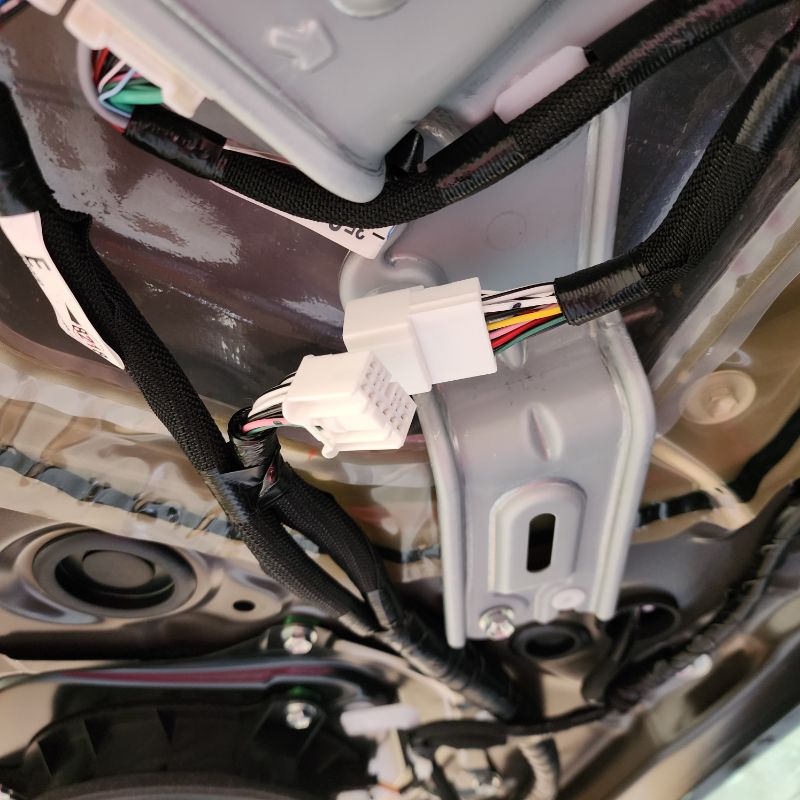
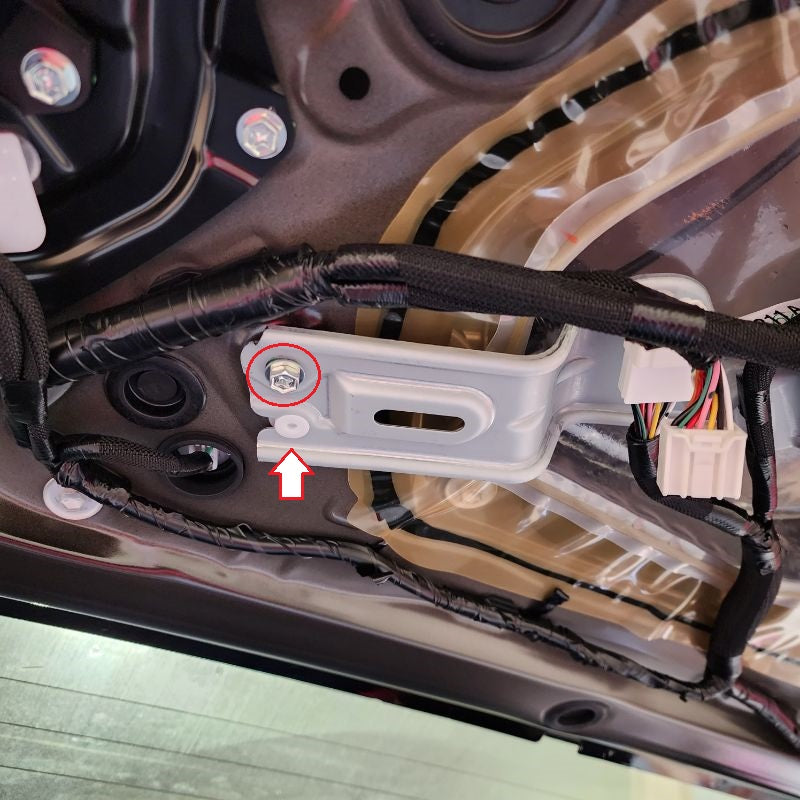
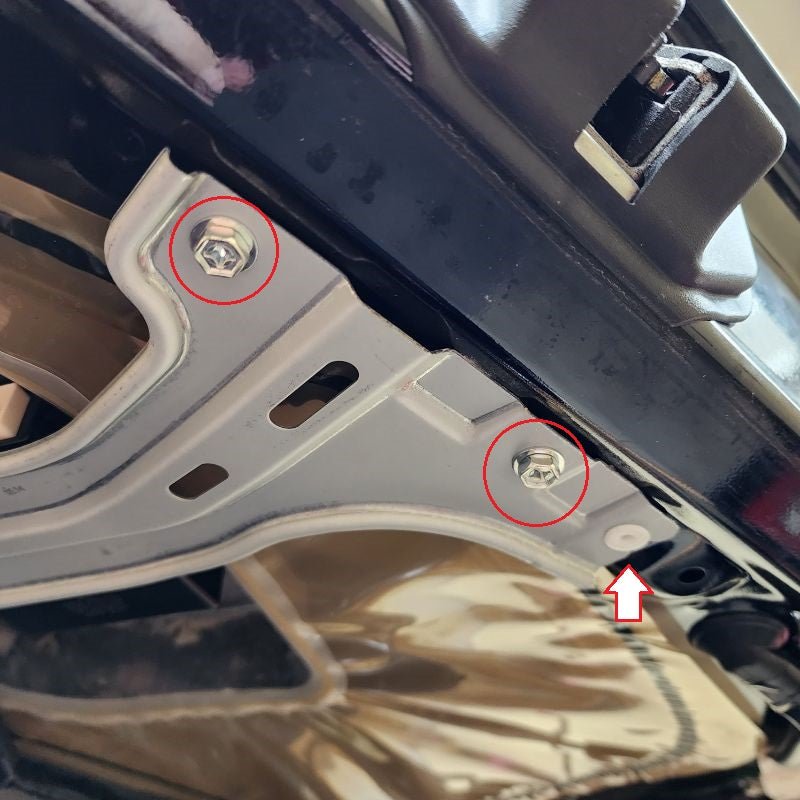
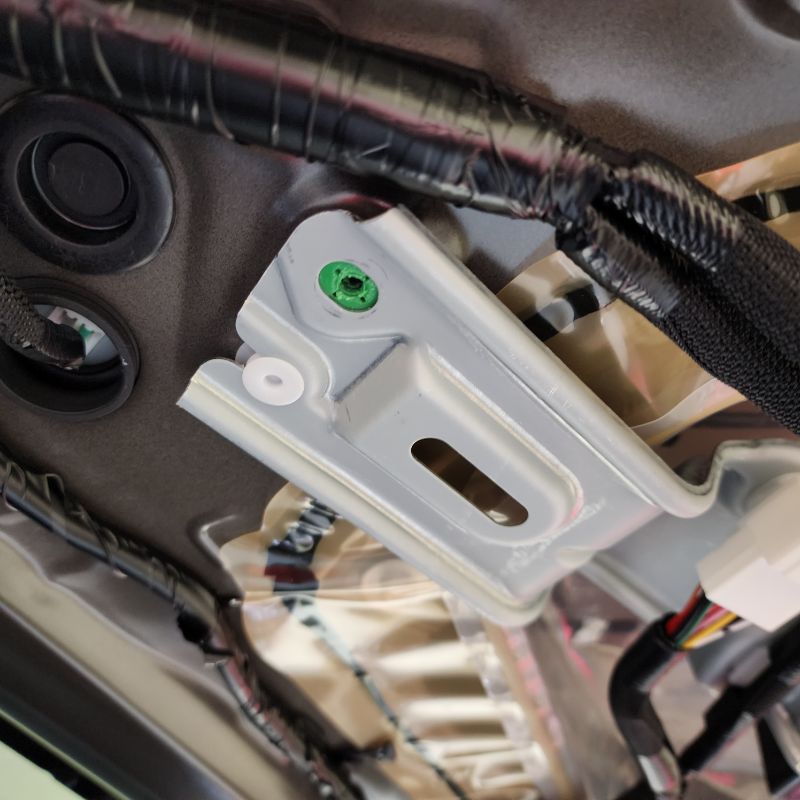
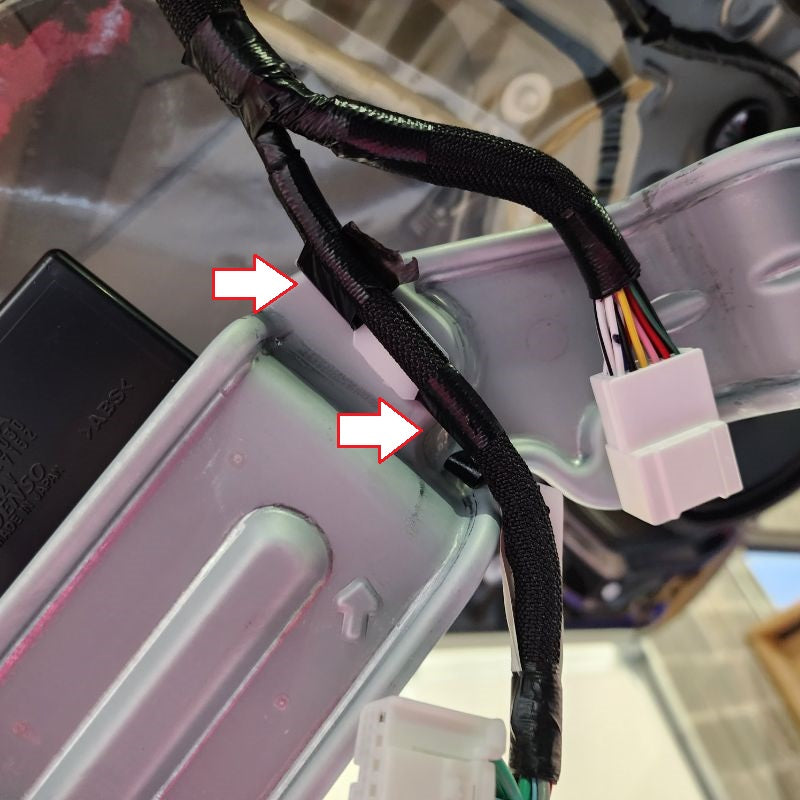
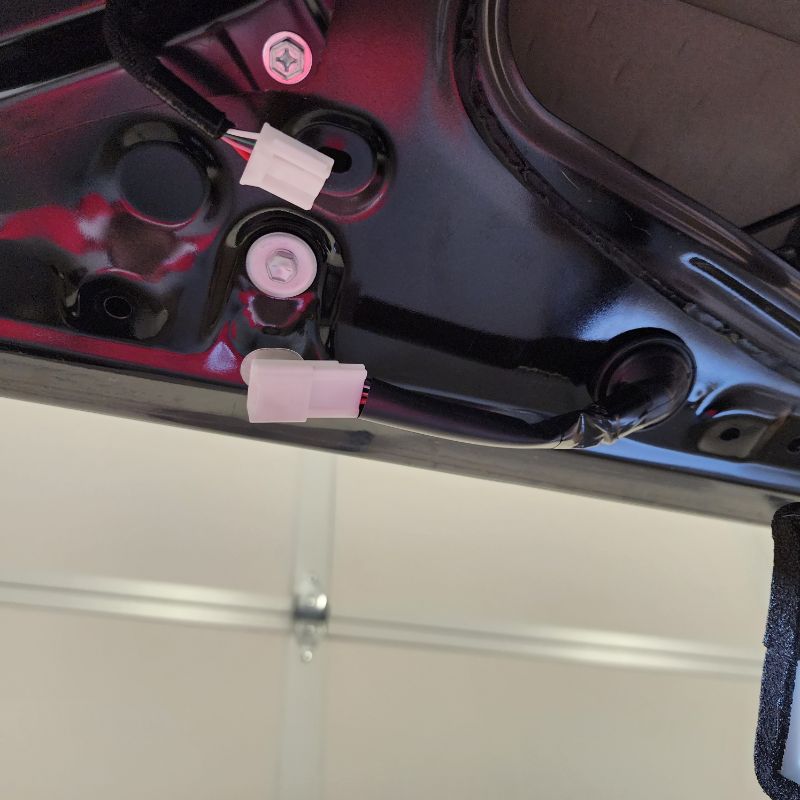
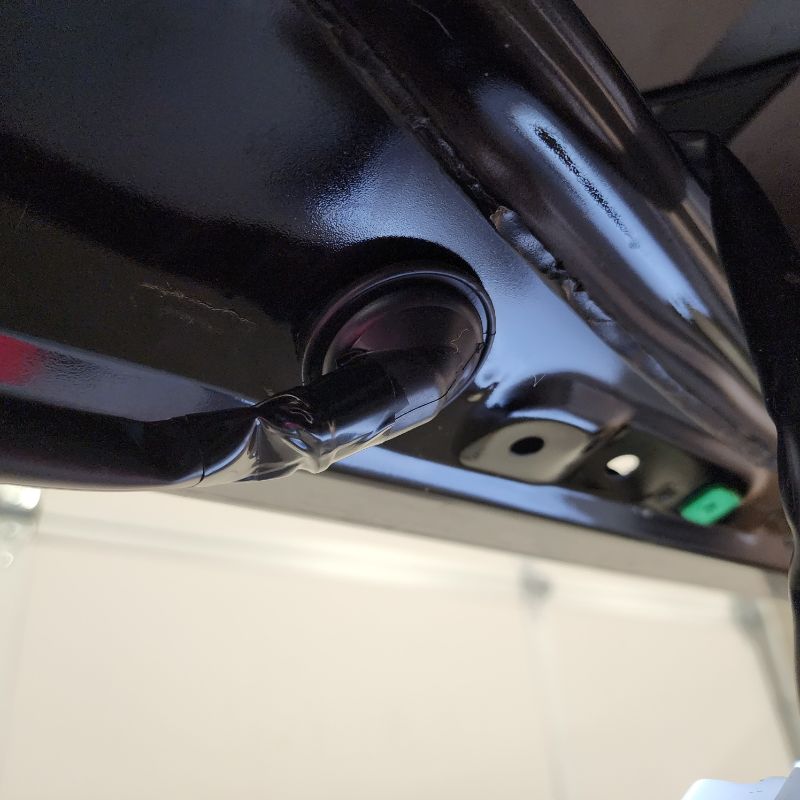
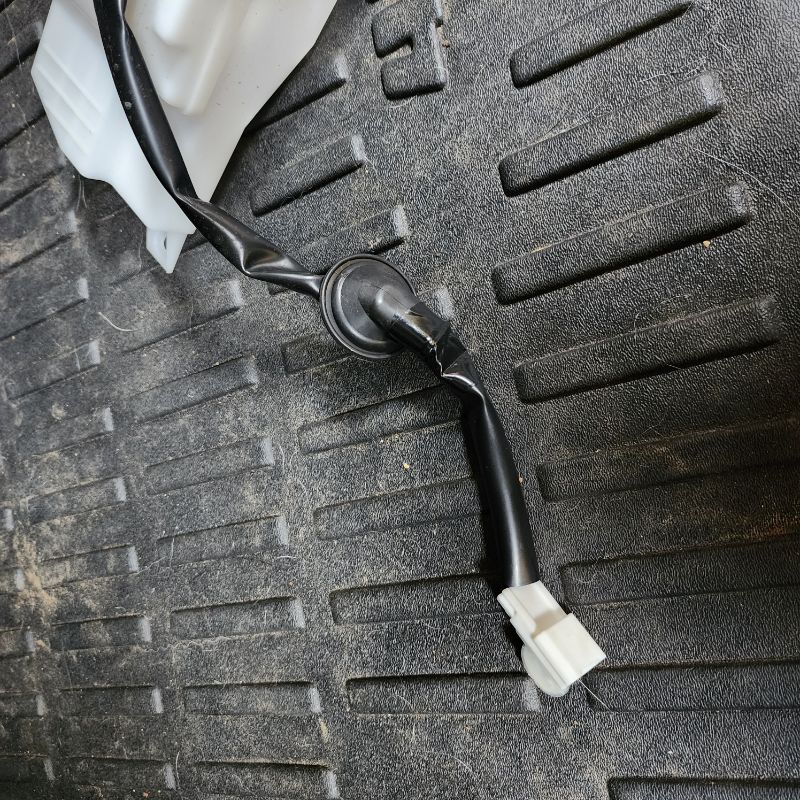
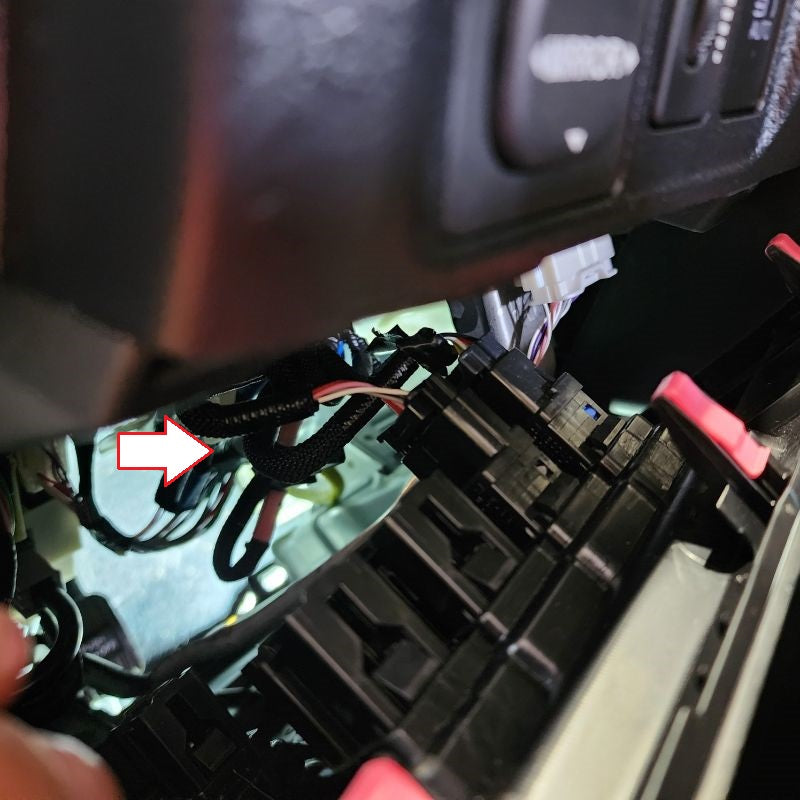
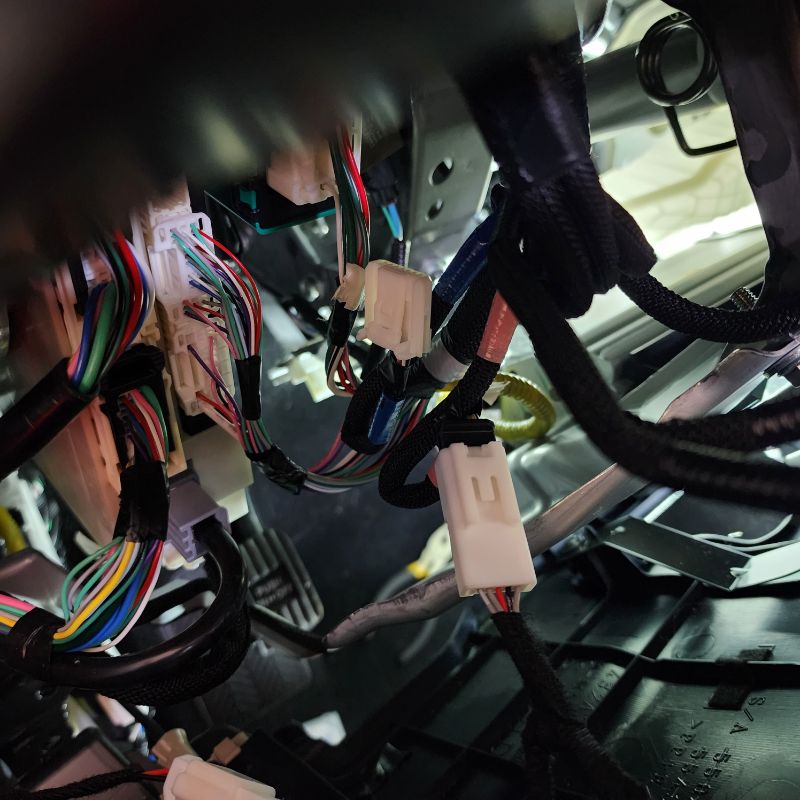
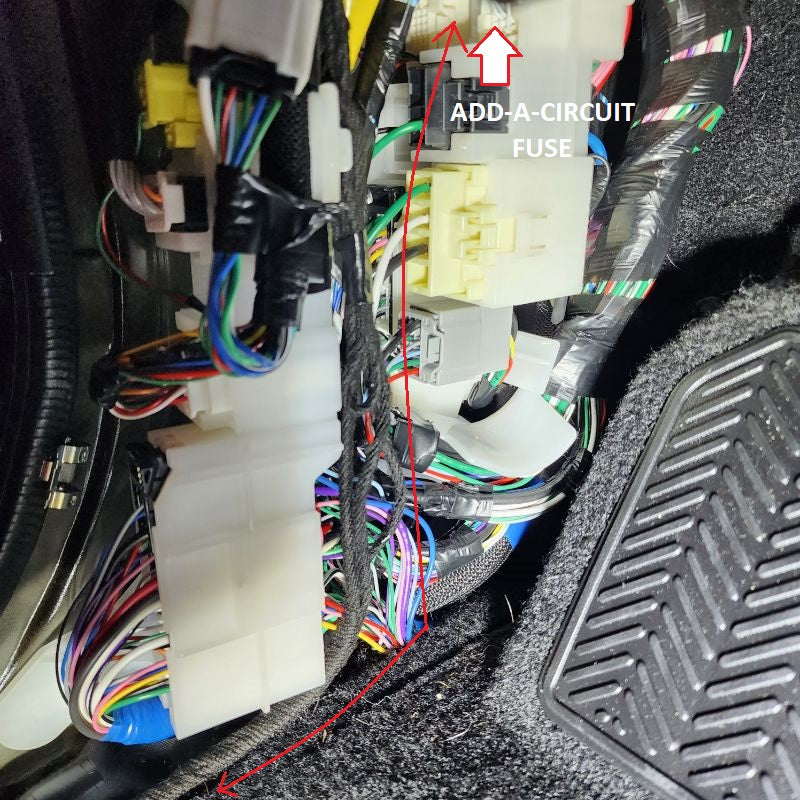
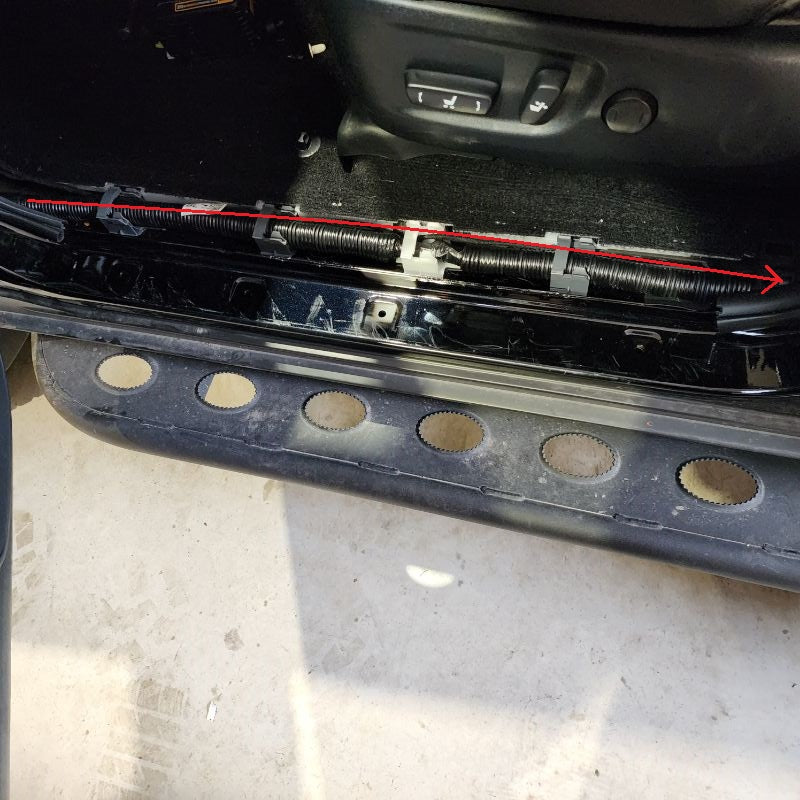
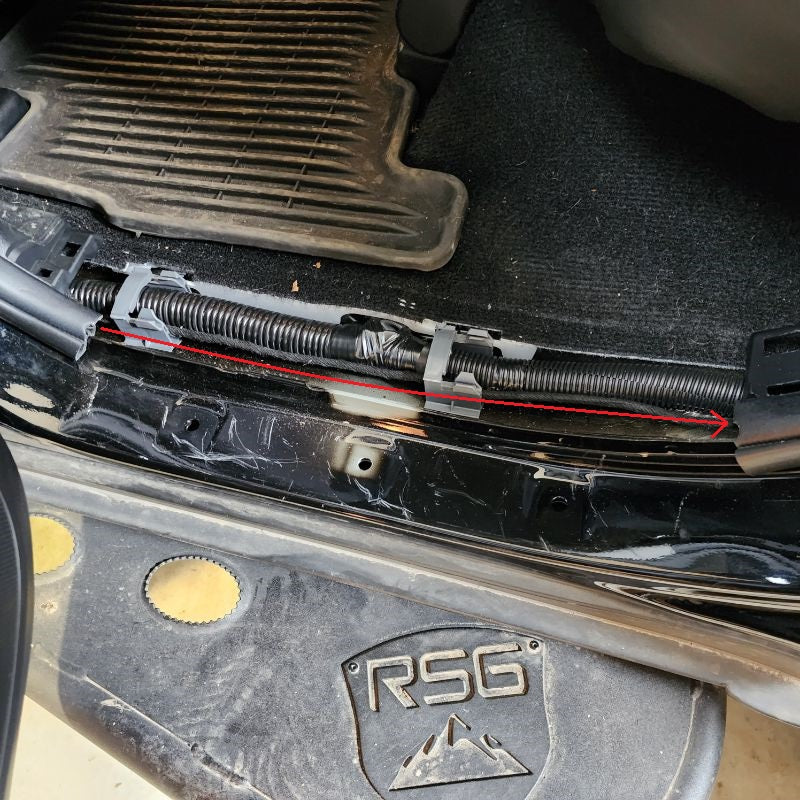
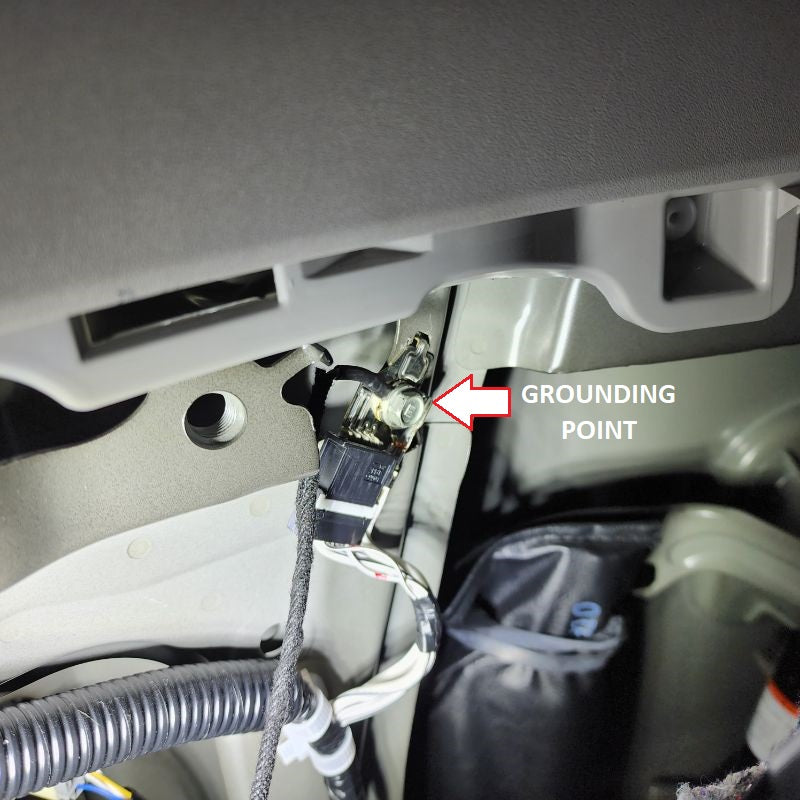
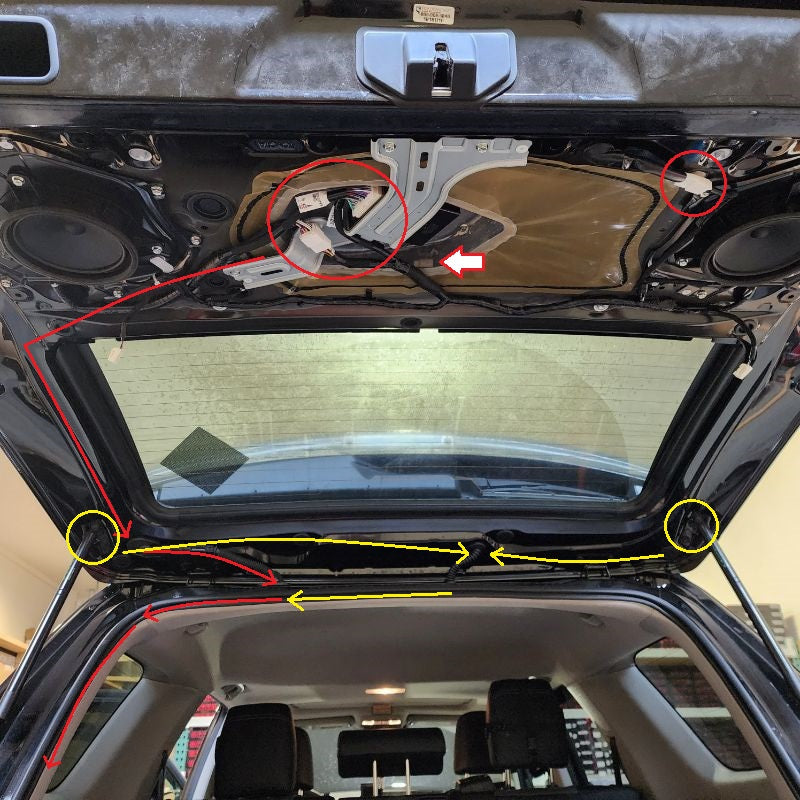
Route New Wire Harness to the rear of the vehicle. You will see the most common path is removing the driver front and driver rear passenger door sill panels to the rear driver's side left corner / wheel well interior trim panel. Here you will connect the grounding points and mount your control box with 3M.
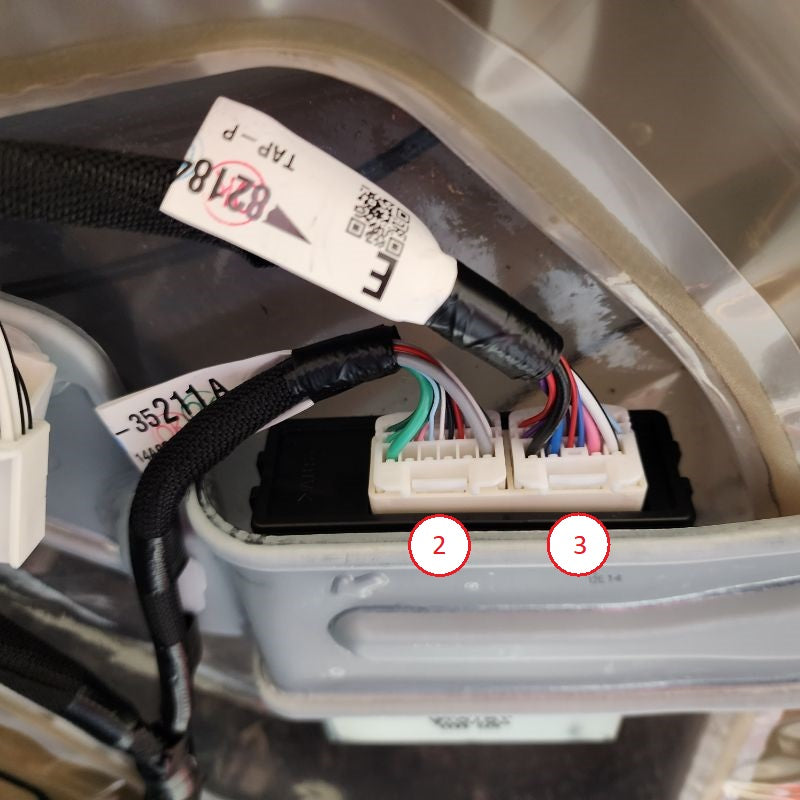
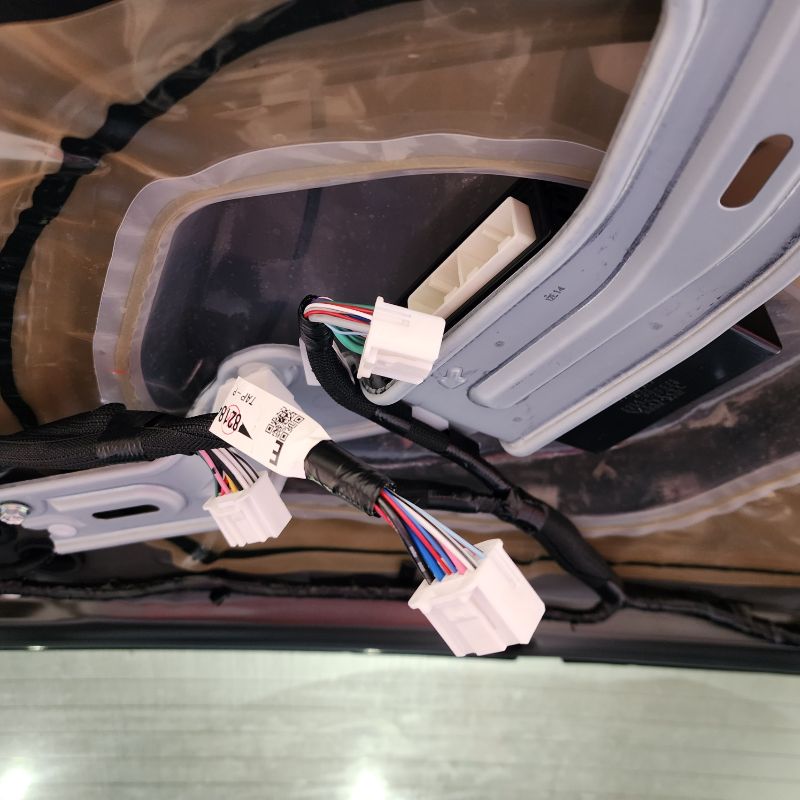
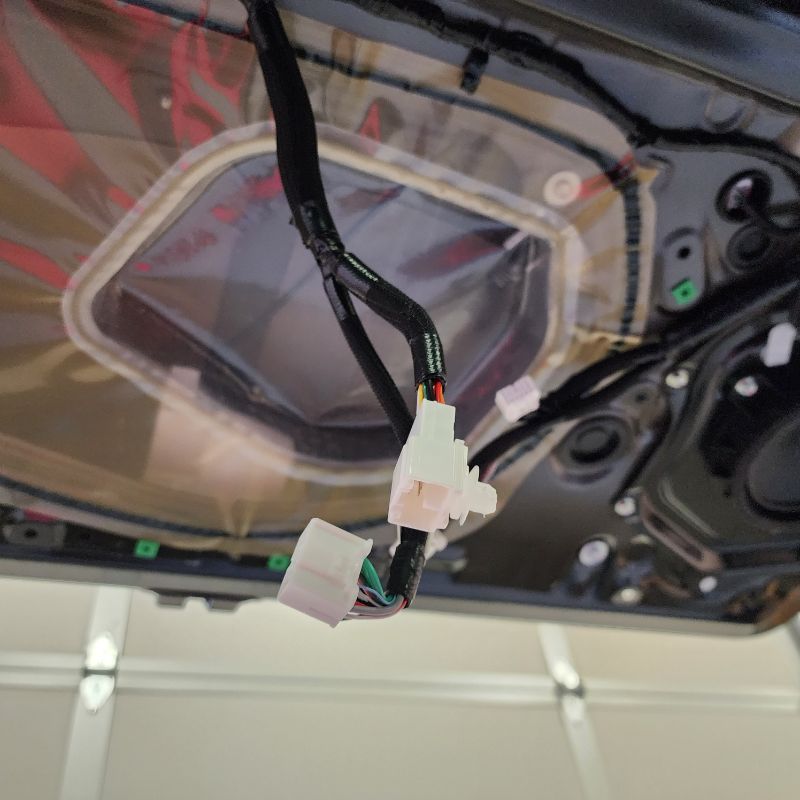
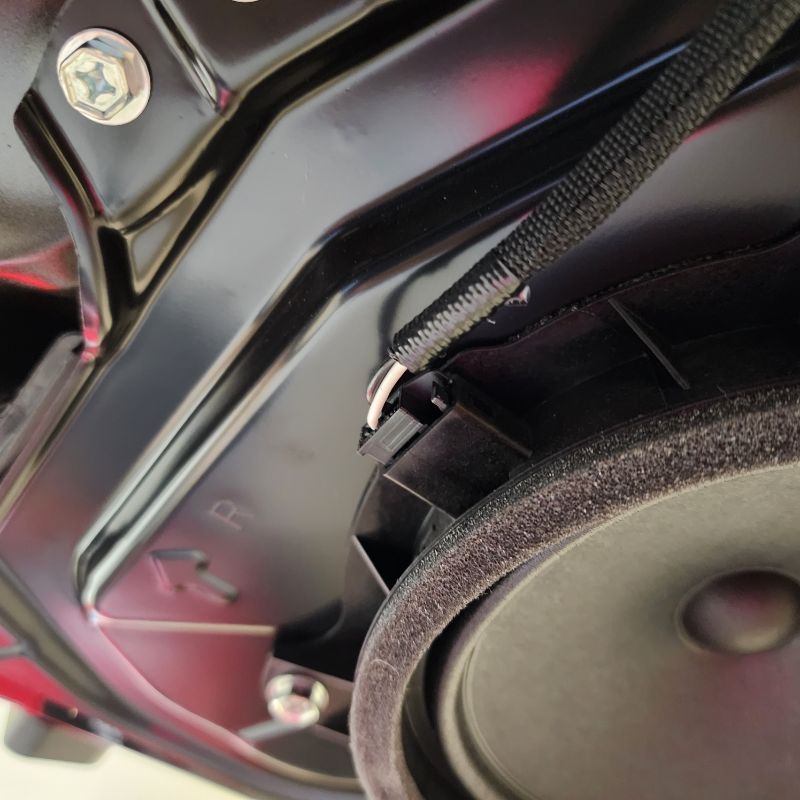
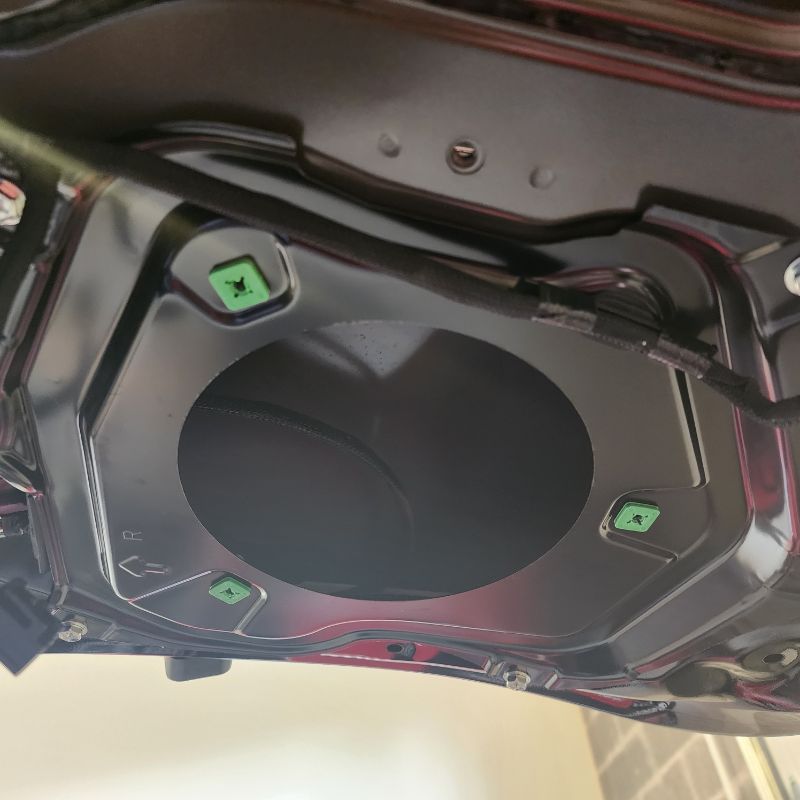
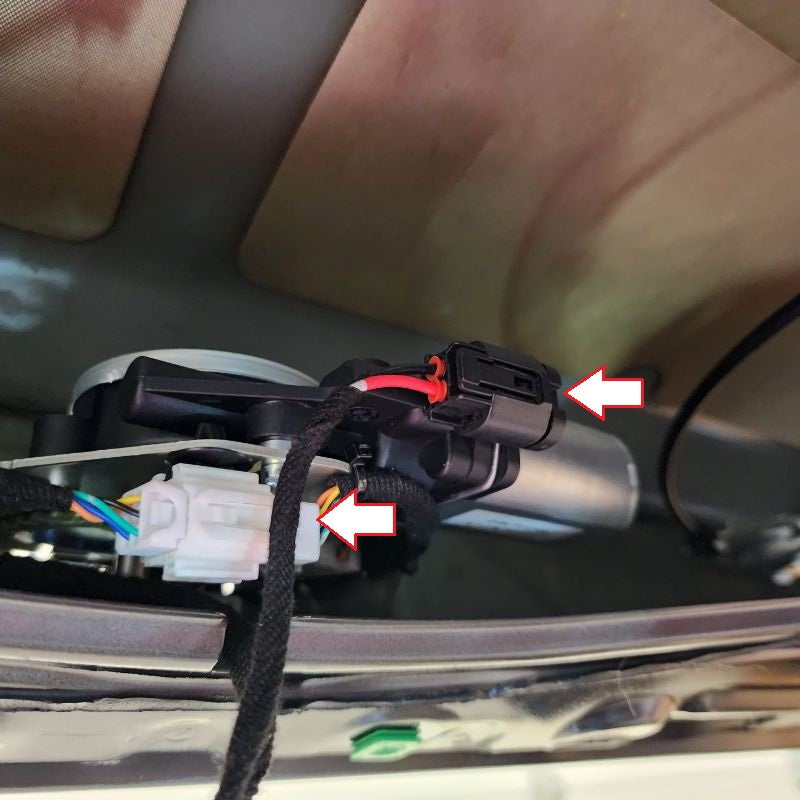
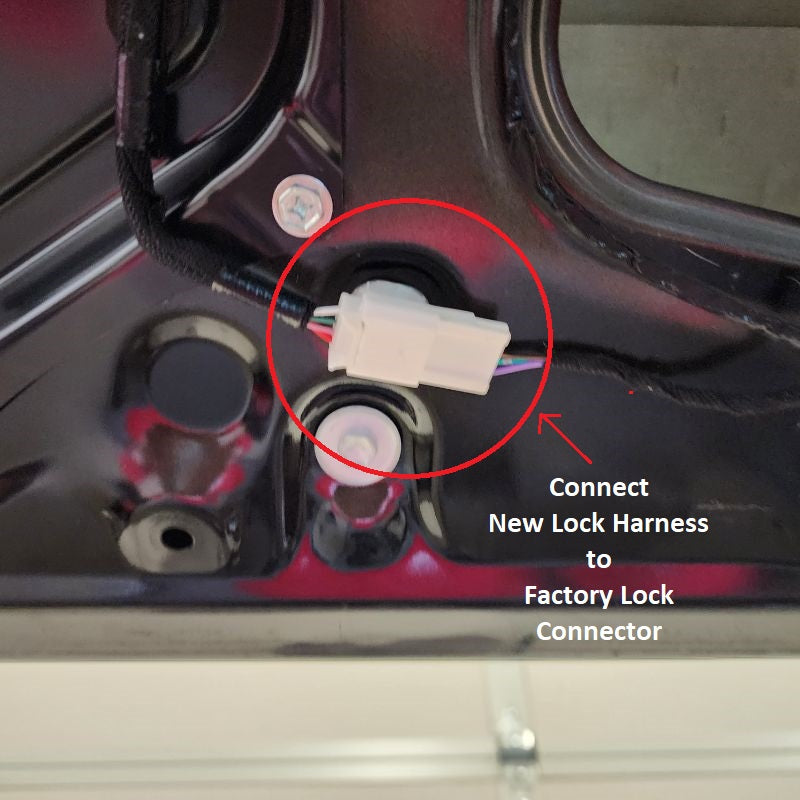
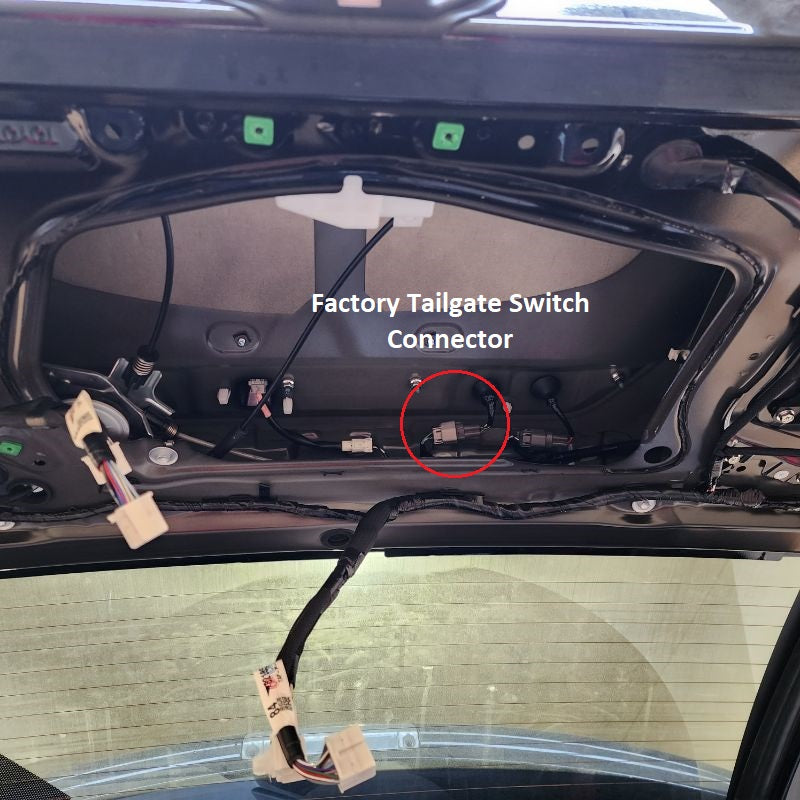
Moving to the Tailgate, you will need to locate the correct connectors to the factory plugs. Please use all of the images provided for you below as this is a very detailed step. Be patient and take your time. To route the wire through the tight spots, it is recommended to use a fishing tape wire puller. Again, follow the pictures and take your time.
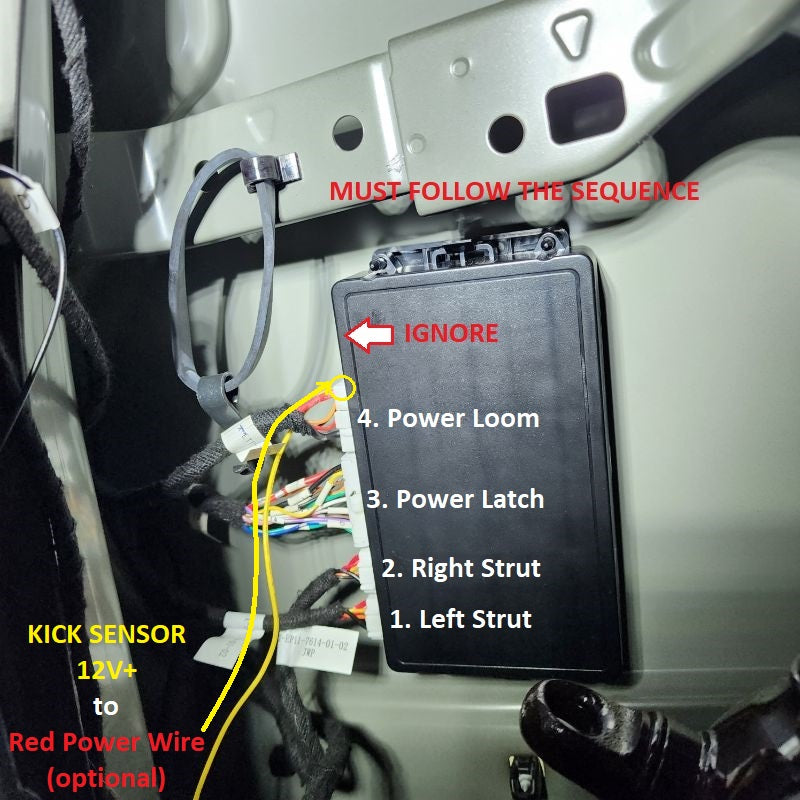
Lastly, you will need to follow the EXACT sequence numbered to operate. If you do not follow inserting the power strut plugs #1 & #2, then the power latch plug #3, and finally the power plug #4 last, you may find that the tailgate will not close.
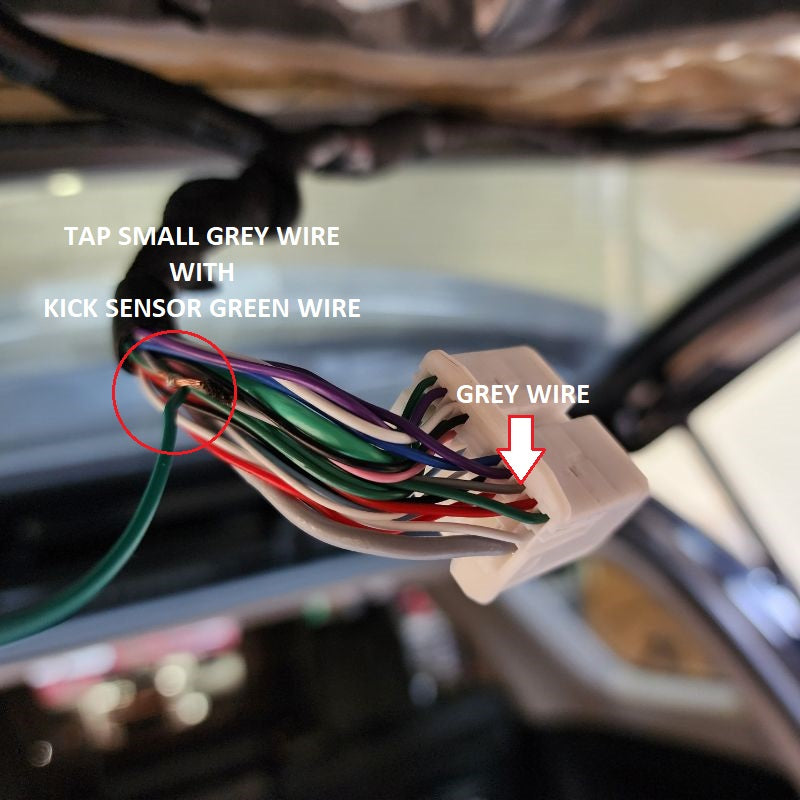
Foot Sensor Install:
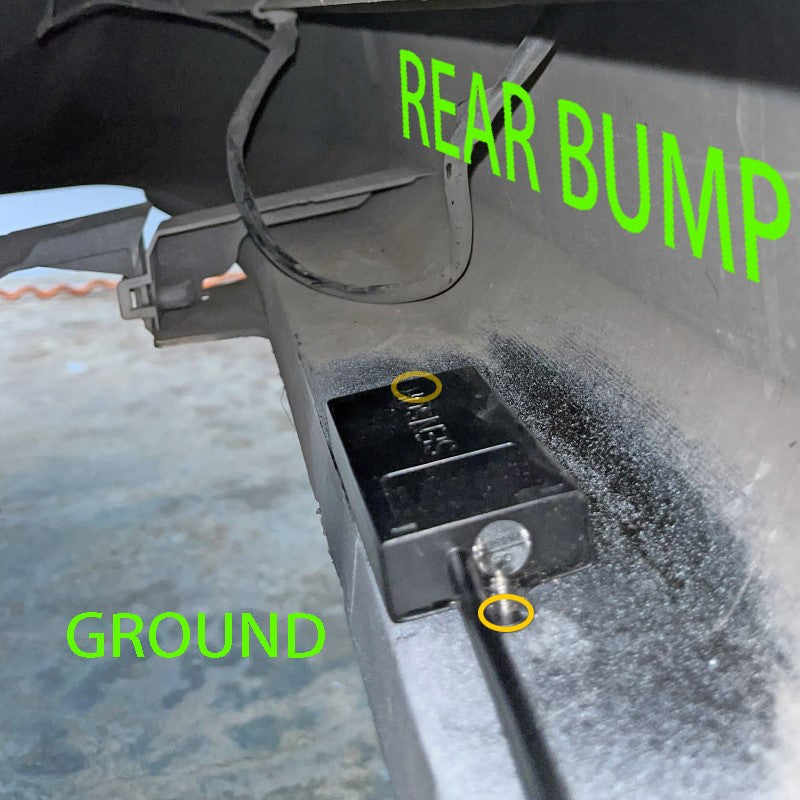
Run Green wire into the Tailgate and connect with small grey wire as shown below. Yellow wire is for 12V+ constant power. You have a couple options here: run to the front and connect under the dash or to the Battery OR you can find the big red wire located in the power plug connected to the control box as shown. The last Red Wire with the Kick Sensor is the ACC wire. This is for the protection feature. When the engine is on, the ACC wire will receive power not allowing the Tailgate to operate. Some customers choose not to use this connection so they can operate their tailgate with their ignition on. Owner's discretion on what you would like to do. Black wire gets grounded.
DISCLAIMER: KTJO 4x4 and its vendors shall not be liable for any accident resulting from the use of this product if Owner does not connect the protection ACC Wire. This system is designed to be professionally installed into a vehicle in which all systems and associated components are in perfect working condition.
INSTALL IMAGES


STEP 11
-
Enjoy your New Power Tailgate Lift!

